react基础(组件+组合组件)
这篇文章的教程
假设我们已经了解一些JavaScript的基础和OOP编程思想了
vscode中ctrl+p 实现文件查找
下载自动优化插件prettier,在保存时自动优化代码增加可读性
Component
Setting Up the Project
1 | create-react-app XXXX; |

Your First React Component
我们接下来想做一个类似购物车的计数器
在src中新建文件夹components,里面新建counter.jsx
JSX是一种JavaScript的语法扩展,运用于 React 架构中,其格式比较像是模版语言,但事实上完全是在 JavaScript 内部实现的。元素是构成React应用的最小单位,JSX就是用来声明React当中的元素,React使用JSX来描述用户界面。
JSX可以使用引号来定义以字符串为值的属性:
const element = \
也可以使用大括号来定义以JavaScript表达式为值的属性:
const element = \;
下载 simple React Snippets 插件,imrc+cc即可生成代码
1 | import React, { Component } from 'react'; |
修改一下即可
1 | import React, { Component } from "react"; |
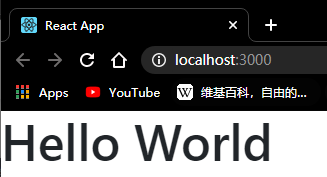
index.js中做如下修改
1 | import React from 'react'; |
结果如下:
Specifying Children
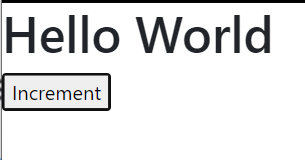
我如果想在h1后面放一个按钮,我可以这么写
1 | import React, { Component } from "react"; |
Babel 会 自动React.createElement(‘div’)
因为下载了prettier,所以在保存时自动优化成下列代码
1 | import React, { Component } from "react"; |
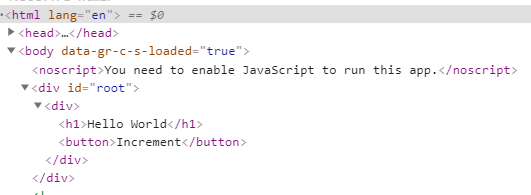
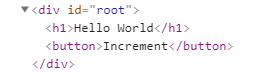
观察源码我们可以发现我们生成的代码和刚才写的是一样的。当然我们也可以实现移除div标签。
通过把原来的div改成 React.Fragment即可
1 | class Counter extends Component { |
Embedding Expressions
我想在原来HelloWorld基础上变为动态文字,这时候我们在Counter类中添加一个新的属性state
此外我们需要把原来的h1 改成span 。在花括号中可以使用任何js的变量,包括表达式,或者这个类中的某个属性
现在我们只要修改count的值,网页会实现动态的变化。
1 | import React, { Component } from "react"; |
此外,花括号里还可以这样写:
1 | <span>{2+2}</span> |
也可以传入一个函数
1 | import React, { Component } from "react"; |
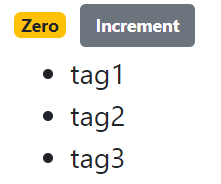
那么count改成0,显示Zero
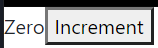
1 | formatCount() { |
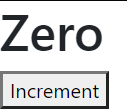
我们也可以直接输出一个标题,源码则变成了span中又一对h1

Setting Attributes
怎么样给元素设置属性?
1 | import React, { Component } from "react"; |

上面的代码放到一边,这里说一下 className 因为js中的class是关键词,所以jsx中class标签对应的名称就是className
利用bootstrap中的css样式我们可以做以下修改:
1 | import React, { Component } from "react"; |

有时候我想用一些确切的有针对性地样式,那么可以使用style
1 | import React, { Component } from "react"; |
这就是style的修改,我们先定义一个对象,然后在jsx中引用,当然我们如果用 行内样式表 。
Rendering Classes Dynamically
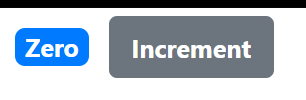
如何动态渲染css样式呢?现在0是蓝底的,我们想要在0的时候变成黄色的,其他情况是蓝色的,怎么办呢?
蓝色:badge badge-primary 黄色:badge badge-warning
通过{}的性质,我们可以新建一个classes字符串,然后对其做一个逻辑判断。
1 | import React, { Component } from "react"; |

但是上面的写法有缺点,它污染了render()方法。更好的方法是把这两行放到单独的方法当中去这样计算的细节就不会和渲染耦合了
通过vscode中的重构,我们可以这样。ctrl+shift+R, 把那两行新建一个方法getBadgeClasses()。
1 | import React, { Component } from "react"; |
Rendering Lists
怎么渲染一个列表呢?可以利用map函数。同样的,想要动态渲染利用花括号
但是我们在每个列表项生成的时候,需要设置它的key属性。每个key的唯一性,只在当前列表有效。这样当react中的虚拟dom改变的时候,react能够迅速反应过来什么组件改变了,然后重新渲染浏览器dom以确保同步
在这里,我们直接把tag作为key值即可,因为tag是两两不同的
1 | import React, { Component } from "react"; |
Conditional Rendering
条件渲染
如果数组列表中至少有一项,那么我们就渲染它,否则我们就输出”No Tags”
在jsx中没有if之类的条件判断,因为jsx不是模板化引擎。所以我们要回到js层面构建这个方法
1 | import React, { Component } from "react"; |

在render中我们用&&来进行简单的逻辑运算如果tags.length===0 才可以运行下面的代码。如果下面一个条件不是是非判断,而是字符串,那么如果是空串即false,非空串即为true
Handling Events
所有的react元素都有基于dom事件的属性,例如按钮元素有一个onClick属性,还有双击事件、鼠标移入事件(onKey…)。
处理onClick事件:
1 | class Counter extends Component { |
值得注意的是,我们在”onClick={this.handleIncrement()}”中并没有调用方法,只是传入了一个引用。这与在js中的处理方式不同:在写行内代码的时候,我们直接调用 js 函数。
和下面的调用不同,因为我们需要一个返回值来给className赋值,所以我们要调用一个方法
1 | <span className={this.getBadgeClasses()}> |
现在按按钮的时候console就会显示Increment Clicked了
现在我们要实现当鼠标点击Increment的时候,显示\
我们不能直接这么写!这样浏览器就爆炸了。
1 | handleIncrement() { |
如果我们单单显示this,那么会指向一个undefined。
Binding Event Handlers
回到上面的问题。为什么会出现这个问题呢?明明是在类里面啊。
js中,调用函数的方式不同,this指代的对象也可能不同。如果一个函数被方法调用,那么this总是返回那个对象的引用。但是因为这个函数被以独立函数的方式引用,this会返回默认的全局对象(严格模式下为undefined)
那你会说我tm也没独立调用啊,我onClick={this.handleIncrement} 中有this啊。。
但是注意,这不是调用一个方法!!!
如果我们改成onClick={this.handleIncrement()} 那么我们会发现确实会显示 Increment Clicked 0(或者别的数字) 。而且点击按钮是没用的,因为他会默认你已经调用了这个方法了,而不是触发调用。
这就很矛盾了。如何解决,我们需要用下面这篇文章提到的bind()方法
https://jasonxqh.github.io/2020/05/26/OOP-in-JavaScript/#more
1 | import React, { Component } from "react"; |
当然,我们也可以不适用constructor来实现这个功能,那就老样子,箭头函数,箭头函数中的this就继承自构造这个函数的对象。
1 | handleIncrement=()=>{ |
而且我认为这种方式更加直观,能更好的帮助我们理解为什么调用引用而不是直接调用方法。
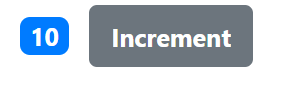
Updating the State
现在我们要学习更新状态。也就是说当我们click的时候,要实现前面的数字+1
我们不能想的太简单,直接这么写.这是没有用的。
1 | handleIncrement=()=>{ |
事实上我们代码中的count确实++ 了,但是react不知道,所以视图并没有更新。为了解决这个问题,我们需要用到继承自component对象的一个方法setState() 这个方法告诉react state已经更新了,然后让react去同步视图
这里我们可以向setState方法传入我们需要实时修改的参数,我们传入一个对象,对象中的this.state.count属性会和state中的合并。或者当state中有相同的属性时,就会被覆盖
1 | handleIncrement = () => { |
What Happens When State Changes
原理就是当我们点击了increment按钮的时候,调用了setState方法。这个方法告诉react,state要变化了。react会计划调用一次render方法,也许未来某个时候会调用。这就是异步调用,他将在未来发生。所以在未来某一点调用render的时候 这个方法会返回新的react元素。
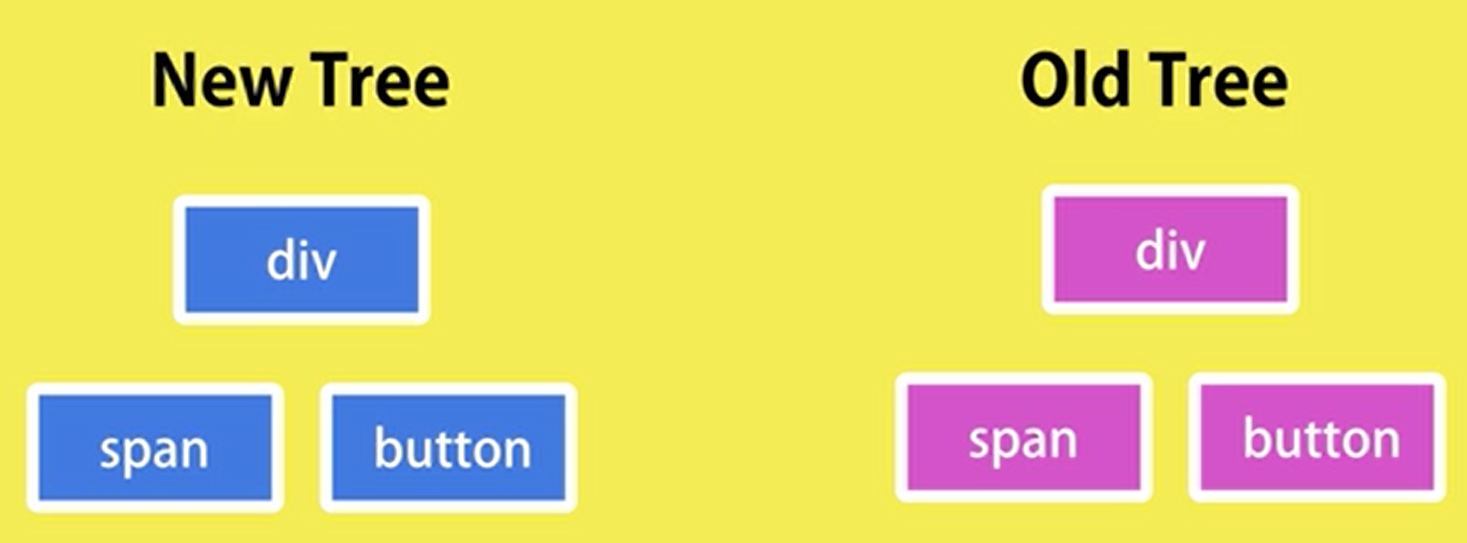
就像这样,然后react会对比他们俩修改了什么地方。在这里,它会发现是span的内容变换了,因为span调用的是count属性的值。然后react会找到真实的DOM,找到对应的span,修改它让它与虚拟的DOM同步。所以除了span标签以外的所有地方都没有发生改变
Passing Event Arguments
如何传递事件参数?现在我们的handleIncrement 没有参数,但事实上我们在日常生活中常常需要传入参数。 比如这里我们处理了装有商品的购物车。当我们点击增加按钮的时候想传入一个商品对象的id
1 | import React, { Component } from "react"; |
这样当我们渲染一组购物车商品的时候 我们可以用map方法访问商品的对象
我们当然可以新建一个doHandleIncrement 方法,但是这样会让代码更加凌乱,可读性不好,我们可以直接箭头函数。
当然我们可以不输出id:1 那么我们就直接传入商品对象
onClick = {() => this.handleIncrement(product)}即可
所以我们如果想对一个event handler 传递一个参数的话,我们就写一个箭头函数,在箭头函数中调用event handler并传入参数即可
Setting Up the Vidly Project 新建vidly工程
https://www.bilibili.com/video/BV1Sb411P79t?p=36
Exercises
在网页中做一张类似的表格。
 re
re
我们需要在app.js中进行修改:
1 | import React from "react"; |
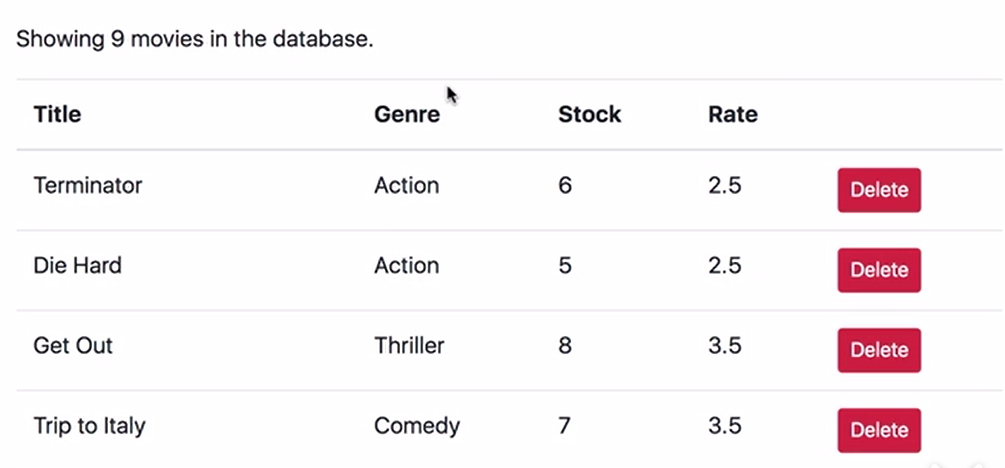
Building the Movies Component
和上面一样,我们先从fakeMovieService中引入getMovies()方法。
然后建一个state来存放movies对象
然后见一张表格,可以用快捷键 table.table>thead>tr>th*4 (表头)和 tbody>tr>td*4 (表身)
利用map函数,对movies中的每一个movie对象进行渲染,每部电影生成一行
1 | import React, { Component } from "react"; |
Deleting a Movie
要实现删除,也就是说我们在点击的时候要新建一张表格,新的这张表格不包含被删除的那行,然后再通过setState函数实现更新
我们在这里通过filter函数,对movies中的每一个元素进行判断是否与被删除id相等。然后用movies来接收filter函数返回一个新的列表。
利用setState,传入一个对象,然后和state中重复的属性会被新的属性覆盖,达到删除效果
1 | import React, { Component } from "react"; |
Conditional Rendering
怎么进行条件渲染呢?就是如果电影数是0,那么显示There are no movies in the database
否则显示Showing n(行数) movies in the database
注意,react中return一个component只能返回一个元素,如果想要把两个元素合并,需要用到\
1 | import React, { Component } from "react"; |
效果如下:
Composing Components 把组键组合
Introduction
react程序基本上就是一个组件树,我们可以将组件组合在一起,变成一个复杂的UI
Composing Components
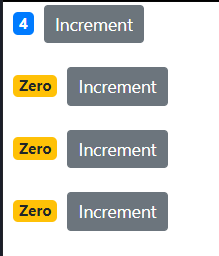
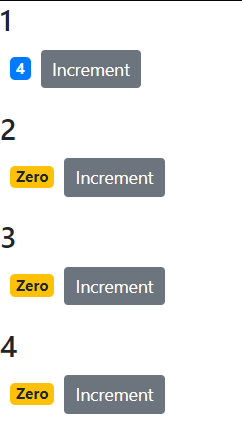
现在我们要通过一个组件来渲染一组counters
在component文件夹中新建counters.jsx
1 | import React, { Component } from "react"; |
但是我们现在如果修改counters列表中对象的value值,在Dom上并不会显示。接下来我们就要解决这个问题
Passing Data to Components
每个组件都有他的props属性他会用用我们向counter组件传递的所有属性,在\
1 | render() { |
然后我们回到counter,把state.value改成 this.props.value,即可显示
Passing Children传递子元素
有个很特殊的props叫做children,也就是说当我们在传递组件的时候。有时候想要传递内容,比如说对话框等等。那么我们需要把原来的但标签\

这里有value属性,是之前设置的,还有children属性,type是h4
在counter的return中加上{this.props.children},我们看到这样的ui

当然,我们也可以把这个变成动态的,只要把原来的 Title 变成 Counter #{counter.id}即可
1 | render() { |
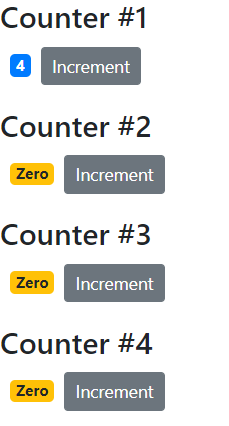
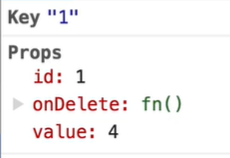
事实上,我们可以直接把id当作一个props放在单个\
1 | <Counter key={counter.id} value={counter.value} selected={true} id={counter.id}/> |
然后呢在counter 的render中。
1 | <h4>{this.props.id}</h4> |
如下图
Props vs State
props 就是我们给组件的 数据。state是组件本地或者私有的数据容器,其他组件是没有办法访问的。他完全只能在组件内被访问。
换句话说我们在counters中给Counter标签设置的属性,都传入到了Counter的props中。但我们不能在Counters中访问Counter组建的state,因为他是私有和本地的。
类似的,Counters有着自己的组件state,这个state也是对其他组件完全不可见的。
有时候组件是没有state的,他用props处理所有的数据。
props 和state的区别还在于props是只读的。换句话说我们不能在组件内部改变传入的数据。如果我们想在组件声明周期 修改输入的数据,那么我们需要把输入的内容复制到state当中而不是修改props
Raising and Handling Events
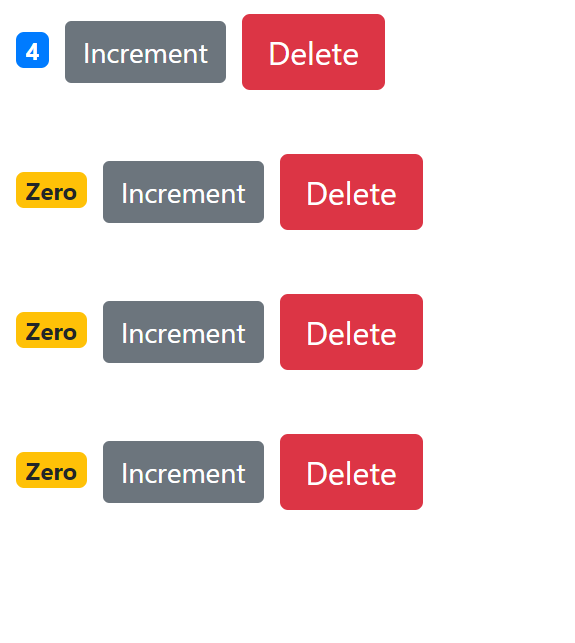
利用快捷键新建一个按钮 btn.btn.btn-danger.btn.m-2
效果如图
1 | <button className="btn btn-danger m-2">Delete</button> |
在这里我想实现点击Delete按钮,然后这行的\
这将引入一个react非常重要的原则
The component that owns a piece of state, should be the one modifying it
也就是说只有组件自己才能修改自己的state
所以我们没有办法在counter.jsx终实现,因为这四个\
所以我们需要让Counter组件发起一个事件,我们把这个时间叫做onDelete事件。然后Counters组件将会处理这个事件,也就是说我们要在Counters组件当中实现一个handleDelete()的方法
理解了原理之后我们在Counters组件中添加一个方法(并非最终实现),然后通过props给Counter组件传递一个方法的引用:
1 | class Counters extends Component { |
然后再Counter组件中刚刚实现的button标签中,通过this.props.onDelete来调用该方法
1 | <button |

Updating the State
接下来我们要正式做删除操作
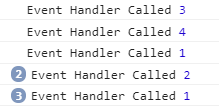
向上文提及的,我们先测试一下handleDelete函数能不能正确打印counterID,如果能打印,那么我们可以放心删除
counters.jsx中做如下修改
1 | handleDelete = counterID => { |
counter.js 如下
1 | <button onClick={()=>this.props.onDelete(this.props.id)} className="btn btn-danger m-2"> |
看来是成功的
现在我们回去更新Counters组件中的元素了,像以前说的,我们不直接修改state,而是重新生成一个数组然后让setState去更新原来的数组
1 | handleDelete = (counterID) => { |
关于id和key,这里有一点要补充。
key是react组件内部的信息,我们在Counter组件的prop中是没有办法访问它的。但是id我们可以通过组件内部的props来读取。但是问题又出现了,我这里定义了很多props,每个props都是独立的,那么当随着我们传入props的增多,代码的管理会变得混乱不堪。所以我们直接把他们打包: counter = {counter} 这个counte 本来就包含了所有counter对象的数据。然后我们只需要在Counter组件中做如下修改
1 | state = { |
Single Source of Truth
接下来我们想要做的是一个Reset按钮,按下以后所有现有的Counter的数值都会归零。那么,这时候我们就需要解决一个问题——
我们知道如果我们要重置,那么就要新建一个列表,把里面所有counter的value都置为0,然后setState,但是这对handleDelete和handleIncrement 都是可行的,因为Delete是直接对Counters进行修改,Increment则是通过调用Counters中\
而对reset却不可以。
在counter中,他的value继承自我们传入的props属性,这个属性一旦传入就没有办法修改了,而我们一开始已经传入了四个counter的值分别是4,0,0,0 当我们尝试着重置的时候,counters中的state.counter已经被修改,但是counter中的state.value 却并没有得到修改。而当我们显示数字的时候,我们显示的是this.state.value,所以并不会改变。
1 | state = { |
所以问题就在这,我们对父子关系的组件(Counter是子组件,Counters是父组件)却有两套值得来源,这是万万不可的,所以我们要删除Counter的本地state数据,Counter中对本地state操作都转移到对父组件Counters操作中props的操作。
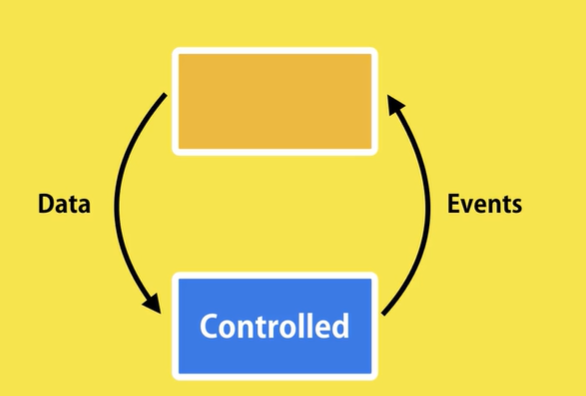
我们把Counter这种类型的组件 叫做受控组件,受控组件没有自己的state,他所有的数据都来自props,之后在数据需要要改变的时候发起事件。所以这种空间完全是被它的父控件控制的
Removing the Local State
修改过后的counter.jsx如下
1 | import React, { Component } from "react"; |
然后我们在counters.jsx中处理counter发起的events
我们先在render中添加一个reset标签和一个onIncrement 的prop
1 | render() { |
然后我们来处理 handleIncrement
1 | handleIncrement = (counter) => { |
最后我们写一个reset函数
1 | handleReset = () => { |
Multiple Components in Sync 多组件同步
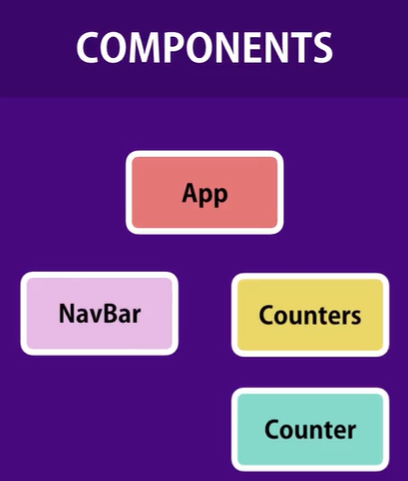
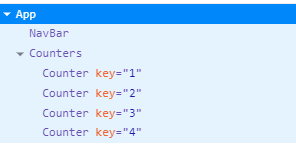
现在我想在网页上加一个导航栏,里面记录当前有多少的counter,这样我们就需要把组件树改成这样子
现在我们需要把index.js中的\
当然了我们要在component当中新建一个navbar.jsx
1 | import React, { Component } from "react"; |
然后对App.js做如下修改
App.js
1 | import React from "react"; |
这就是我们结果了,我们看到组件树和我们要达到的是一致的
Lifting the State Up
我们现在想在导航栏中显示当前还有几个counter,那么问题就来了
之前我们是通过props的特性,把Counters组件当中的state传到Counter组件当中的,
因为Counters和Counter是上下层的关系。但是Counters组件和NavBar没有父子关系。怎么办呢?
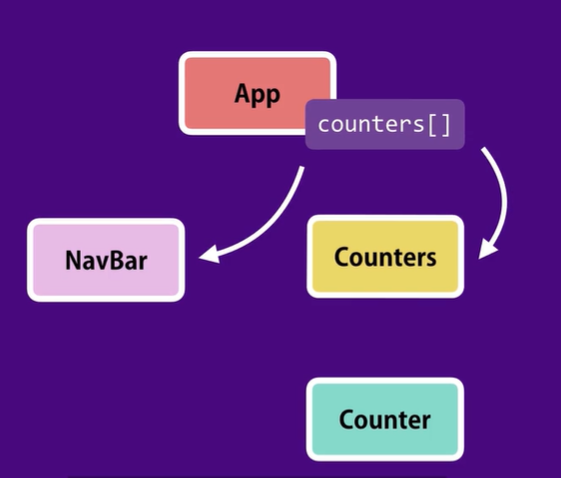
当我们想要在两个没有上下父子级别的关系的组件中共享和同步数据的时候物品,我们就需要上移组件。在这里我们需要把Counters和NavBar组件上移到他们共同的父级App组件当中。然后我们在App的所有的子组件全部使用props。如下图
(奇怪,为什么app.js中的app还是function而不是class呢。。。所以我改了一下)
我们已经知道App.js中已经包含了我们的\
移动过后的counters.js(一滴都不剩了)
1 | import React, { Component } from "react"; |
同样的我们在App.js中需要接受并处理这些events
1 | import React, { Component } from "react"; |
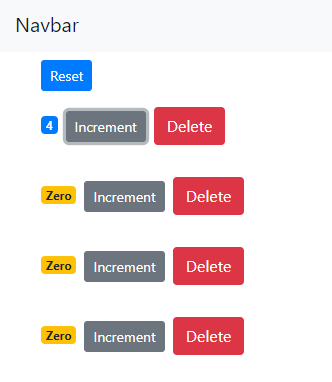
最后在NavBar组件当中显示
1 | import React, { Component } from "react"; |
Stateless Functional Components
我们回到NavBar组件,他没有state,没有方法,他只从props中获取数据,对于这种组件我们就可以把它变成
Stateless Functional Components,也就是我们说的无state的功能性属性
这时候我们就可以用function来定义了
1 | const NavBar = () => { |
原来如此,这就解决了刚才为什么App是一个函数的原因了
Destructuring Arguments
现在我们来简化代码,我已经不想漫天打props了,我们怎么才能解决啊?
可以用解构(Destructuring)
在函数中解构props
在NavBar中我们直接收了一个prop
1 | import React, { Component } from "react"; |
在class中解构props
那么在Counters组件中我们有多个props,我们也可以解构他
解构的顺序不要紧,只要名字对上即可
1 | import React, { Component } from "react"; |
Lifecycle Hooks
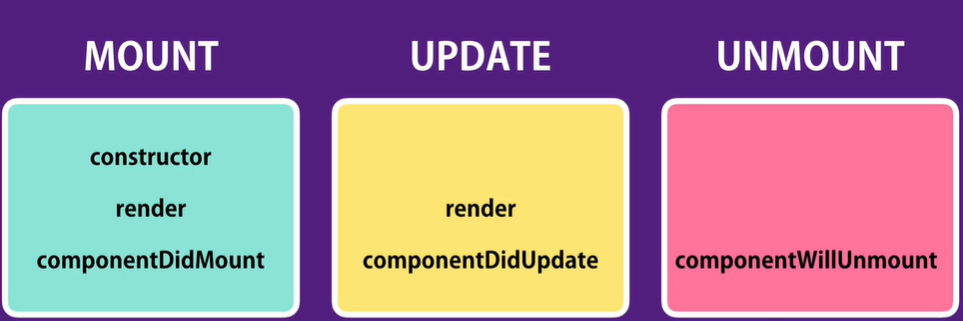
一个组件会经历很多的状态,在他的生命周期中,第一个状态是mount 状态,这是组件被实例化并被创建到DOM当中。这里有一些可以加入组件的特殊方法,react会自动调用这些方法
我们叫这些方法为Lifecycle Hooks。它们允许我们在整个生命周期中勾住某个特定的时刻,并做一些事情。
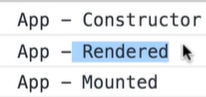
在Mount 状态中有三个 Lifecycle Hooks:constructor,render,componentDidMount,react会顺序调用这些方法
第二个状态是Update状态,他在state或者组件的props改变的时候发生。在这个状态中有render 和 componentDidUpdate两个Lifecycle Hooks。当我们改变state或者传入新的props的时候,会依次调用这两个Lifecycle Hooks
第三个状态是UnMount.这个状态是当一个组件被DOM移除(删除)的时候发生,里面有componentWillUnmount一个Lifecycle Hooks,当我们要删除一个组建的时候,会被react调用
还有很多其他的Lifecycle Hooks,我们很少用到
Mounting Phase
1 | class App extends Component{ |
Updating Phase
//…
Unmounting Phase
//…
Exercise- Decrement Button
加一个Decrement 按钮实现-1 操作
Solution - Decrement Button
在counter.jsx 中加一个按钮
1 | <button |
在counters.jsx中处理这个事件,向上(App)抛
1 | class Counters extends Component { |
在App.js中处理这个事件
1 | handleDerement = (counter) => { |
Exercise- Like Component
设计一个接口实现点赞操作

Solution- Like Component
首先我们要在https://fontawesome.com/v4.7.0/icon/heart-o 复制 心形代码,注意,实心的和空心的差了一个-o:
1 | <i class="fa fa-heart-o" aria-hidden="true"></i> |
然后我们在components 中新建一个common文件夹,里面包含Like组件
like组件声明如下,Like是一个受控组件,我们也可以把它当成funtcion来写,但这里还是class
1 | import React, { Component } from "react"; |
那么我们需要在Movies中添加一个onClick的props,然后新建一个handler处理这个event
首先新添加一列,让他囊括我Like组件,并且传入一个liked和一个onClick props
1 | <td> |
然后我们开始处理handleLike,一样的套路我们新建一个movies列表,然后把对应的movies的liked属性取反。(原来喜欢的变成不喜欢,原来不喜欢的变成喜欢,因为我默认liked属性是不喜欢的,所以一开始都是空心的)
1 | handleLike = (movie) => { |
Summary
这一章节我们学了
如何利用props传递数据
发起和处理时间
怎么上移state(利用这种技巧我可以让多个组件共享一个数据源)
Functional Component
Lifecycle Hooks
后文请移步