第一个 Swift App
Getting Started with SwiftUI
Getting Started with SwiftUI
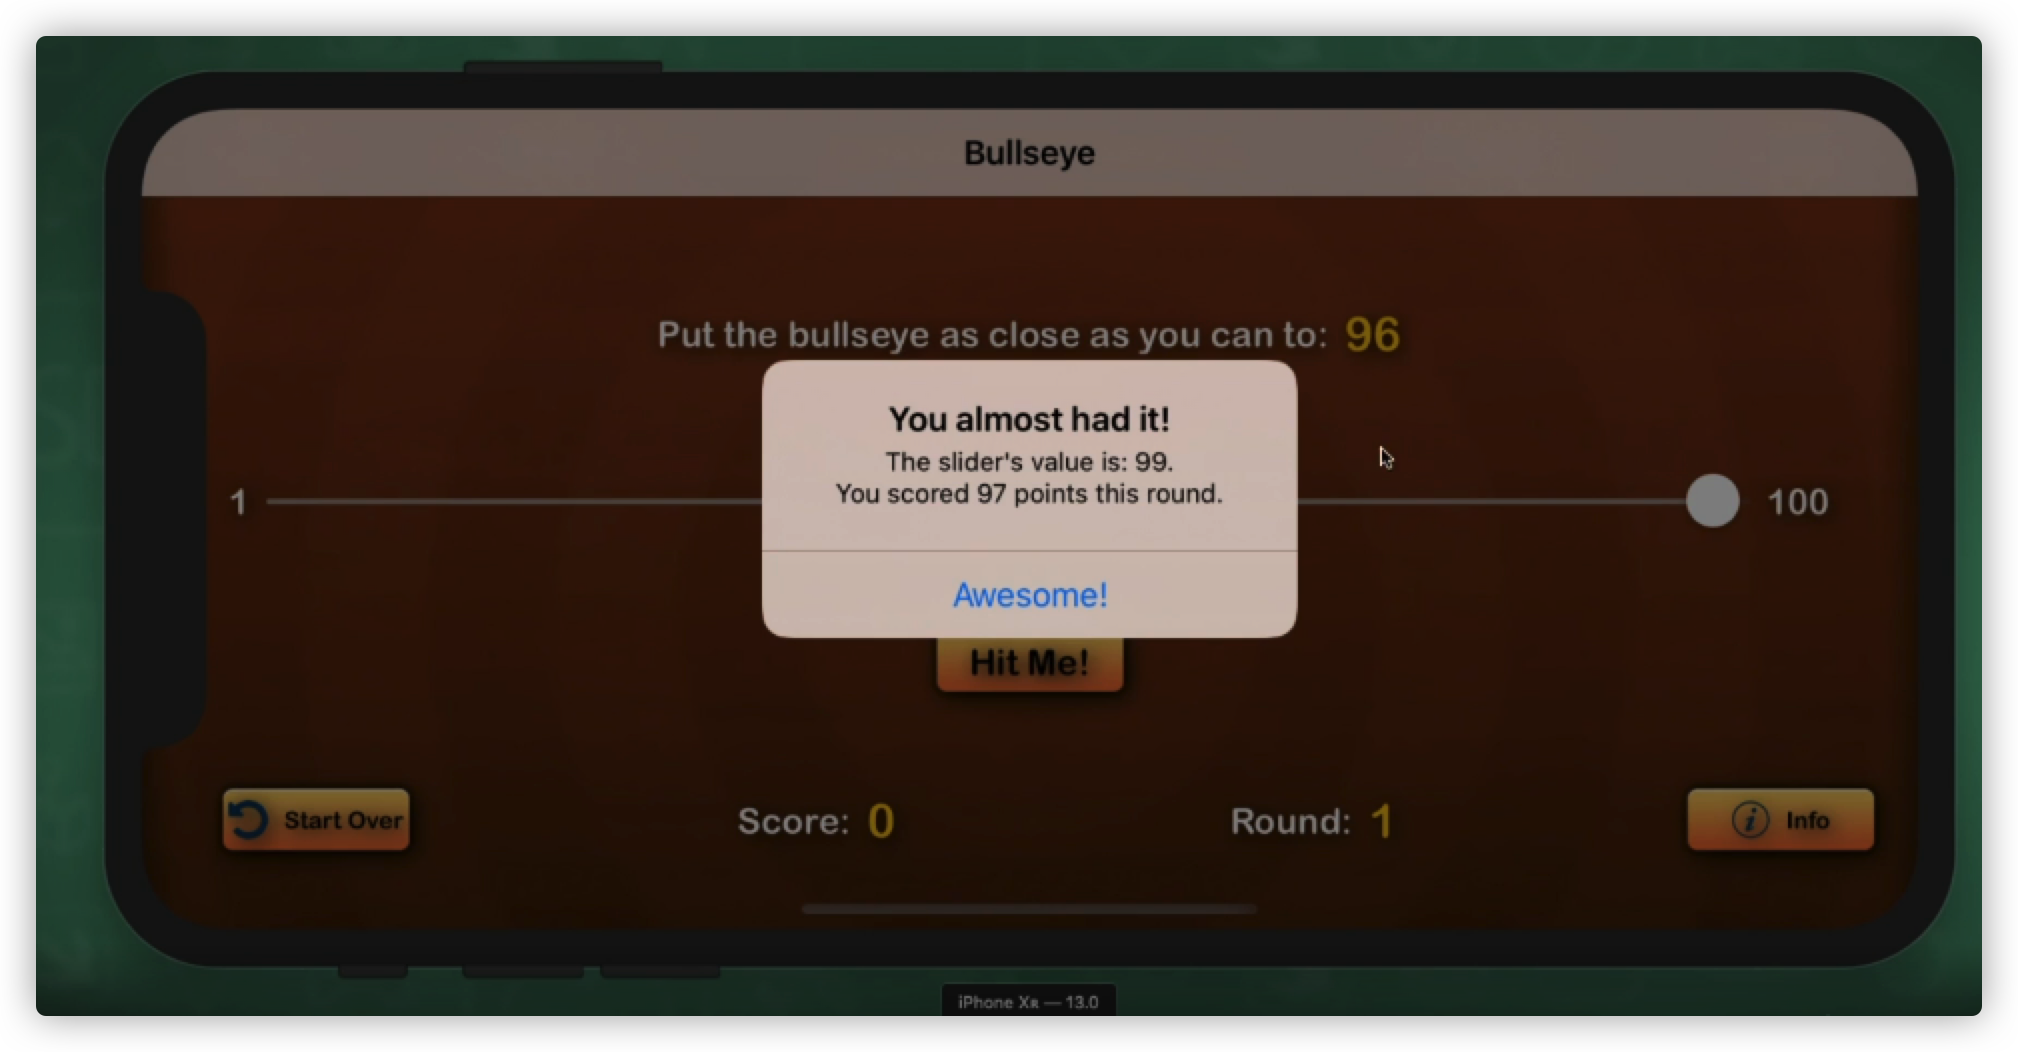
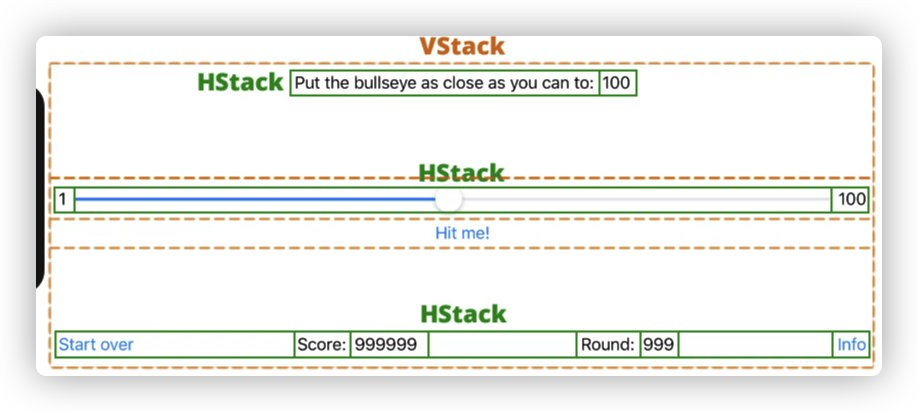
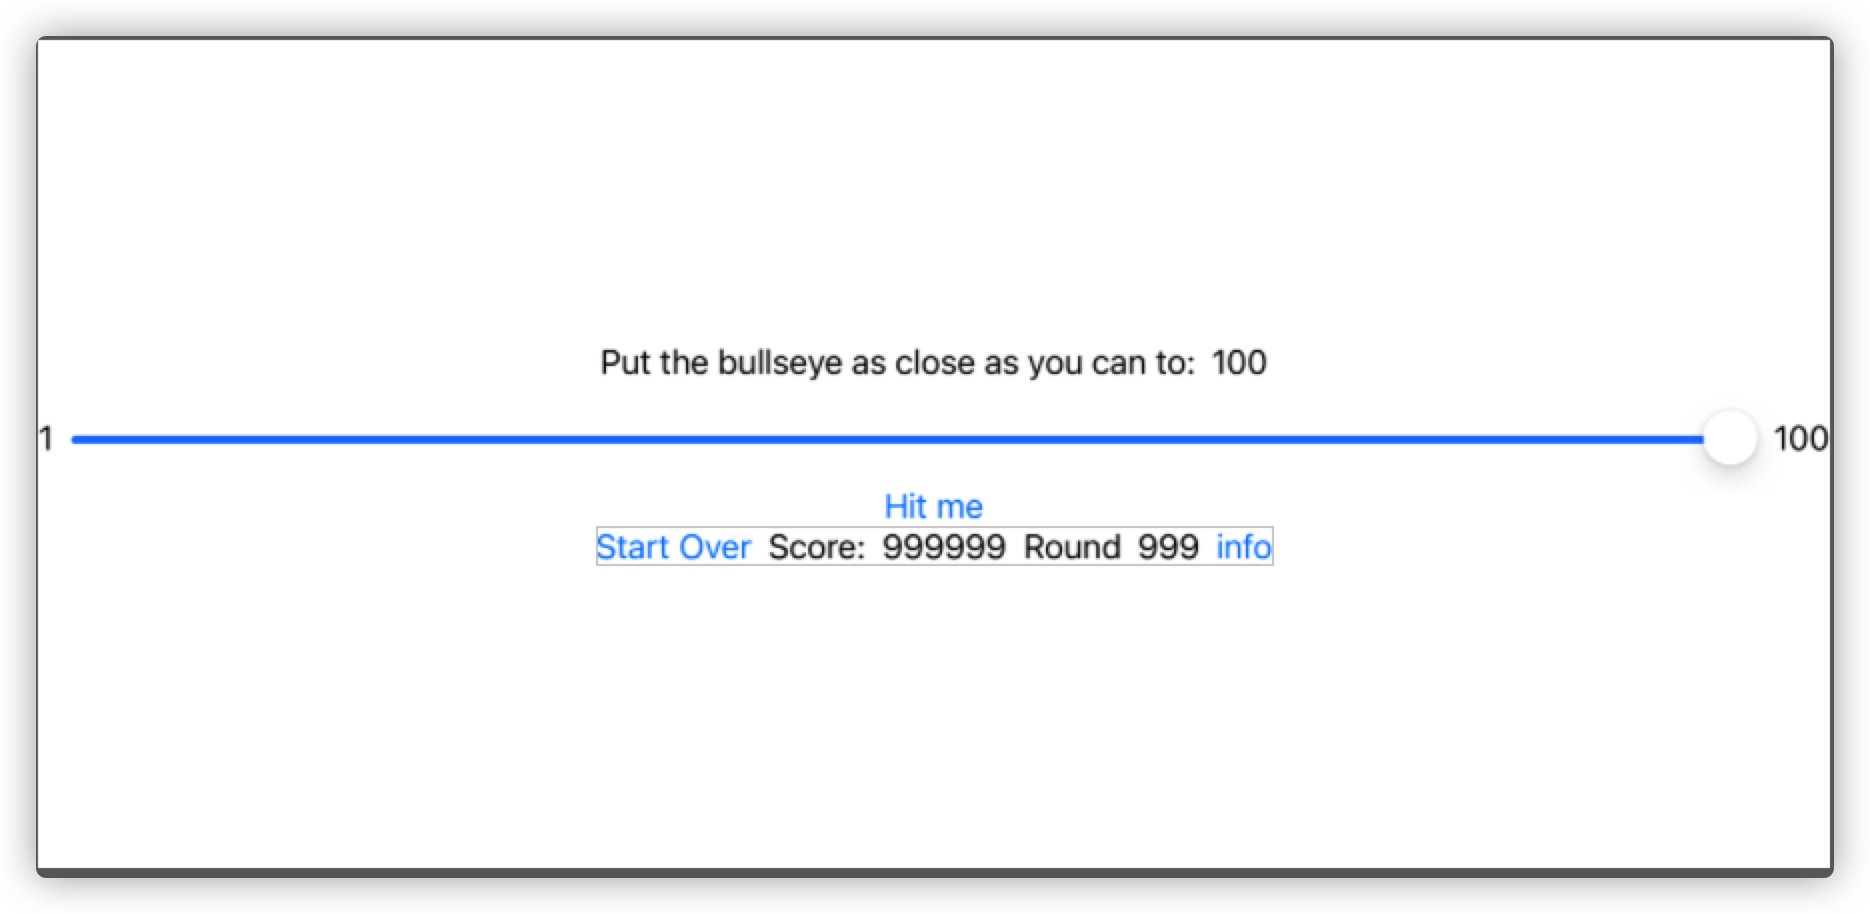
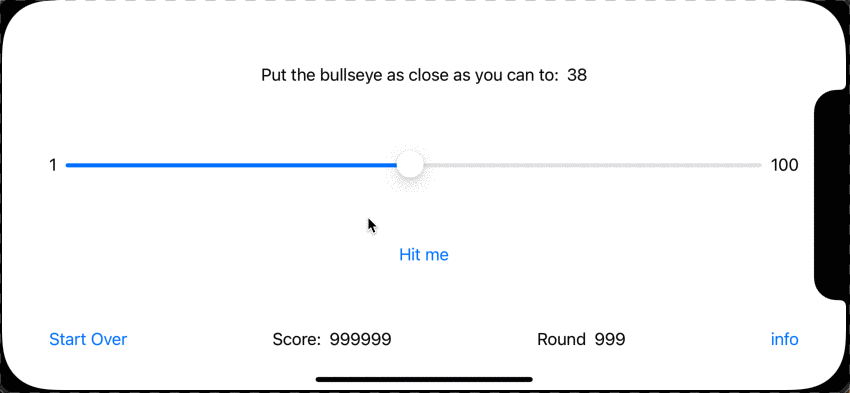
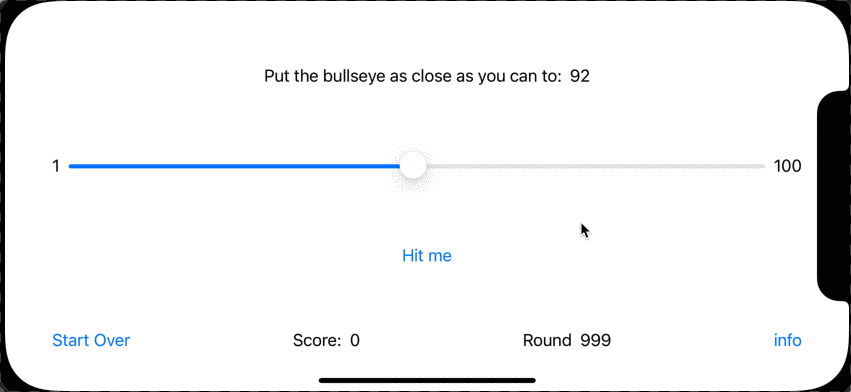
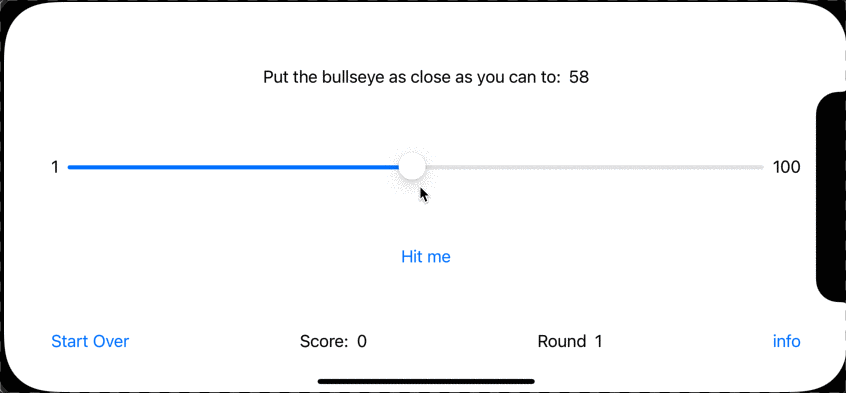
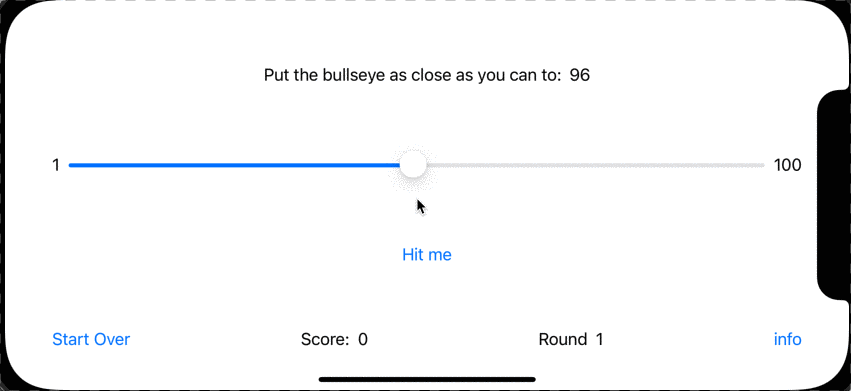
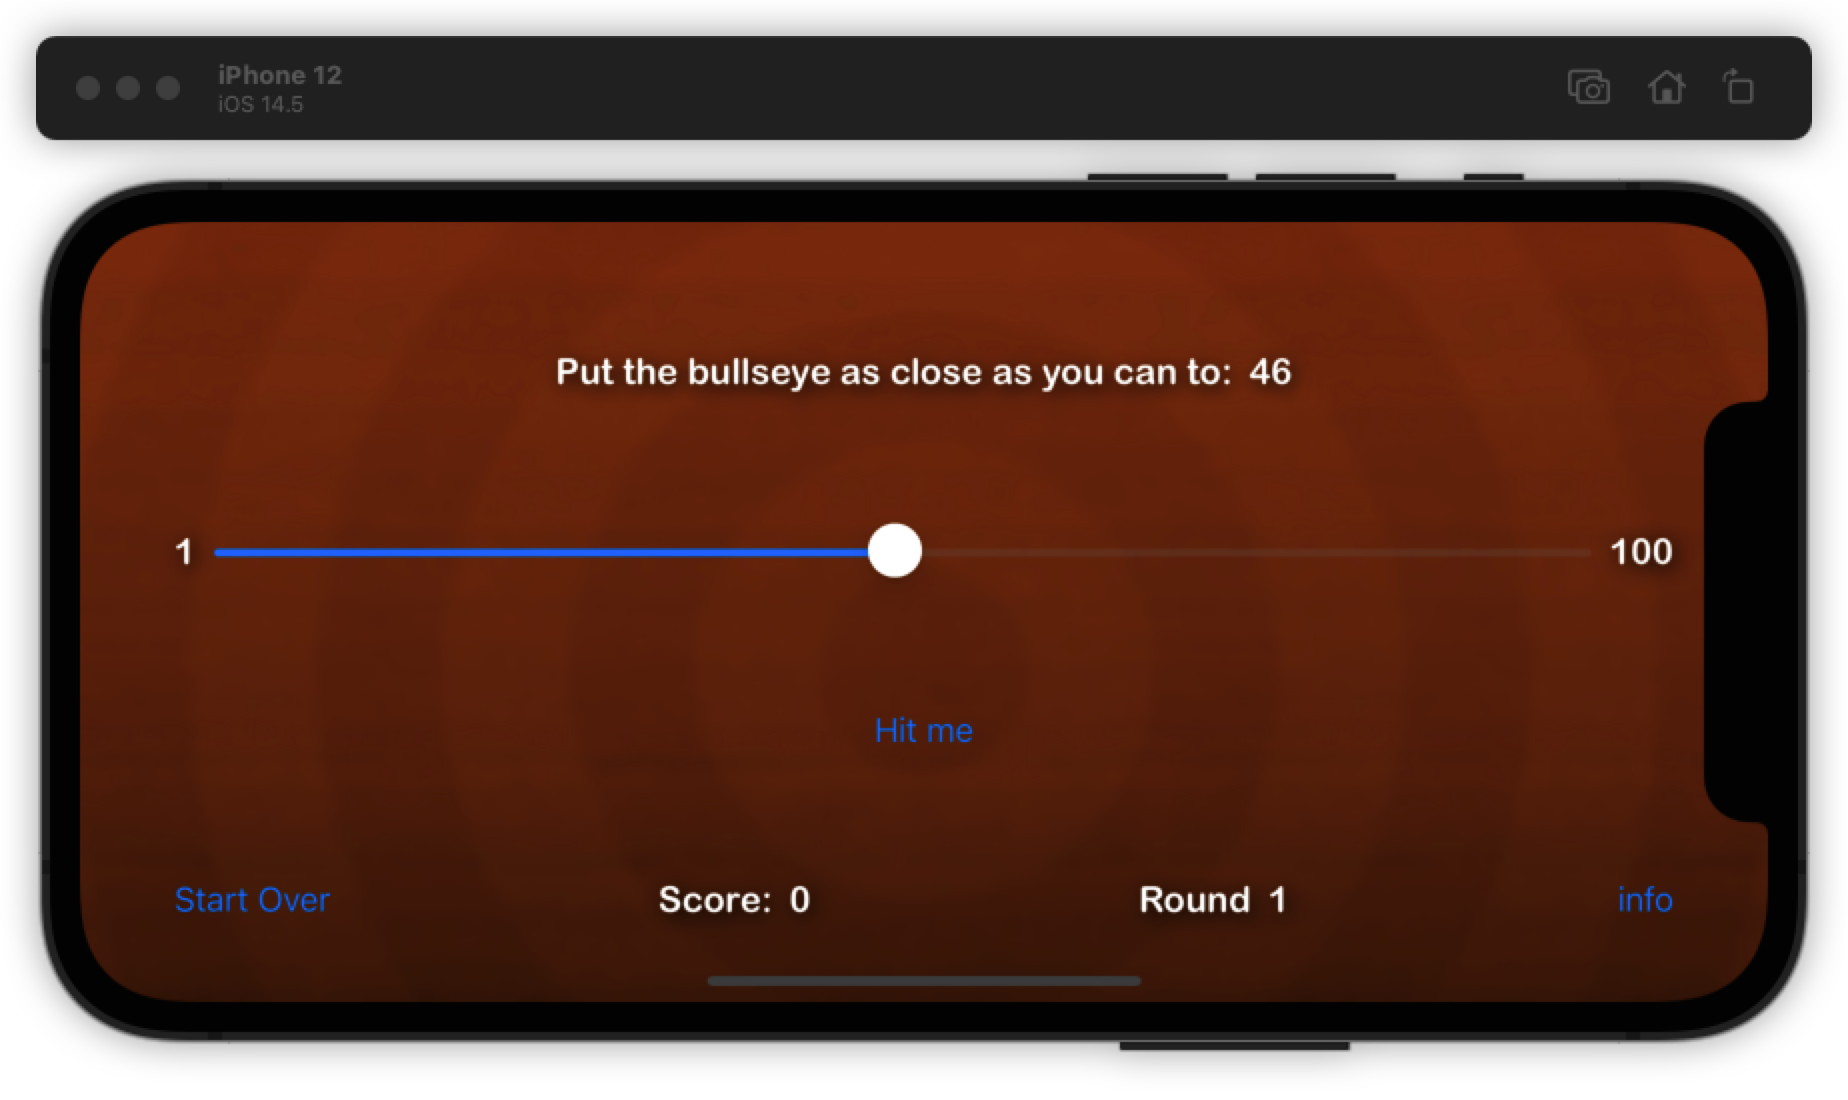
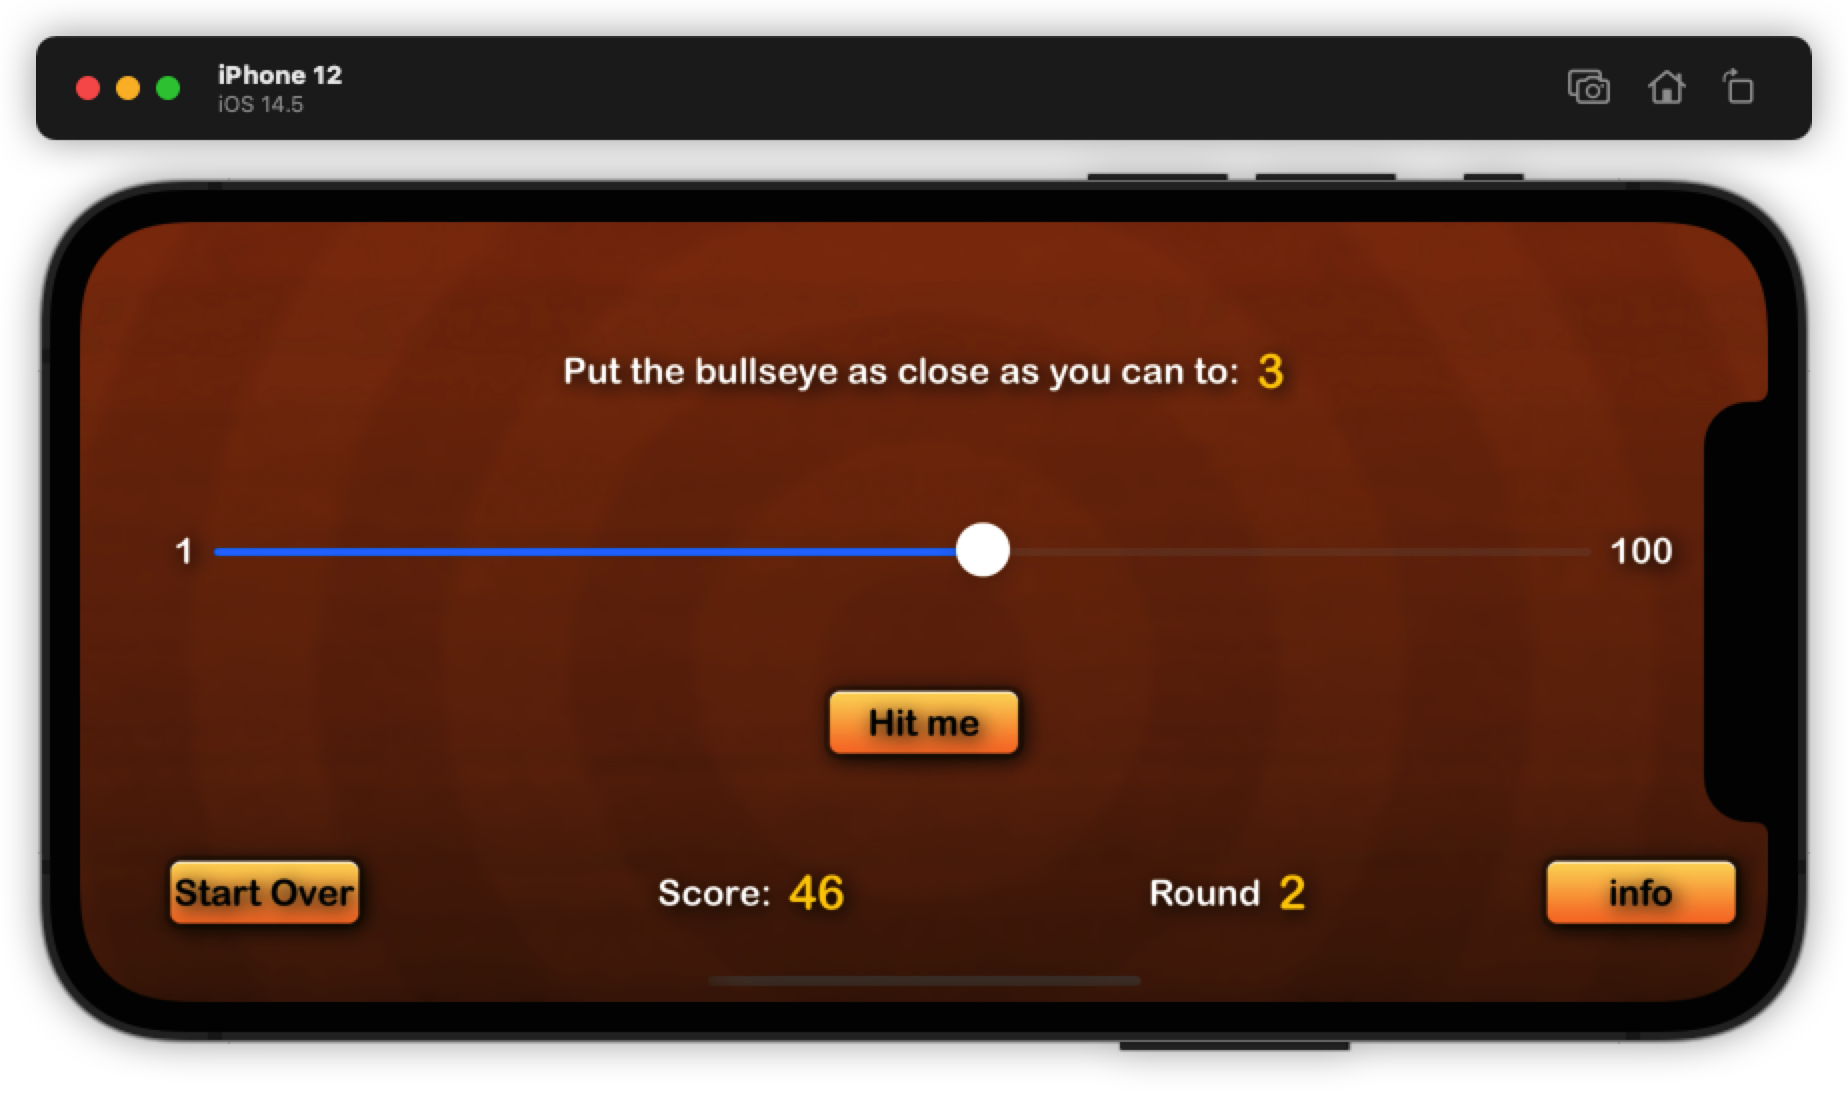
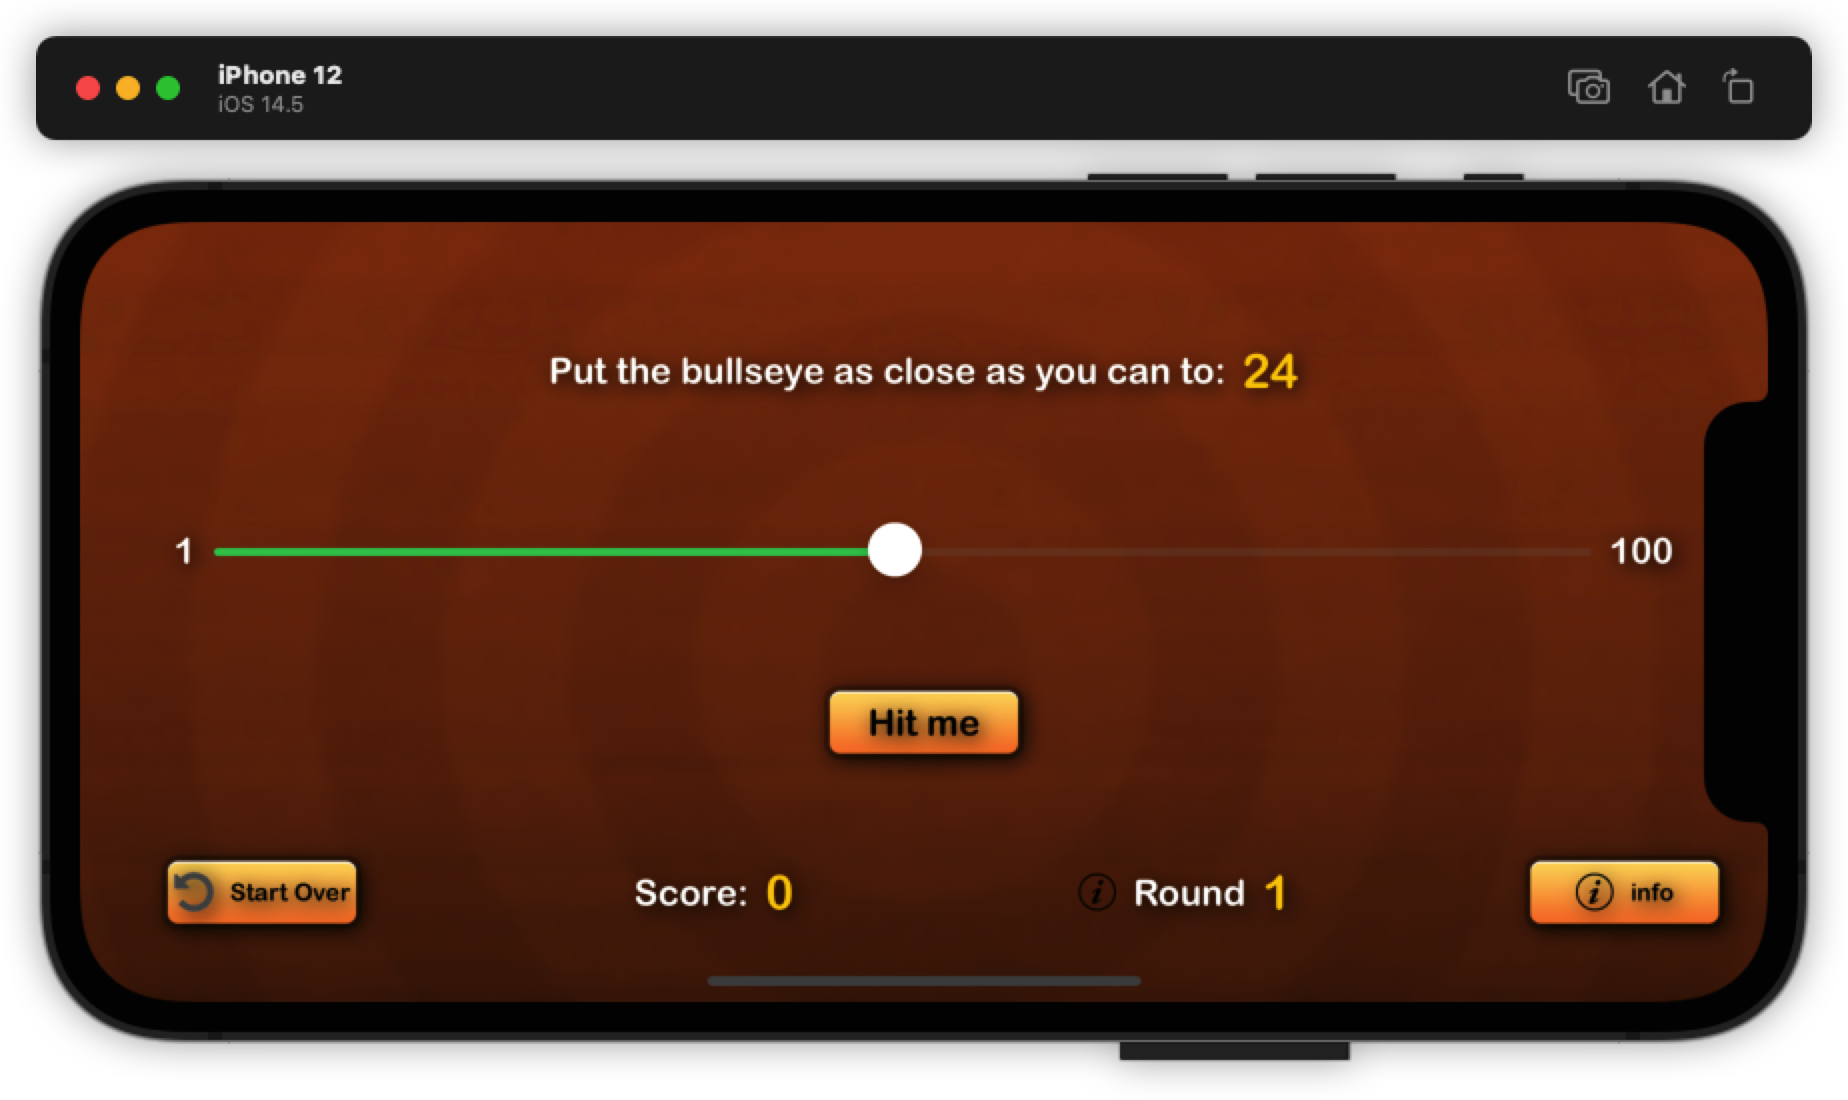
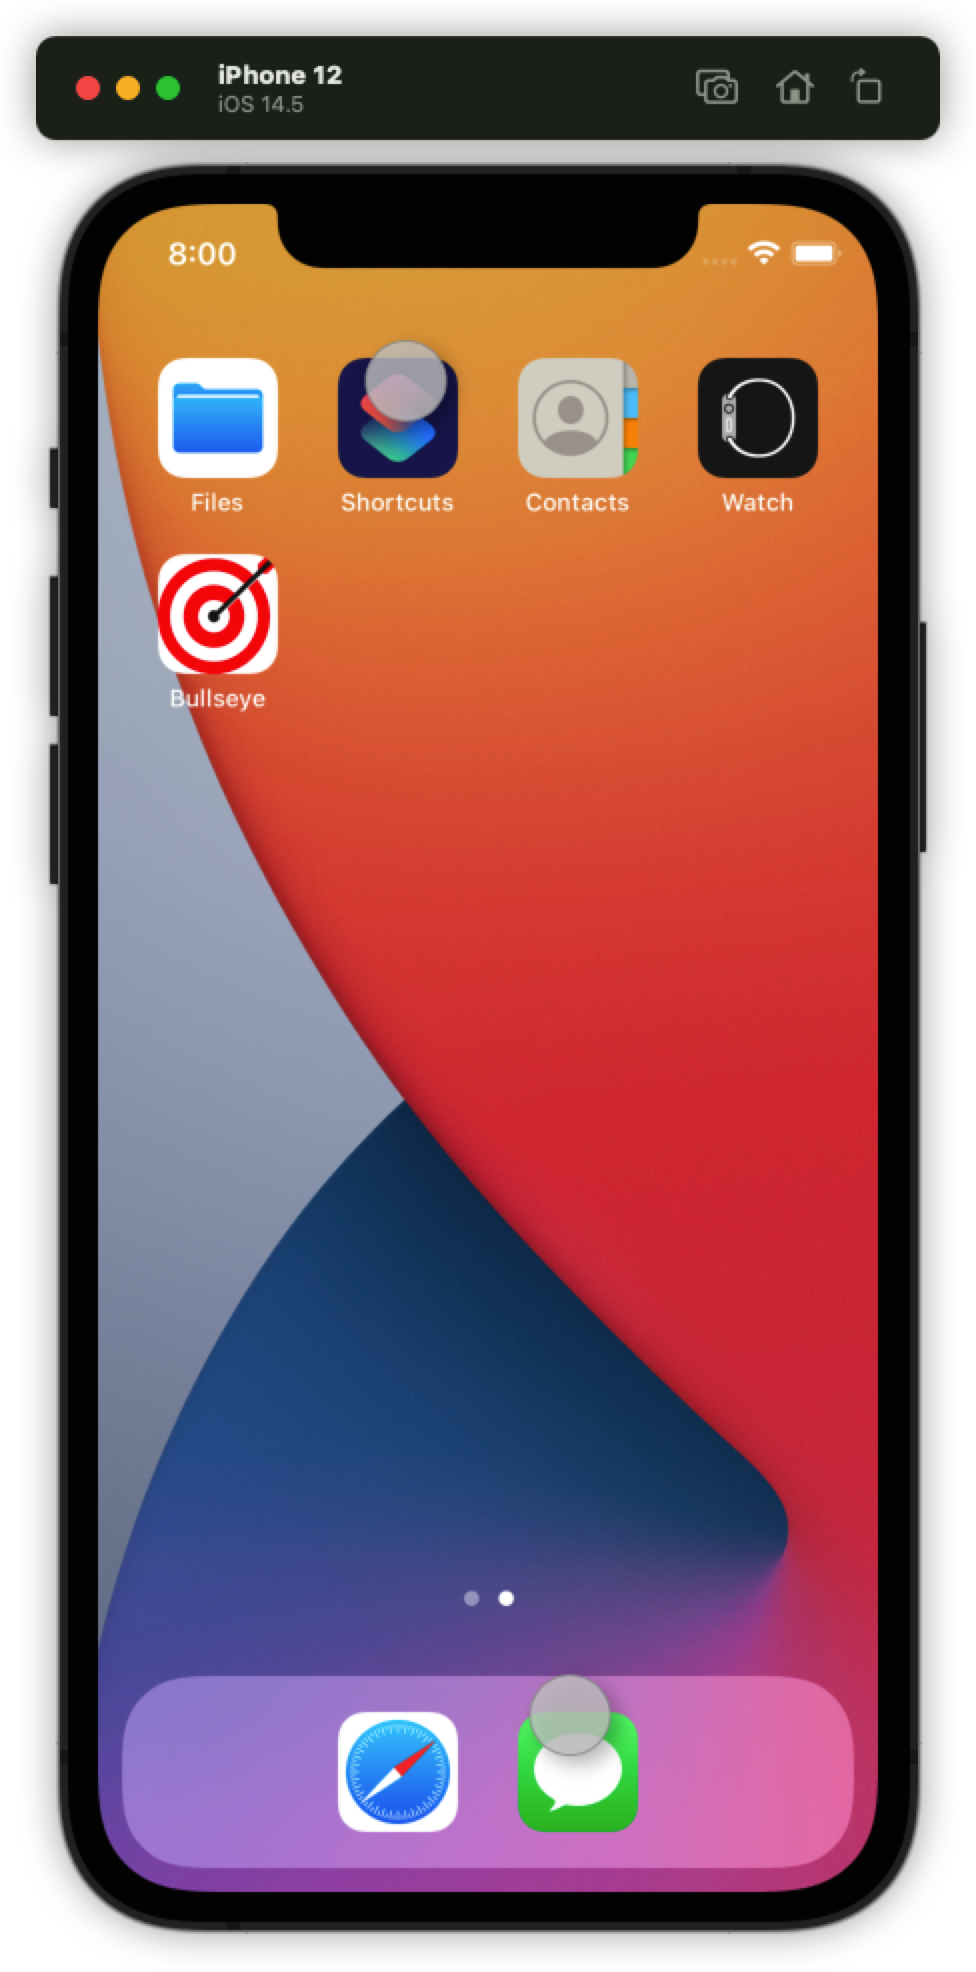
我们第一个app要做一个小游戏叫做 Bullseye,其实就是一个猜数字的游戏。游戏会随机指定一个数字,然后我们可以拖动进度条来猜一个数字。游戏会判断我们移动的数字是否和随机数相等。如下图所示:
在第一部分,我们列出了一个to-do list
- Add the “Hit Me” button
- Show a popup when the user taps it
- Put game info on screen
- Put slider on screen : 1 -> 100
- Read value of the slider
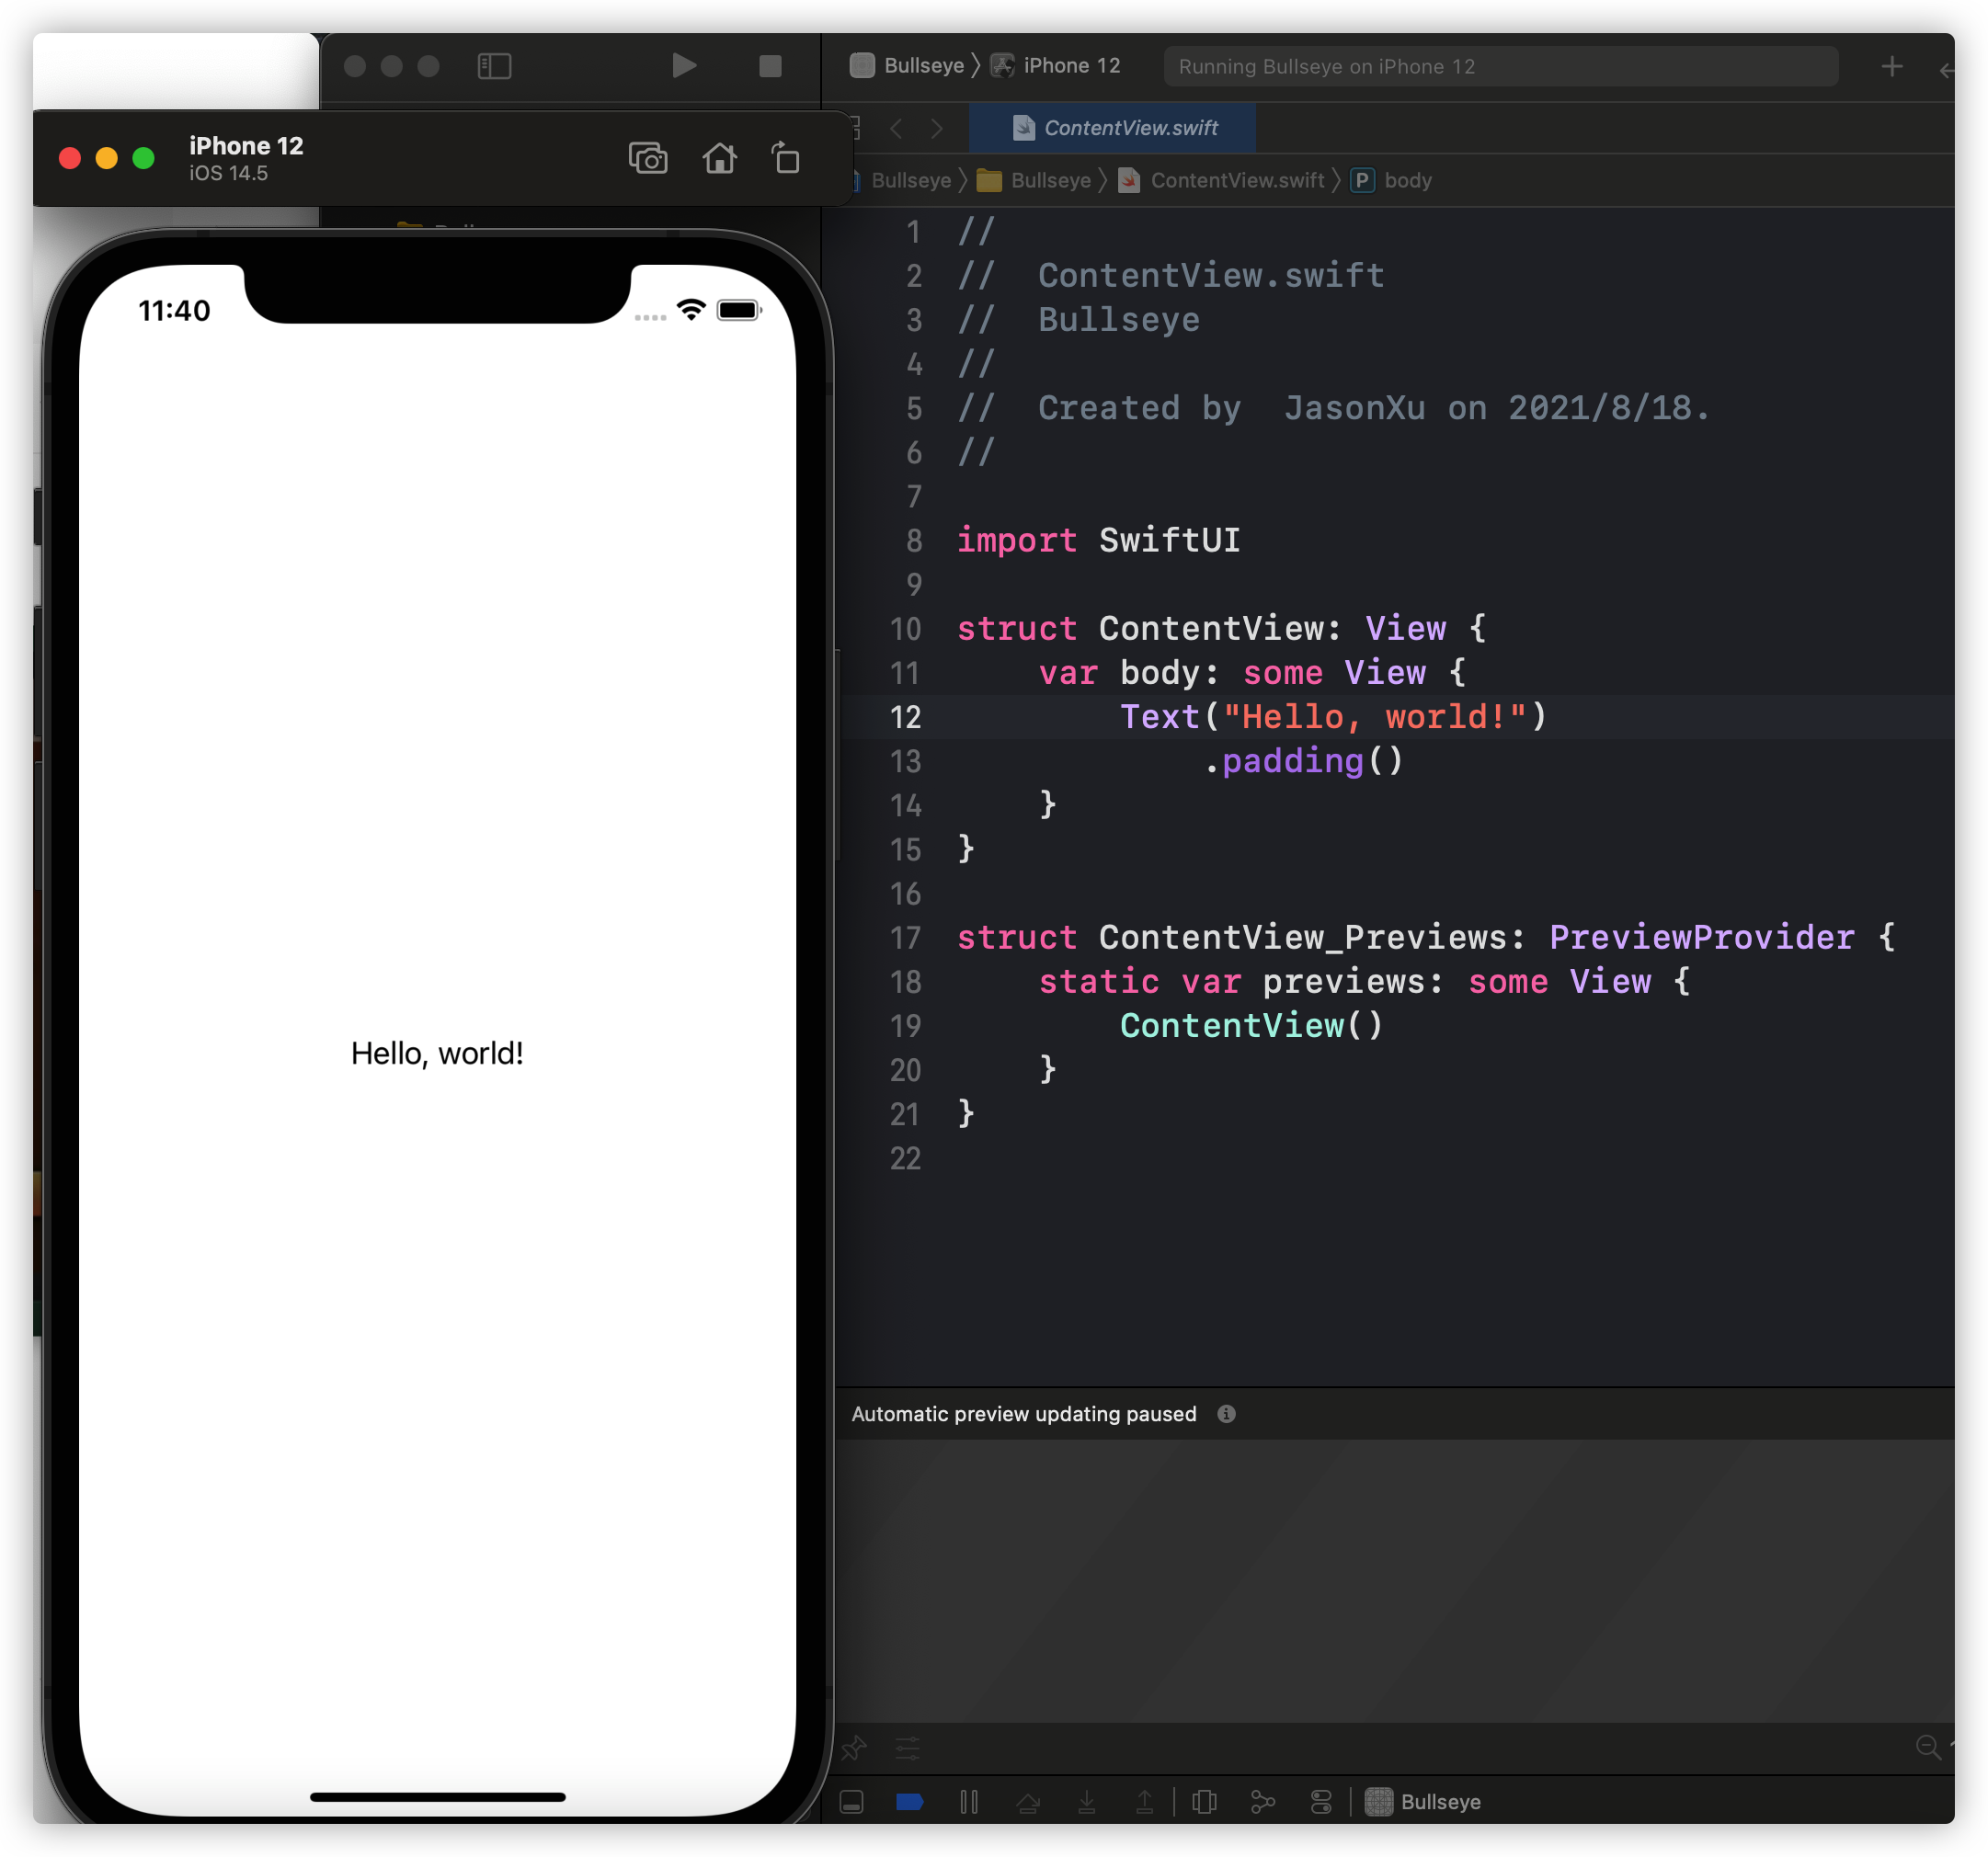
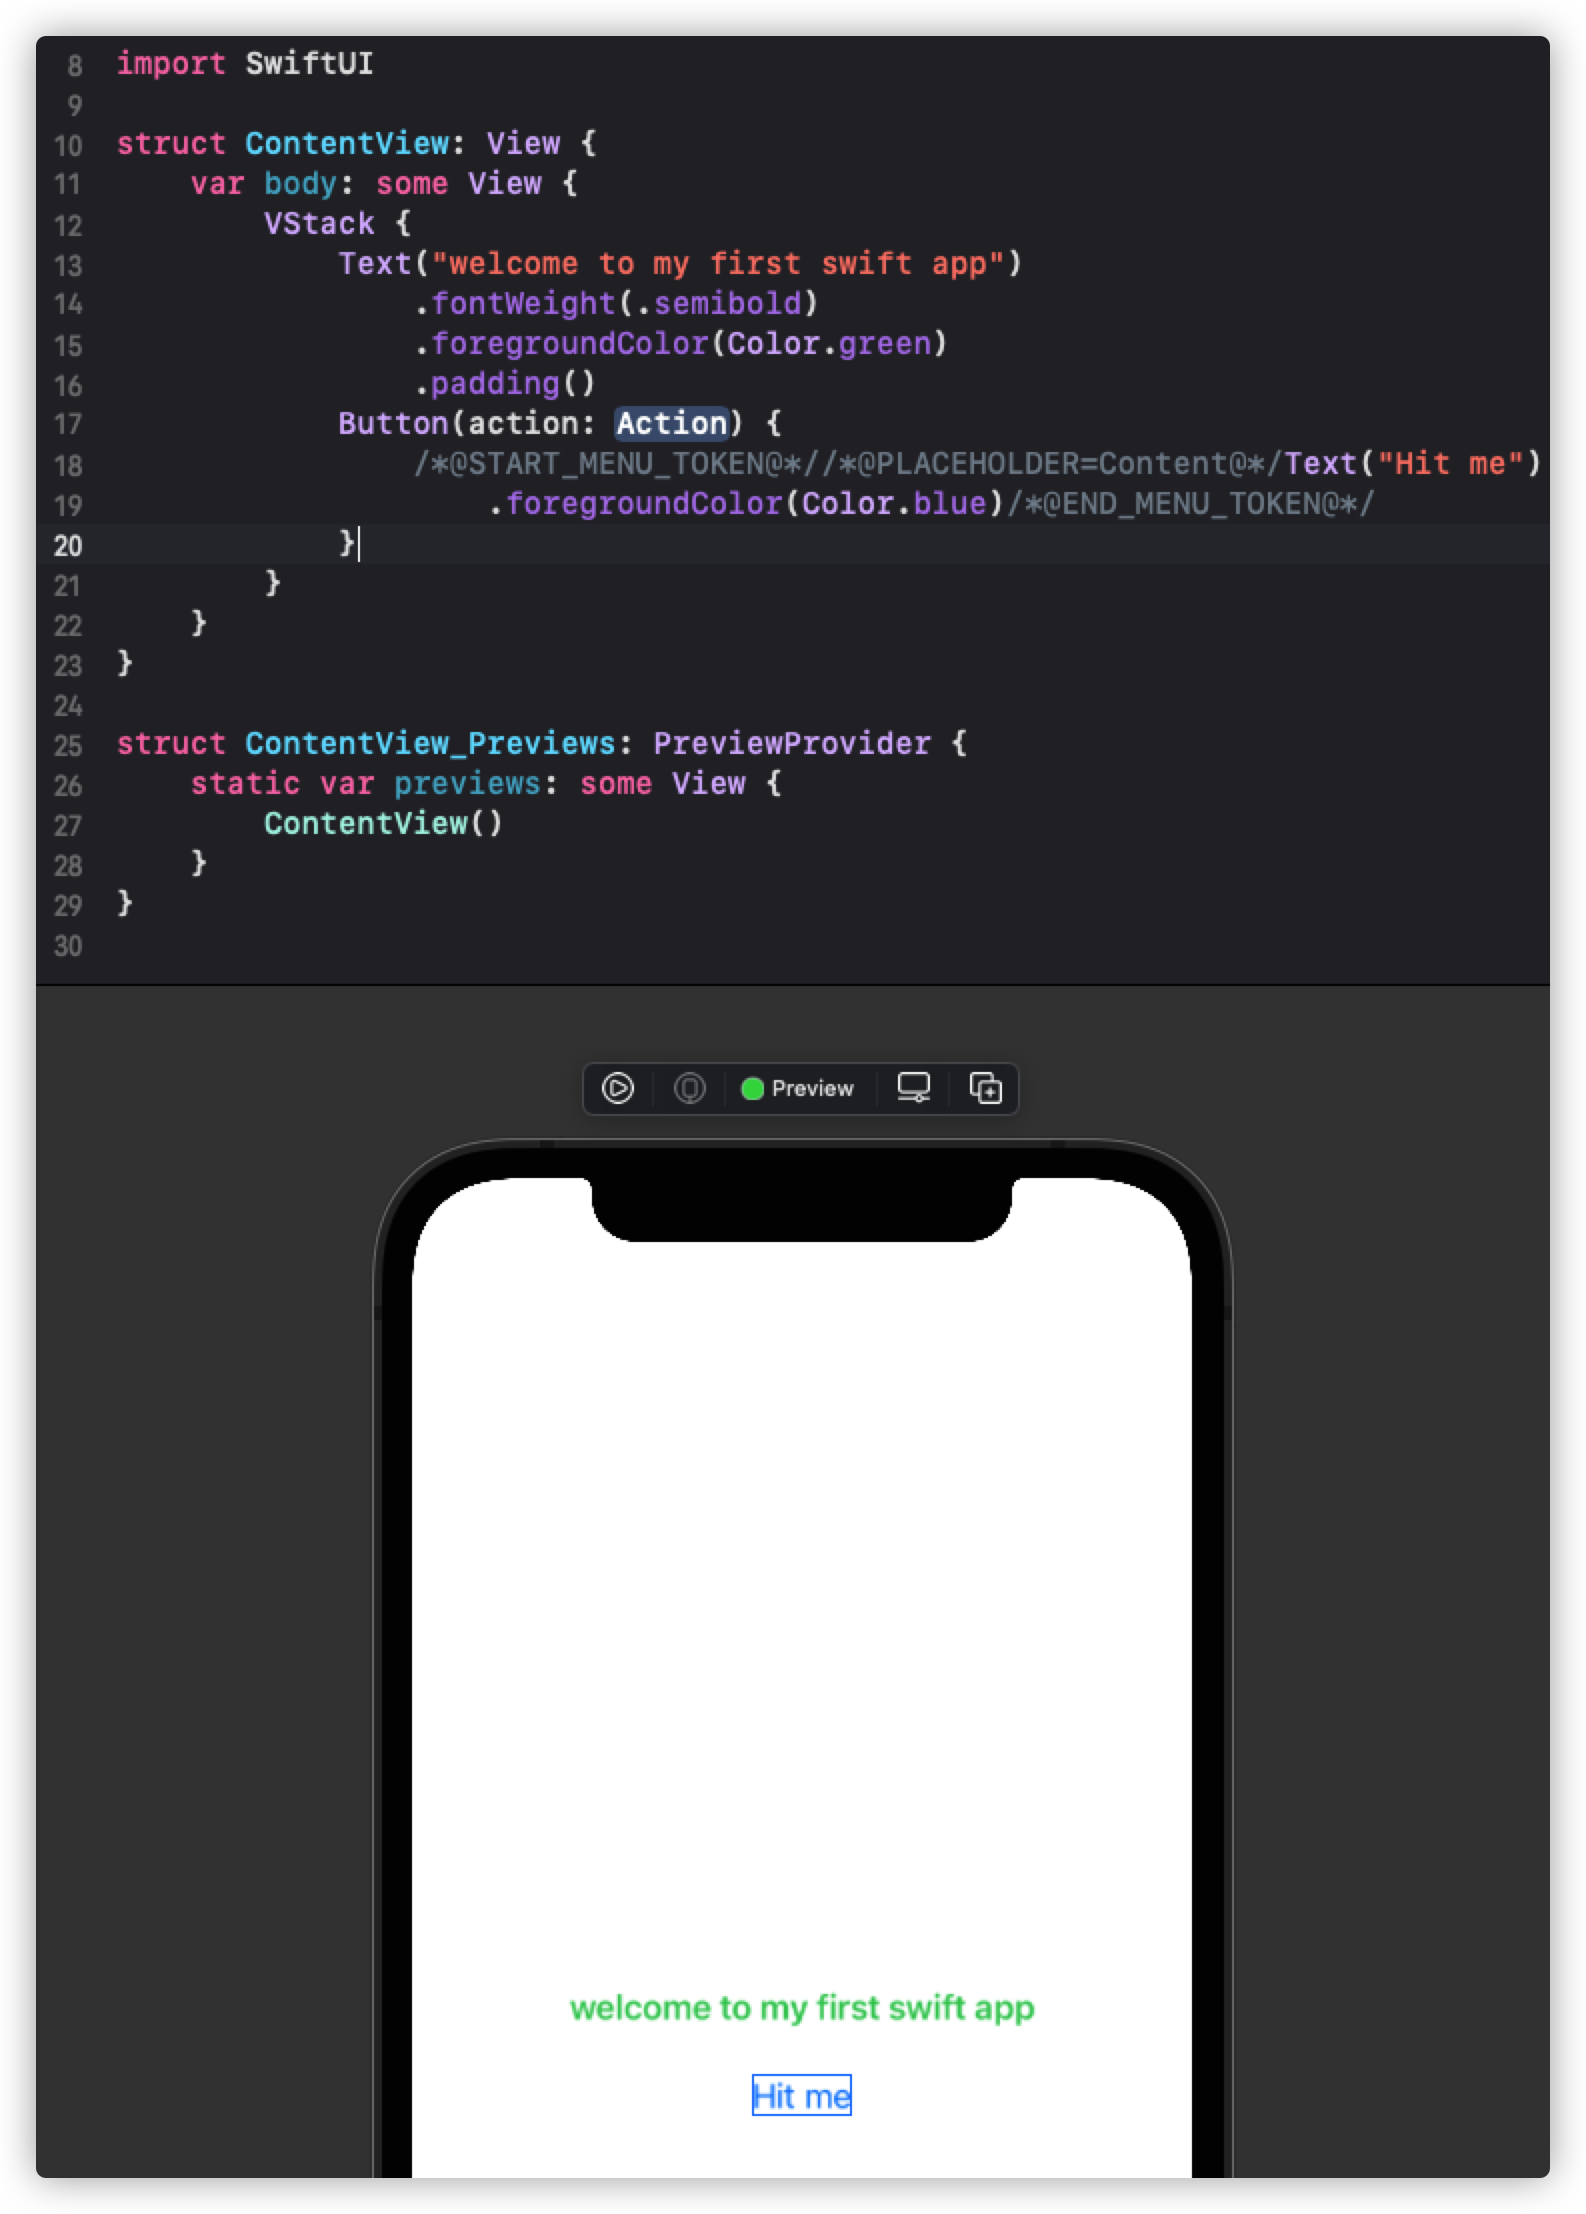
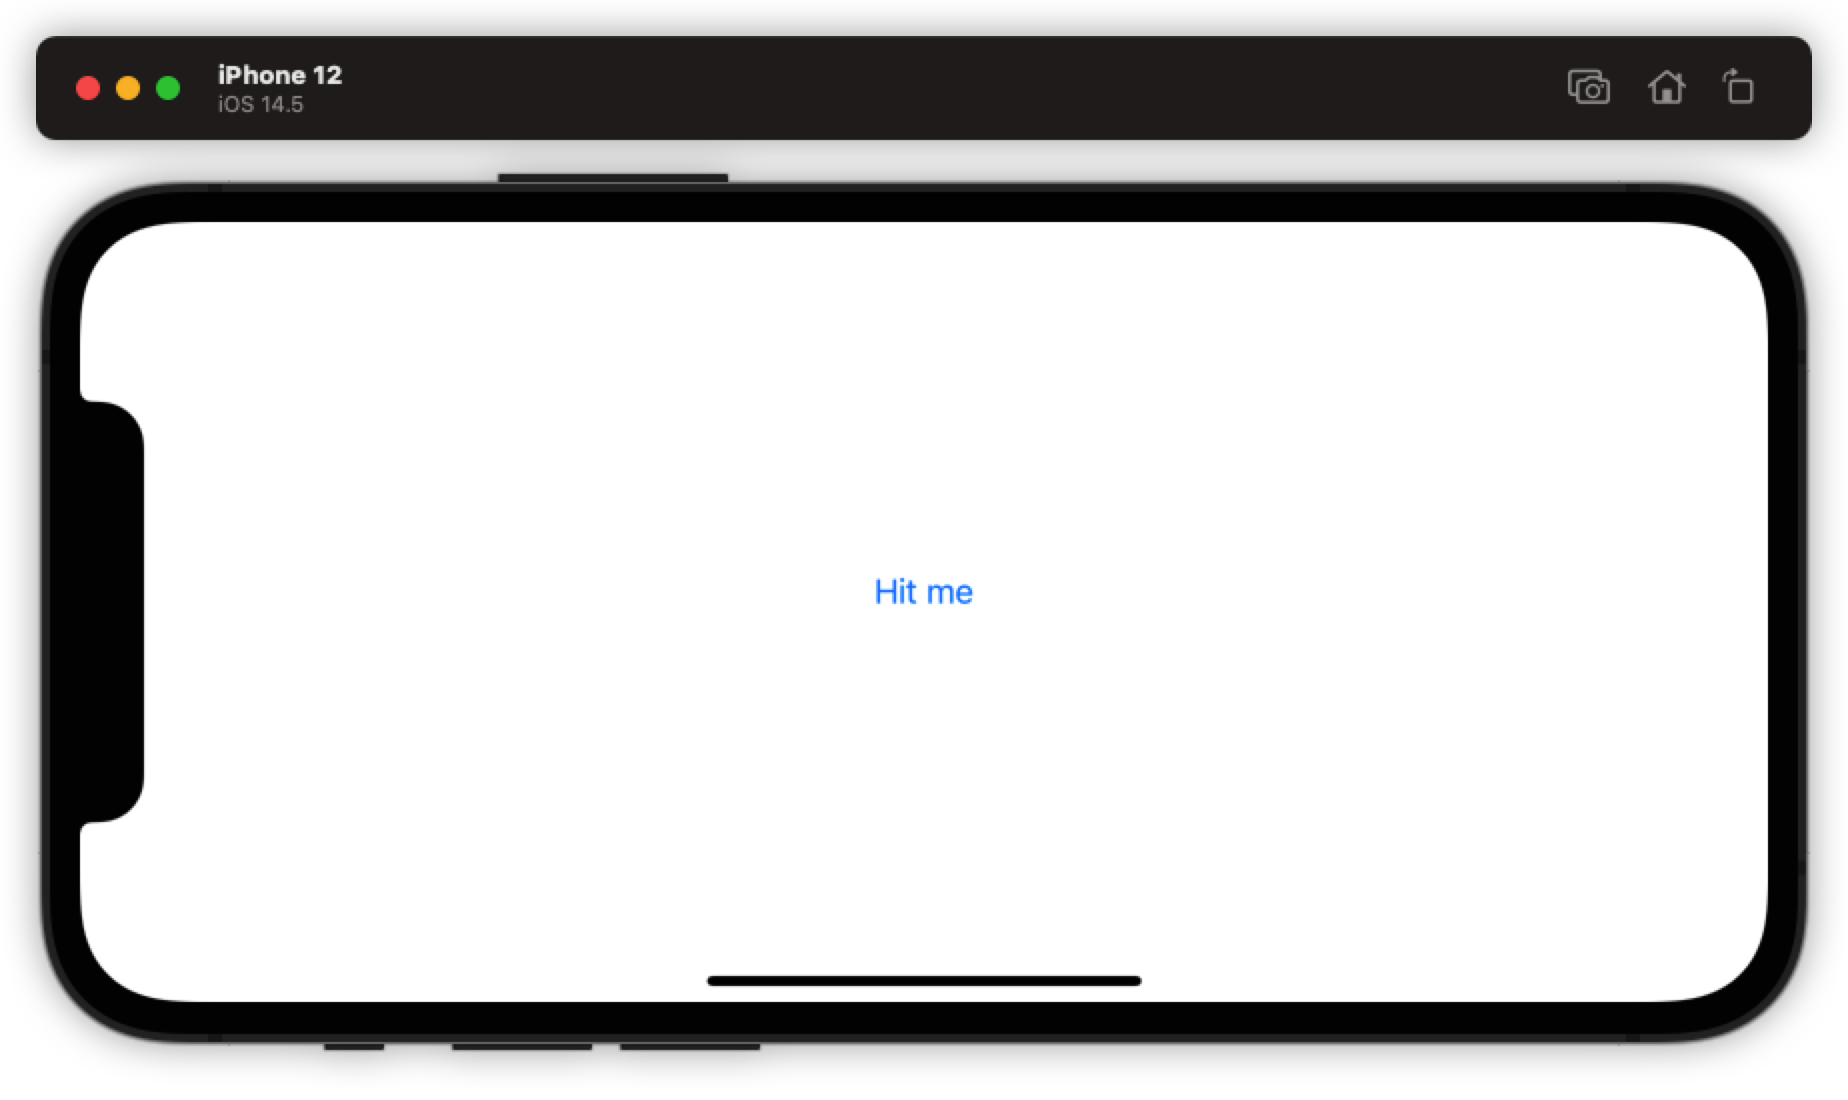
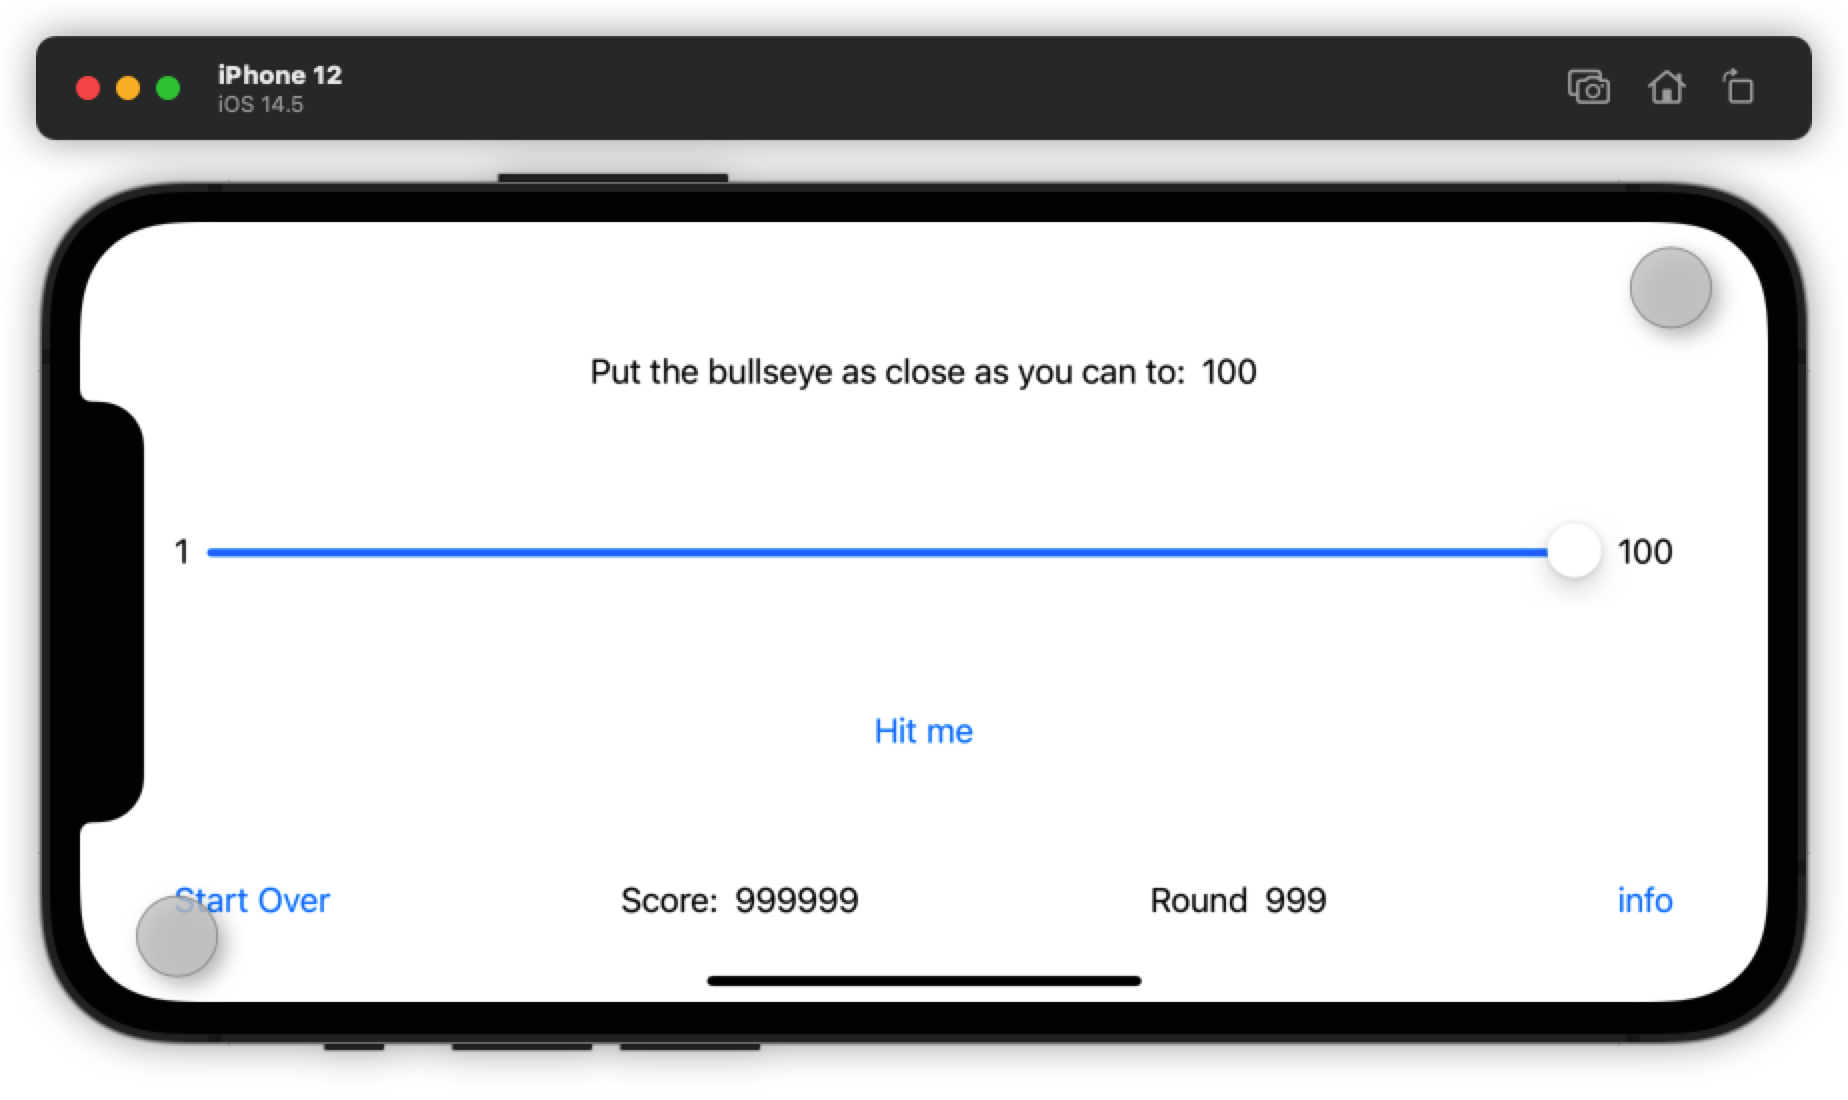
首先,进入 xcode,我们可以在右上角选择预览的机型,这里我选择了iphone12,然后点击run就可以在一个虚拟的iphone中跑app了,如下图所示:
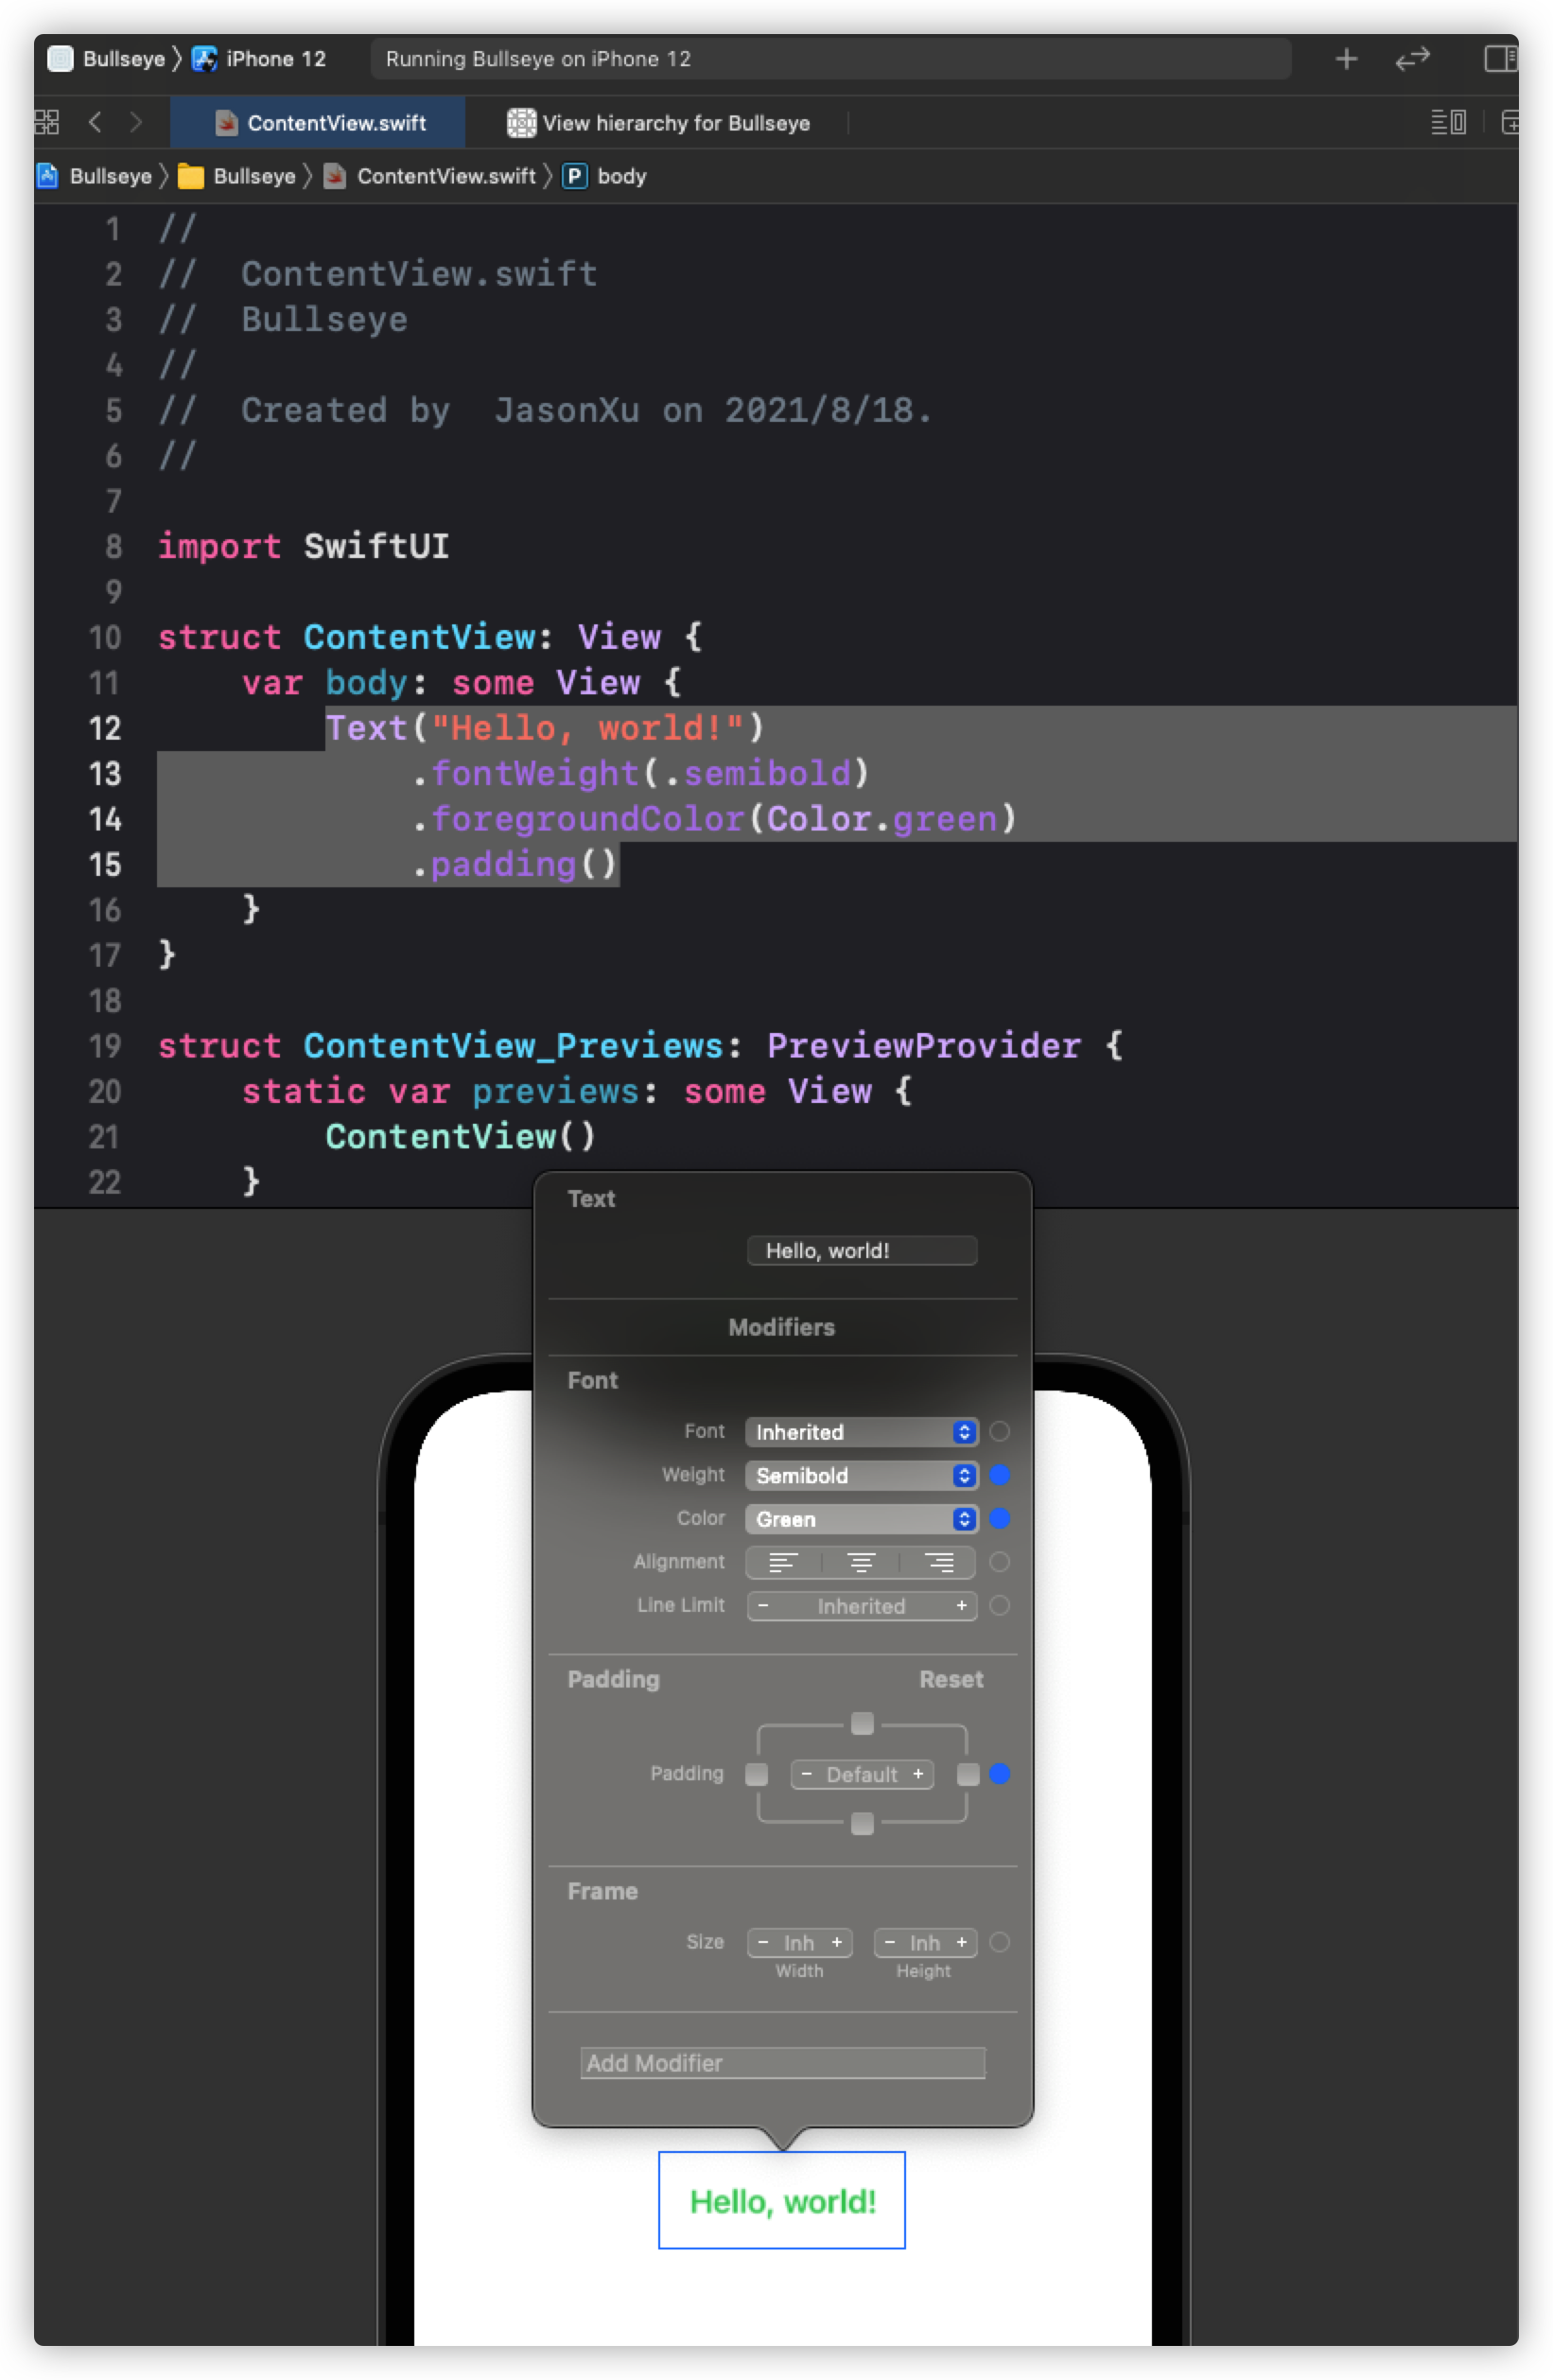
在代码的编写过程中,我们同时可以预览代码的效果,甚至可以直接在预览中对元素进行调整,xcode会自动进行相应的代码修改:用command+鼠标点击就能对这个中间的文字元素进行各方面的修改。我将字体设为绿色,半粗,发现xcode已经修改好了代码。
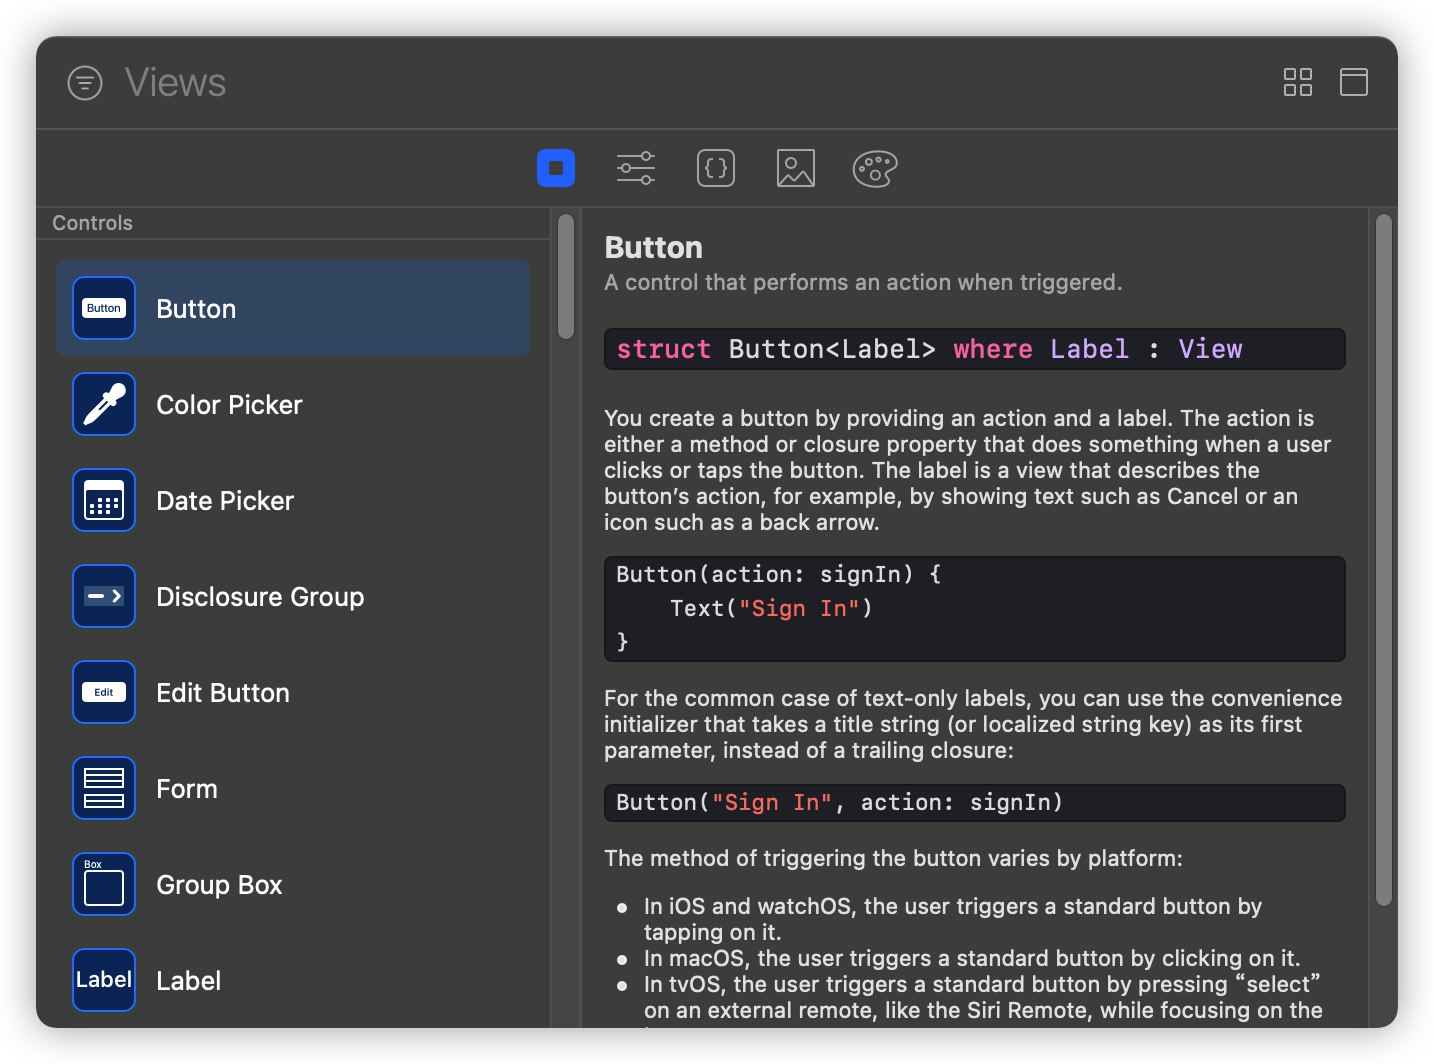
此外,我们还可以通过右上角的+来给我们的程序添加其他元素组件。直接拖入到我们想要的位置即可。如下:
我在文字下面添加了一个按钮,并修改了按钮和文字的内容。结果如下:
Objects, Data, and Methods
在swift中,构成app的基本要素也是对象。有些对象是iOS提供给我们的(button之类的),有些则需要我们自己去写。在上面展示的手机页面中,一共有三个对象—— Text Object、Button Object 和 ContentView Object(可理解为画布)。对象可以调用不同方法(用.)
现在我们来分析一下这段代码:
1 | struct ContentView: View { |
首先,ContentView 申明了一个变量属性body 。body相当于一个容器,将屏幕中的data都包含在内。在body后面写着some View,这其实是告诉 ContentView在body中要呈现的东西是一些view。
在body中首先是一个 VStack, 其作用就是垂直地把对象堆叠起来的一个栈。在这个栈中有两个对象,分别是 Text和 Button。然后,Text调用了三个方法:fontWeight、foregroundColor(Color.green)、padding() ;同理,在Button中设置了一个 Text属性,并调用了foregroundColor .
Buttons and Actions
细心地我们可能已经发现了,Button虽然已经放在页面上了,但在点击后没有为其编写事件。所以现在我们来做这个事。比如说我希望再点击后打印”Button pressed”, 在模拟手机中点击后,于Xcode中的All Output界面就会显示打印结果
1 | Button(action: { |
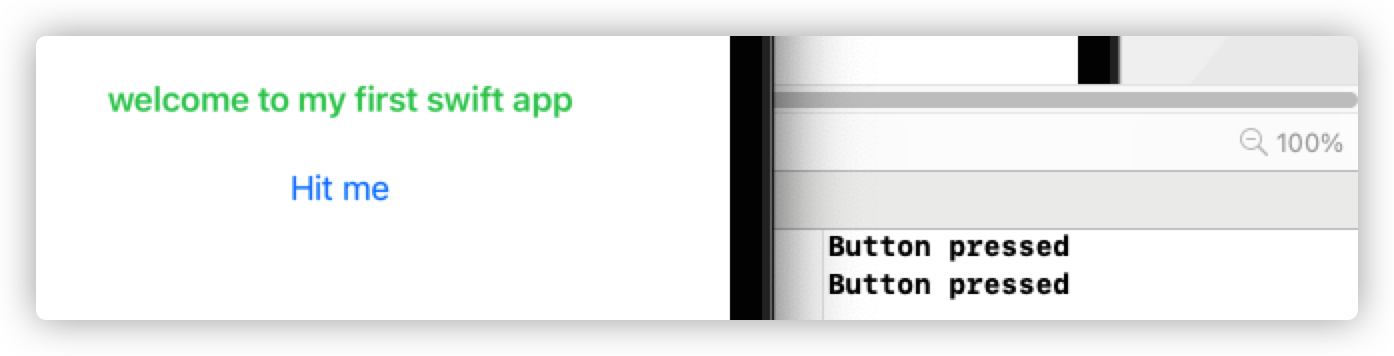
print()是一个很好的debug工具。
SwiftUI State
现在我们来介绍一个很重要的概念: State
我们用汽车仪表盘来举例。一辆汽车中有很多数据,数值类的有:时速、油量、里程数,布尔值有:是否低油量、是否需要保养等。这些数据构成了车的 State.
那么,当司机开始踩油门时,时速会发生变化 ;车内部这时候在燃油,因此油量也会发生变化。那么如果dashbord没有更新这些数据,则会引发很严重的事故。这就是我们需要及时更新state的原因。
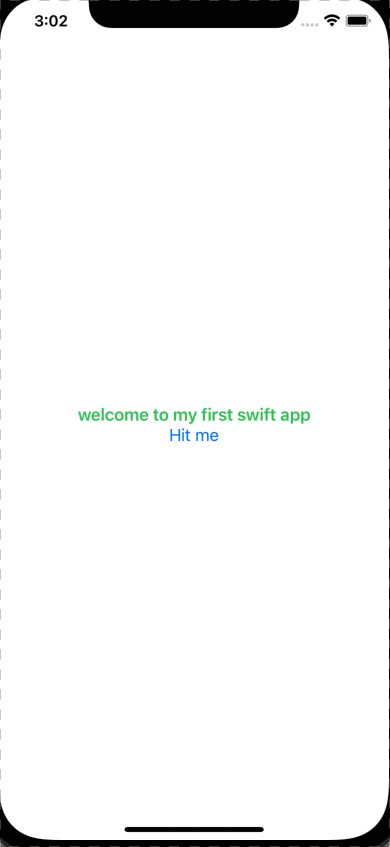
那么采用及时更新的策略,可以实现什么功能呢?比如说:点击按钮后会出现弹窗(pop-up),或者是点击后整个页面发生了一些变化之类的。如下:
实现代码如下:
1 | @State var alertIsVisible : Bool = false |
现在我来解释一下代码:
首先,我们用@State修饰了一个变量 alertIsVisible 并将其置为false。
然后 ,当我点击button的时,会出发一个效果:将alertIsVisible置为True.
因为这个变量是 @state修饰的,因此会重新刷新view。
此时便落入到.alert 判定中,由于alertIsVisible = True,触发了弹窗。这个弹窗由三部分组成:title,message和dismisButton。观察gif可以很清楚的找到对应。
总结:
当 State 更新的时候,view将重新校验UI,并且更新自身。也就是说,我们只要改变了 view 里面被关键词
@State修饰的属性,整个 view 的 body 就会被重新渲染。
Challenge
要求:现在我们要设计一个名为:”Knock Knock“ 的按钮。然后点击后会显示 ”Who’s Here?“。
1 | struct ContentView: View { |
Conclusion
- 我们学会了用canvas来写swift语言
- 我们学会了如何写一个button
- 我们学会了
@State的作用
Creating User Interfaces with SwiftUI
现在我们要写用户界面了。我们列出了我们的To-Do List
- Add the “Hit Me” button
- Show a popup when the user taps it
- Put game info on screen
- Put slider on screen :1->100
- Read value of the slider
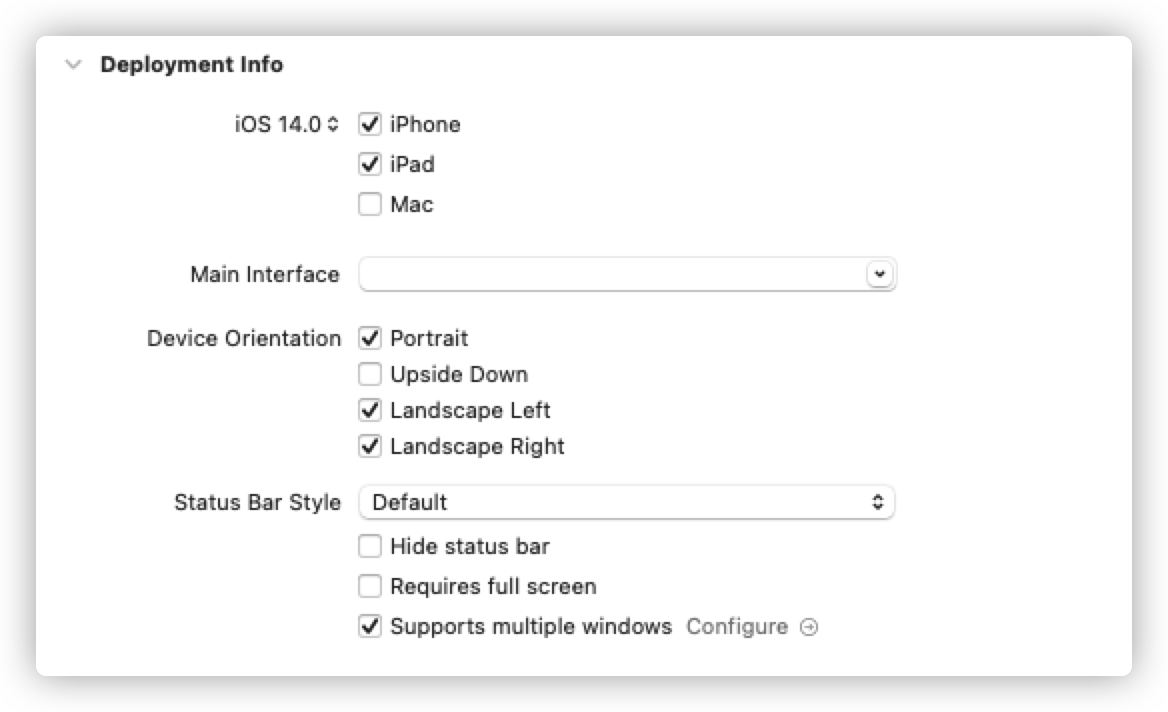
Portrait vs. Landscape
Portrait和landscape分别对应着iphone的竖屏和横屏模式。
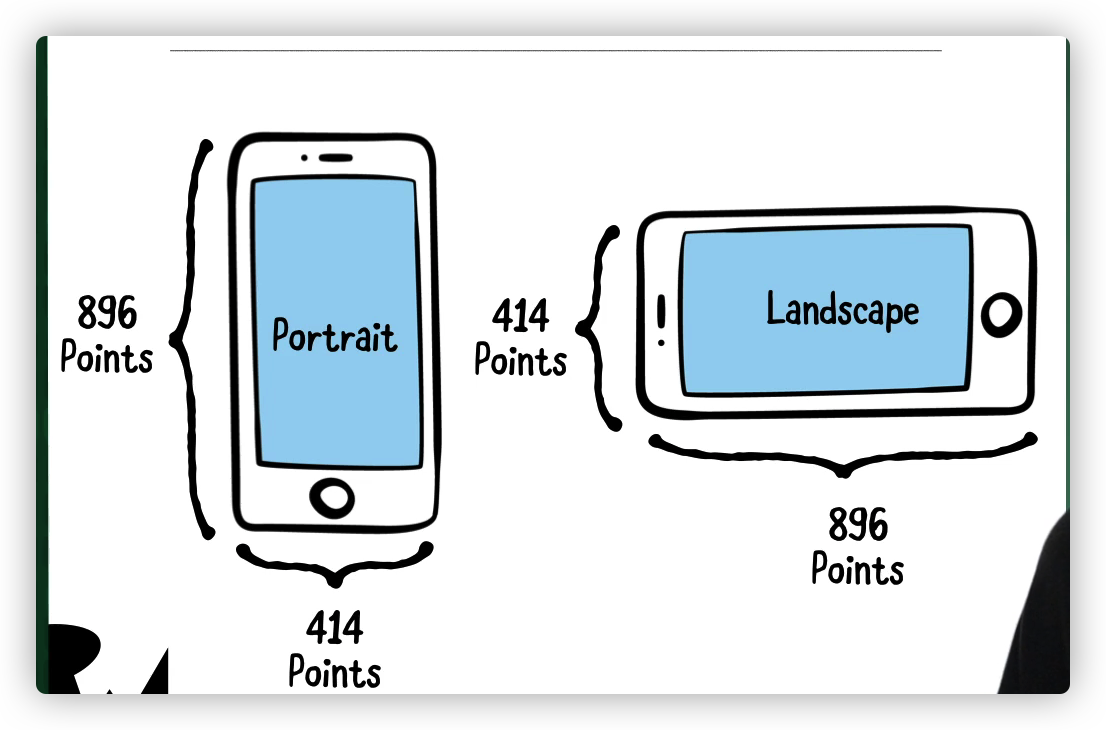
在不同的手机代数上,每一个点所拥有的像素数也是不一样的。随着苹果手机的屏幕不断升级,像素也会越来越高。
直接点击左上角Bullseye项目 ,在 Deployment Info中选择是否要竖屏模式。因为我们这个游戏是横屏的,所以我们直接取消勾选Portrait即可
然后再模拟器右上角可以转变手机的方向:
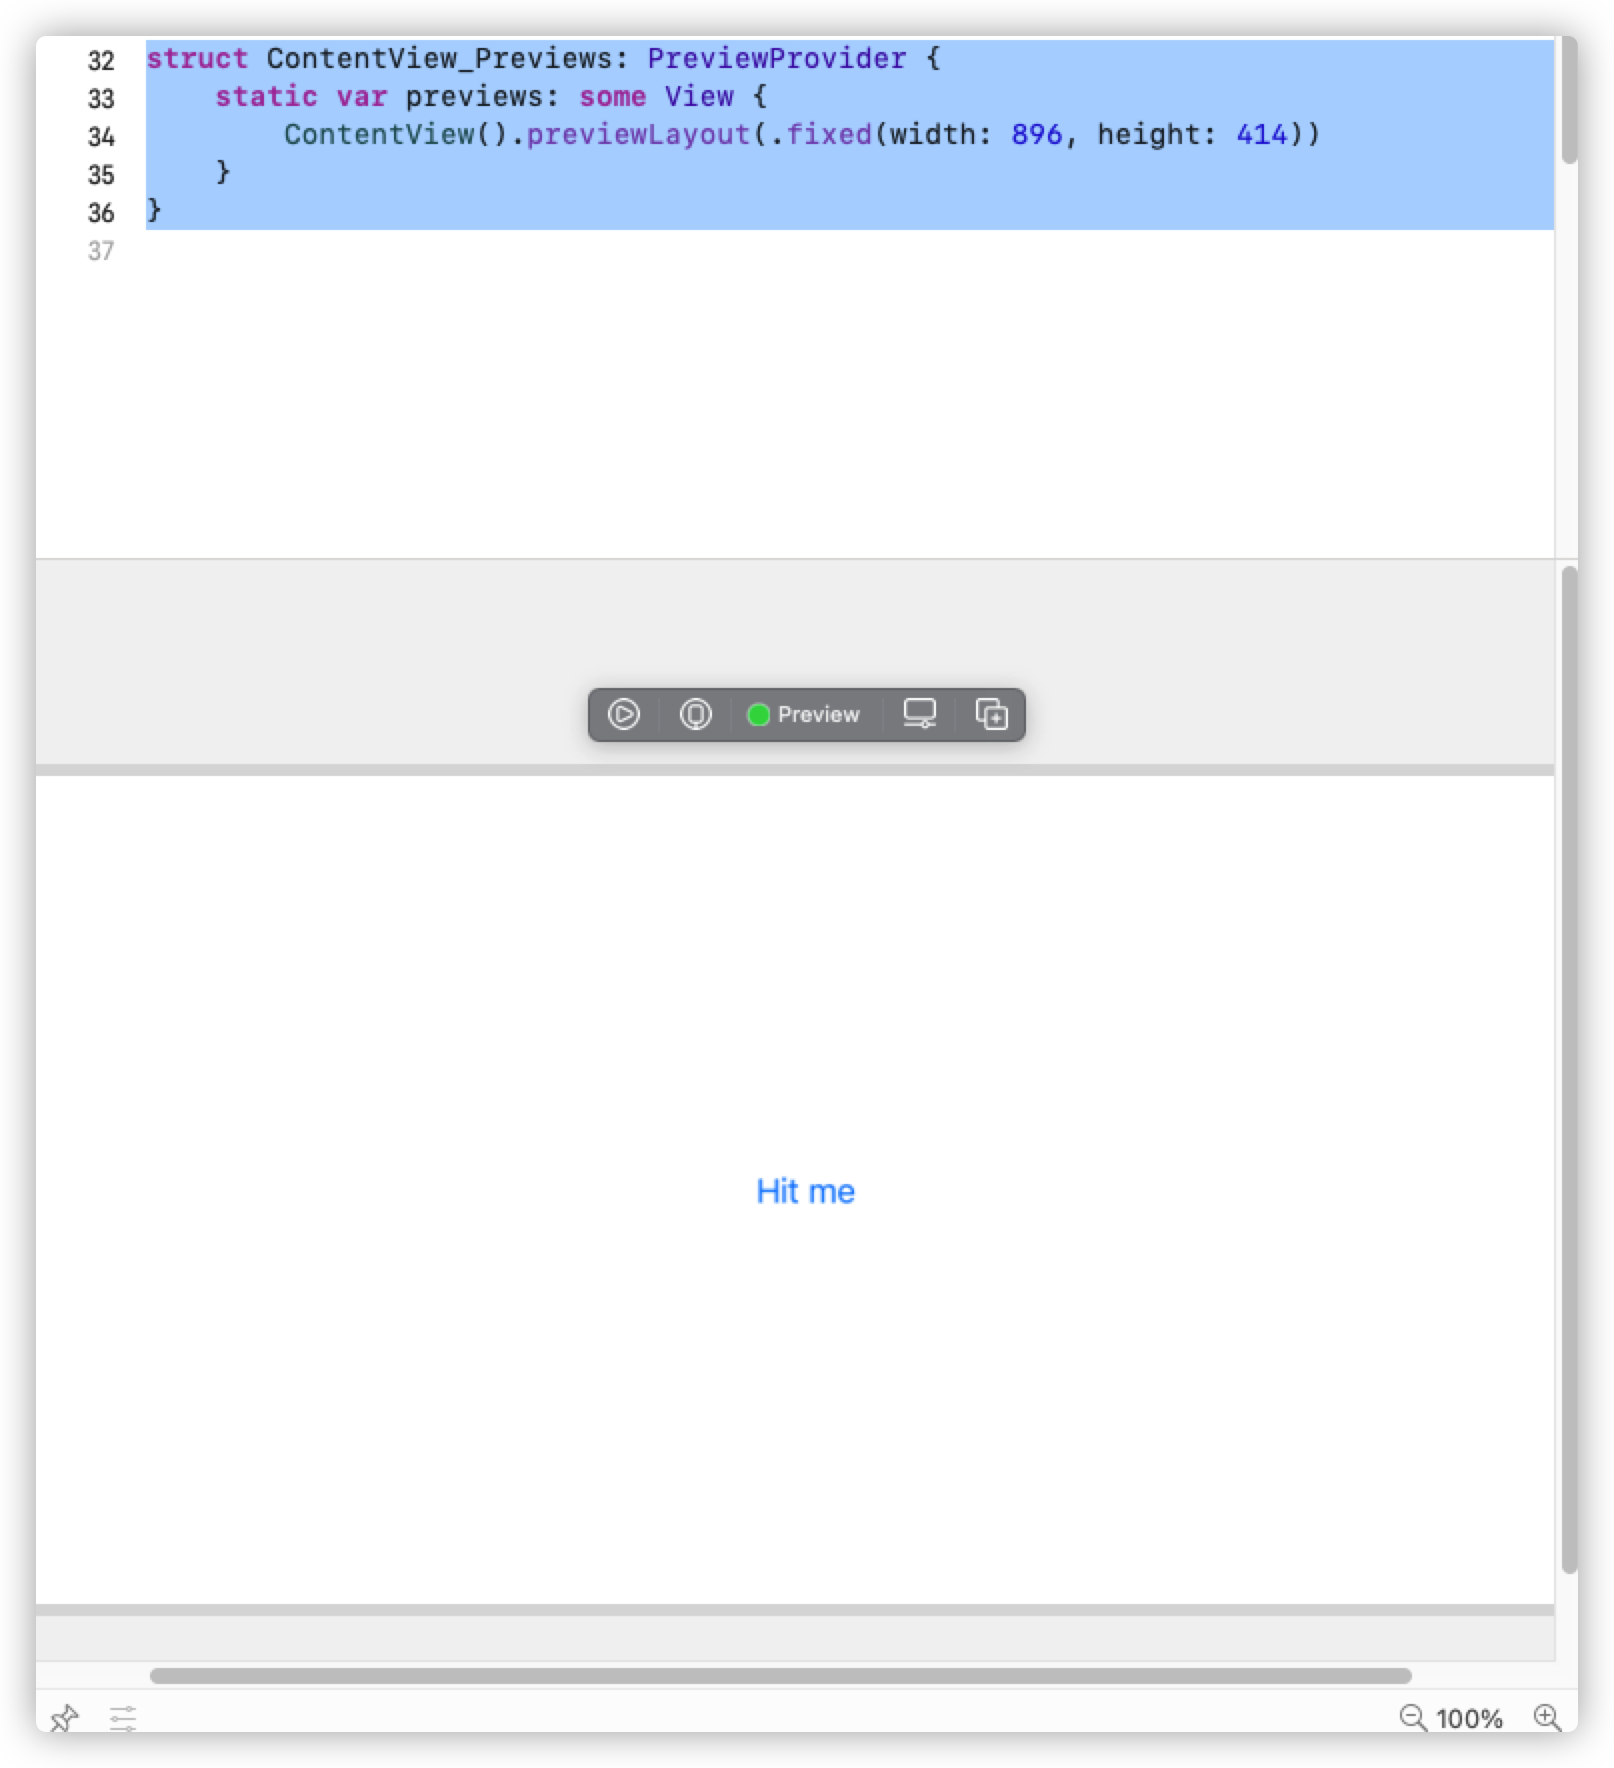
但是在preview界面我们仍然保持着竖屏,这是我因为因为preview使用的是另外一套逻辑,我们可以这样修改:
1 | struct ContentView_Previews: PreviewProvider { |
如下所示
SwiftUI Views
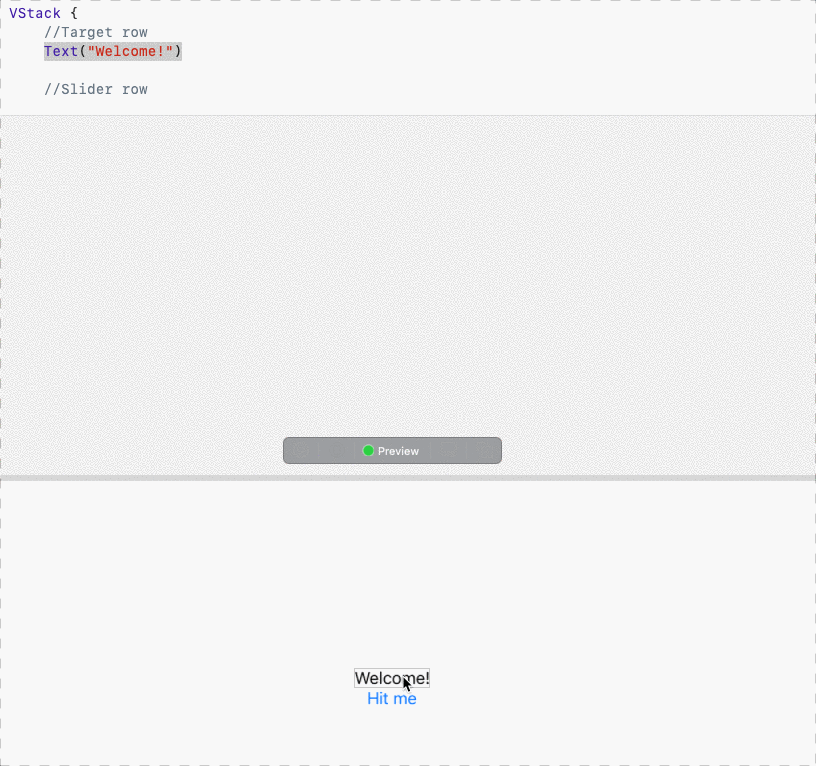
现在我们要来写出Bullseye的基本页面元素:
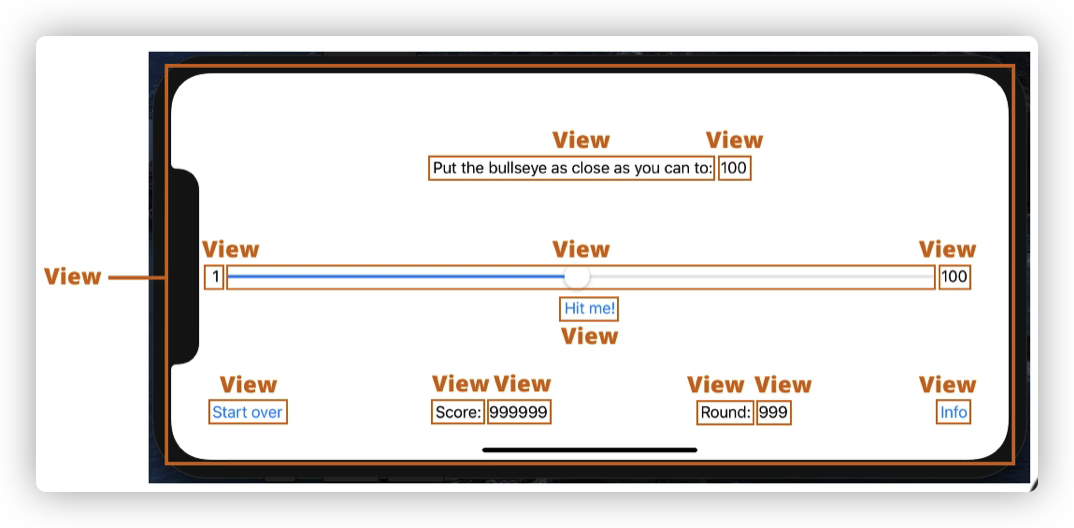
这些框出来的都是 Views
我们现在已经接触到了一些Views: 比如 Text,Button 以及VStack。但是我们发现上面的元素并不是都是垂直分布的,有些是水平分布的,因此除了Vstack还需要HSTack
这个结构就是我们在 Vstack中一共要放下四行,每行又是一个HStack。如下:
1 | VStack { |
SwiftUI Layout
Target row
我们可以在preview界面,将一个单独的Text元素嵌入到一个HStack当中,如下:
接下来,我们可以拖动一个新的Text对象放到Text旁边,注意不要放到整个Vstack的旁边
然后对内容进行修改即可:
1 | VStack { |
Slider row
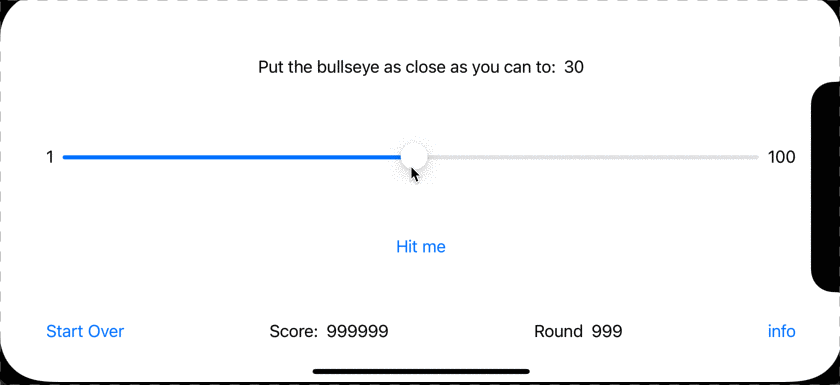
现在我们来制作拖动条这一行。首先在拖动条左右各有刻度1,100,我们需要做的就是在中间加一个拖动条。其实也很简单,只要到对象库中把slider拖到Text中间即可:
1 | HStack{ |
但是现在这样我们是无法拖动的。 我们过一会来解决这个问题
Score row
1 | HStack{ |
这样算是写好了(Button row)之前已经写好了。但这和我们预想的界面还是有差,所以我们接下来要调整间隙。
Spacers and Padding
填入间隙也很简单——因为有个object就叫Spacer,拖进去即可:
1 | VStack { |
swift()会根据spacer()的大小来自动调整间距。如果觉得离边框太近,还可以使用.padding()这里用来调整score row距离底部的位置,大小为20个点位
除了.bottom之外还有:
1 | .top |
字面意思,应该不难理解。
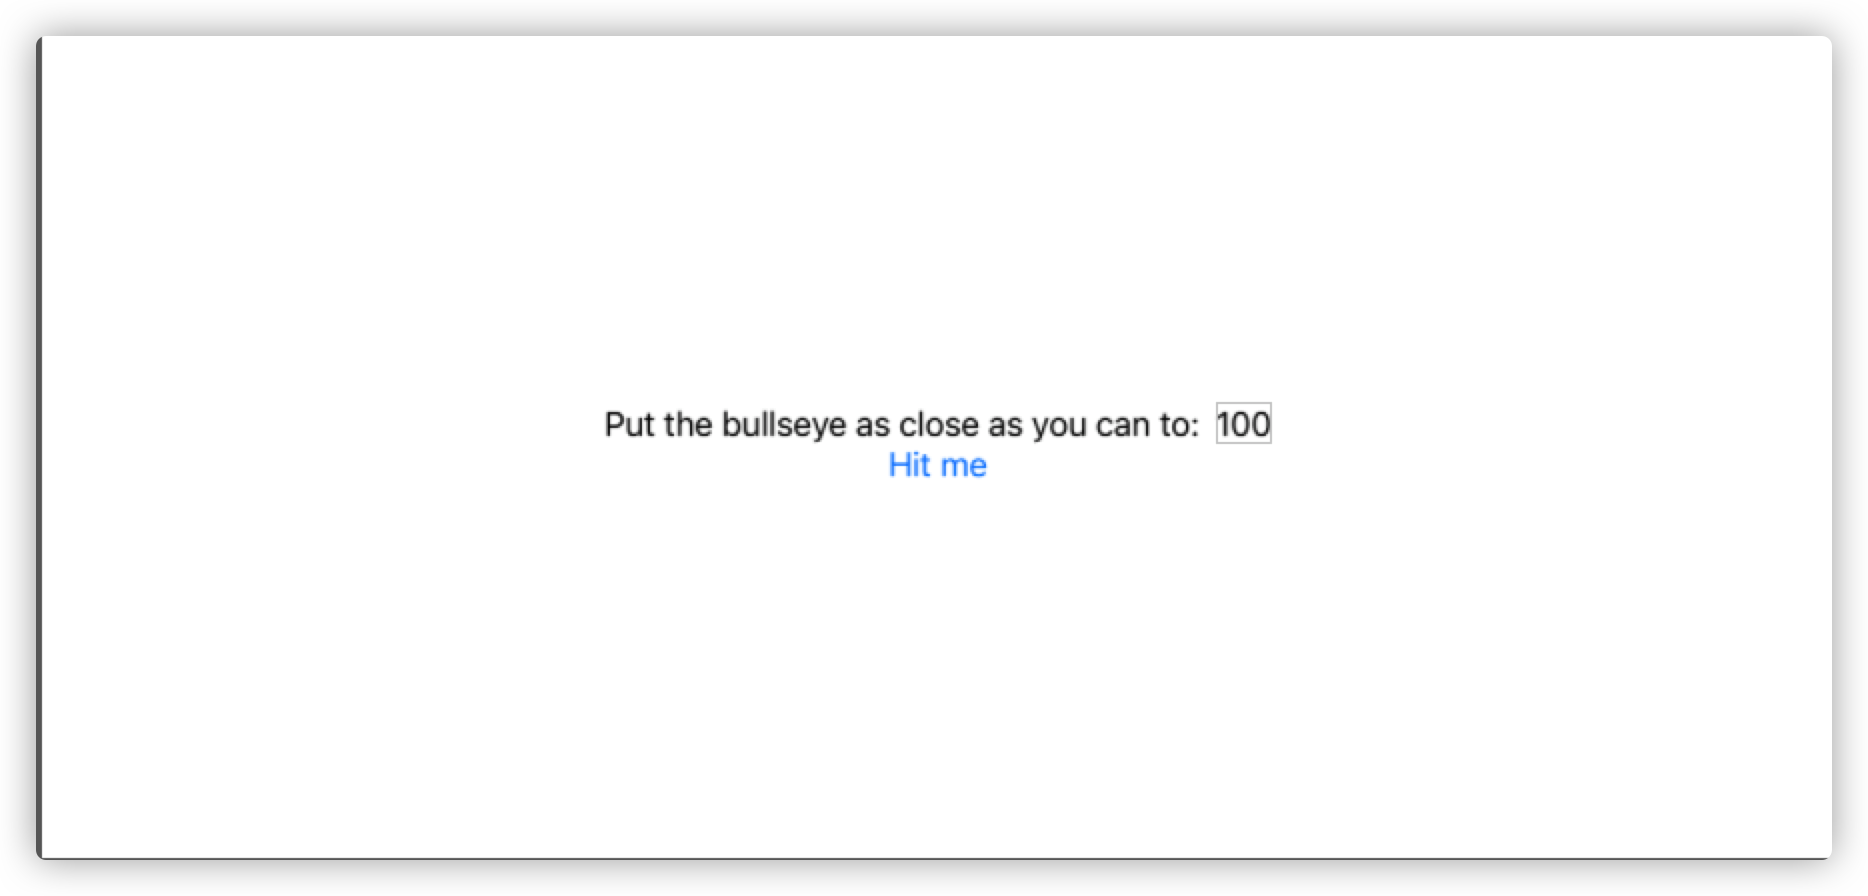
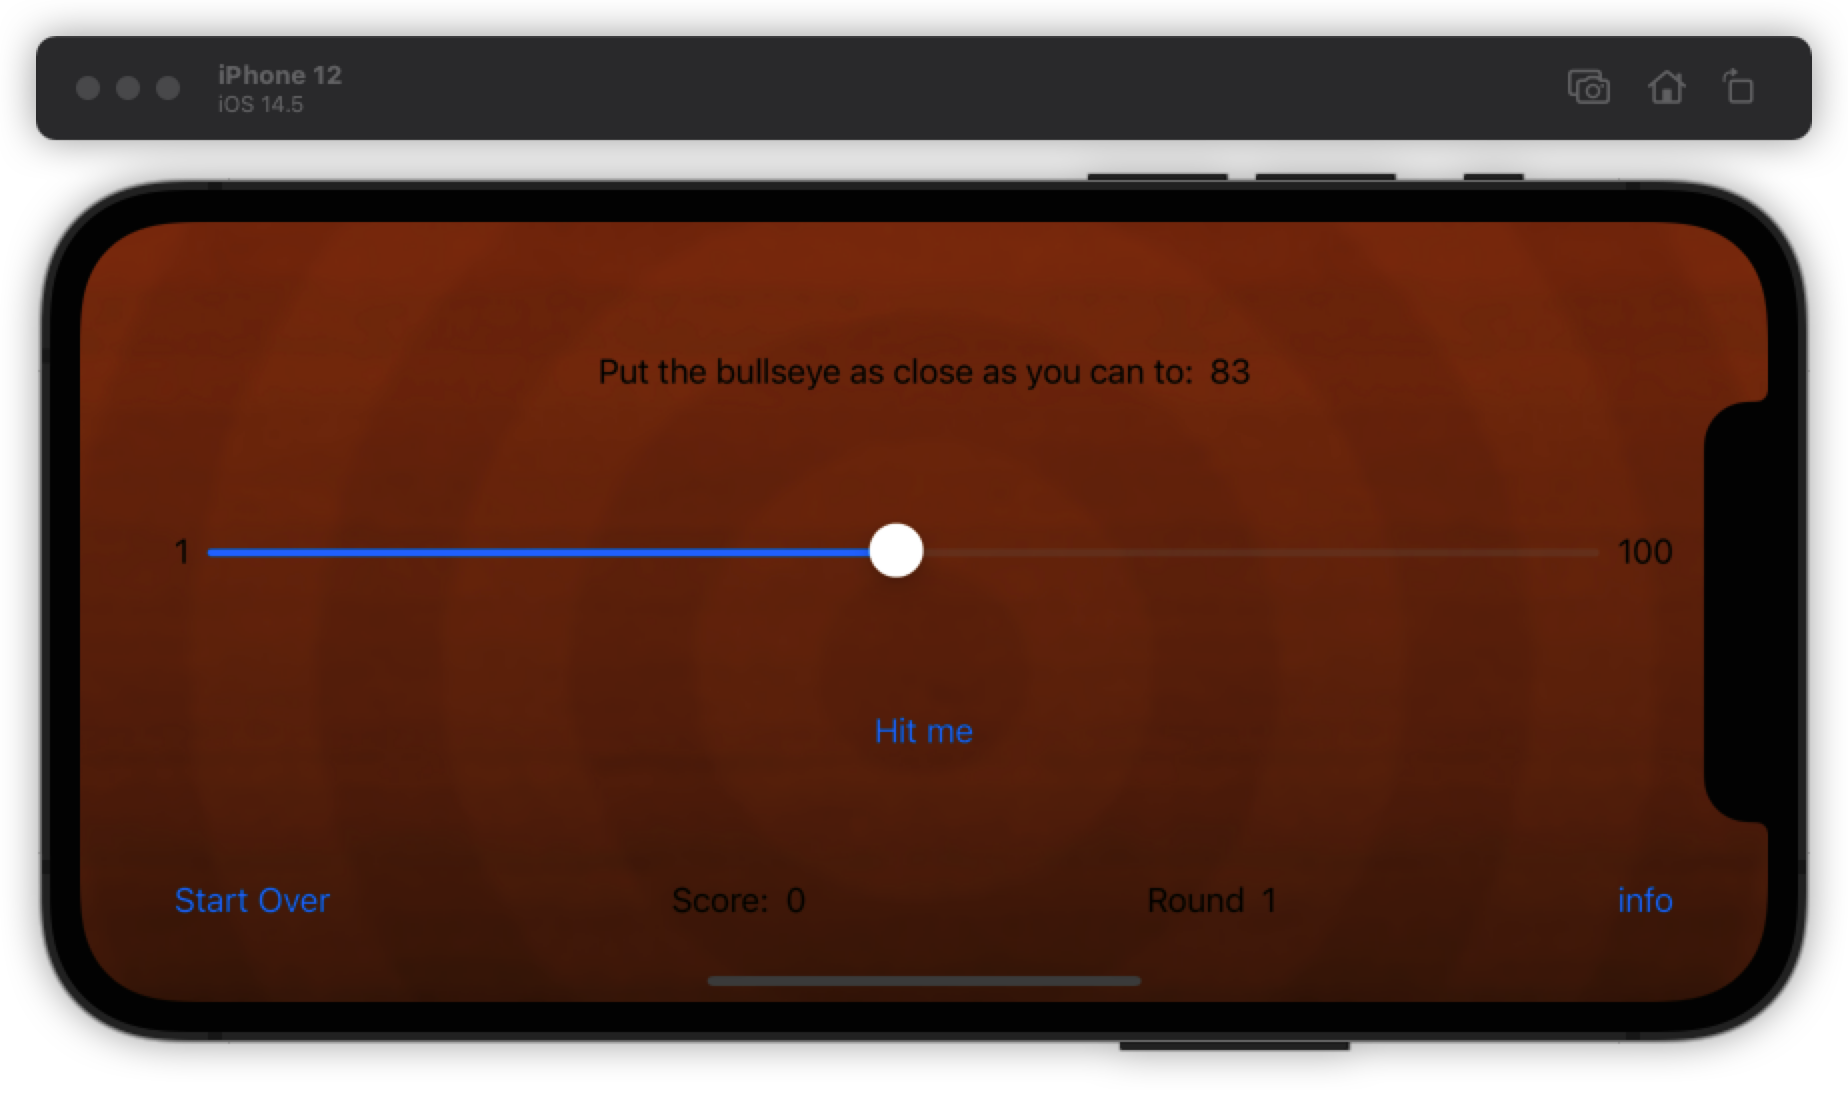
整体效果如下
Bindings
之前我们埋下了一个雷:就是这个滚动条是无法拖动的。那这个问题怎么解决呢?
我们可以使用binding这个小技巧。所谓绑定,就是将一个用@state修饰的变量与用户界面实时绑定,实时更新。在这里我们就可以将slider与一个 state variable绑定在一起。
1 | @State var sliderValue: Double = 50.0 |
value:self.$sliderValue 代表这个slider与sliderValue成功绑定在了一起,拖动slider时会实时更新sliderValue
需要注意的是,当使用Binding时,State变量前面一定要加一个$
in: 1...100 代表从1开始到100
Strings
相信我们对Strings已不再陌生。那么在strings中引用变量该怎么办呢?
1 | "Hello ,\(name)!" |
比如在这个字符串中就引用了name变量,只要在前面加个反斜杠,再用括号将变量括起来就可以了。
现在我们要让我们的app在点击Hit Me之后渲染出滑动条的数值:
1 | Button(action: { |
但是现在显示的是一个小数,接下来我们要用四舍五入的方式来取到一个整数
Variables
在Swift中,这是一个创建变量的基本模板:(@State是可选项)
1 | @State var variableName : Type = InitialValue |
一般变量的命名法是骆驼命名法。
那么如果X是浮点数,我新命名一个y为整数。怎么对x进行强制类型转换呢?
1 | var x : Float = 3.14 |
我们可以在Button中申请一个临时变量用来存放四舍五入后的sliderValue
那有没有能将浮点数四舍五入的函数呢?我们可以command+点击Double查看快速帮助。里面确实有rounded()的用法
1 | Button(action: { |
细心地我们也许会发现,为什么有些时候我们要用self.来引用一个变量,有时候又可以直接用呢?使用self.有三个层次:
- 当我们想在一个闭包中设置
self.property的时候,我们必须使用self.
1 | dispatch_async(dispatch_get_main_queue(), { |
- 当我们想区分
class property和local variable时,我们应该要用self.
1 | class MyClass { |
- 当我们想表明常量/变量是从哪里来的时候,我们可加可不加。
在我们写的Bullseye中,self.的情况基本属于第二种。在Button这个对象中,对sliderValue,alertIsVisible这类变量,使用self可以说明这些变量是属于前实例(content value)的。如果我们这样写:
1 | Button(action: { |
swift也是不会报错的,因为我们定义了两个sliderValue,一个是作用于contentView全局的,一个只是在Button中生效的。我在message中引用的时候,如果写self.sliderValue()那么就是引用Double类型的、作用于全局的sliderValue,但是如果我直接写sliderValue()那么引用的是Int类型的,作用于Button的sliderValue。但这样太搞脑子了,我们还是恢复原来的写法:
1 | .alert(isPresented: $alertIsVisible){()-> |
但是这样我们就不能使用self.roundedValue了,因为我们在全局中并没有定义roundedValue,swift到前实例当中去找的时候是不会发现有这个变量的。
Swift Basics
Introduction
在这部分我们会学习一些Swift的基本语法。这是我们的To-Do List:
- The Swift Standard Library
- Writing Methods
- If/Else Statements
- Variables Vs. Constants
- Type Inference
- Variable Scope
The Swift Standard Library
Xcode中自带了swift文档。对于不懂的语法可以直接按住 Option(⌥) 后点击该词,或者直接搜索也可以。还有一个好办法就是利用alfred中的Dash工作流。比如我想生成一个随机整数,怎么搜呢?
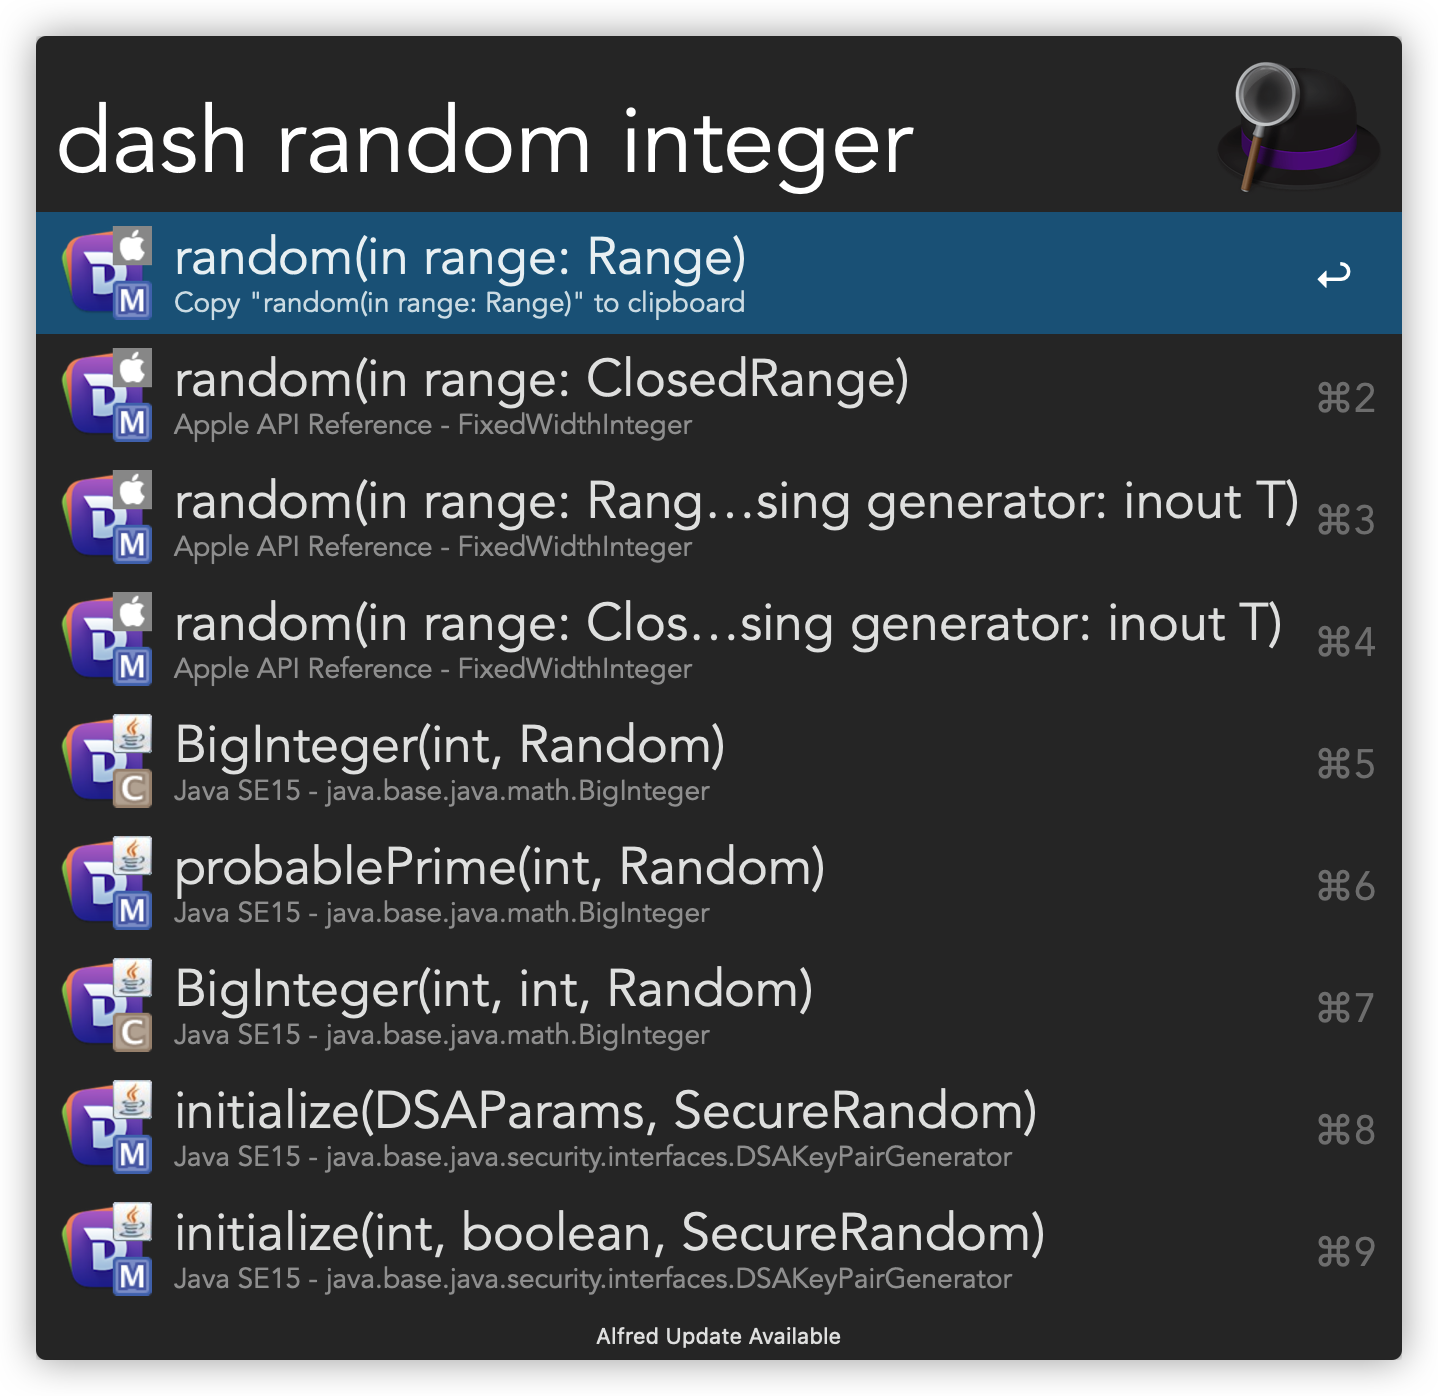
1 | @State var target: Int = Int.random(in: 1...100) |
这样就可以每次都生成一个整数了
Writing Methods
我们写到现在还没有写过函数,那么现在我们就来写我们第一个swift方法
基本格式:
1 | func yourMethodName() -> ReturnType{ |
一般方法写在整个body之后。swift会自动查找全局的方法,所以不用像C语言那样在一开始就声明。
那么怎么调用函数呢?
1 | Button(action: { |
和调用成员变量一样,可以用self.yourMethodName()来调用我们写好的方法。
Challenge- How To Calculate the Difference
现在我们要修改刚才那个pointForCurrentRound()函数,让其返回目标和滑动条之间的差值。
这是我的解决方案:
1 | func pointsForCurrentRound() -> Int { |
如下图所示:
If-Else Statements
之前我们讨了个巧,直接用 abs()来计算差的绝对值。其实最朴素的方法就是用if-else语句来写:
1 | if sth_is_true { |
那么根据这个模板我们可以这样写逻辑:
1 | func pointsForCurrentRound() -> Int { |
也可以这么写:
1 | func pointsForCurrentRound() -> Int { |
Variables and Constants
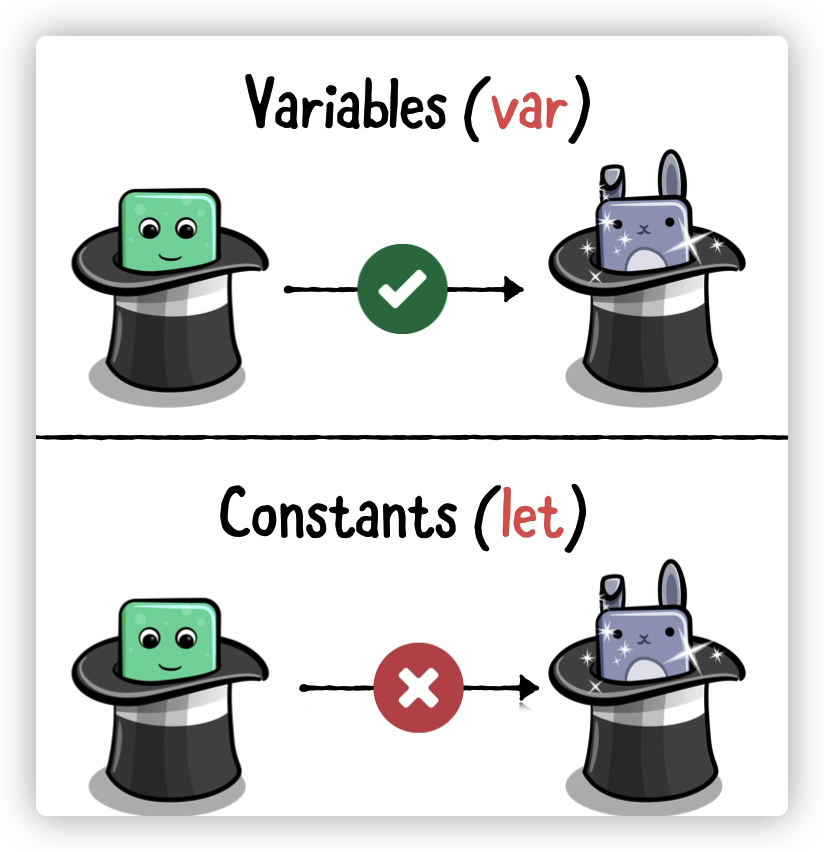
相信我们对常量和变量已经足够了解了。事实上我们之前都是用 var来声明常量和变量的。但Xcode会给我们warning:

事实上,常量一般是不允许改变的,而变量是可以一直改变的。
因此我们要养成好习惯: 用 var来声明变量而用let来声明常量
Type Inference
当我们能确定一个变量(常量)它的数值类型的时候,我们可以直接用等于号赋值:
1 | let sliderValueRounded : Int = Int(self.sliderValue.rounded()) |
Variable Scope
Swift有三种 变量作用域:Global scope, Instance scope, Local scope
- Global scope 就是可以在整个项目中都可以引用
- Instance scope 就是可以在一整个实例中可以使用。比如
target,sliderValue就作用于整个ContentView - Local scope 则是在一个作用于一个method的变量。比如我们上面写的
sliderValueRounded只作用于pointsForCurrentRound()这个方法
Clean Code
无论用什么语言写程序,我们都要遵守一个原则:Dry(Don’t Repeat Your Code)。因此我们可以把重复的代码提取出来成为一个Method
1 | func pointsForCurrentRound() -> Int { |
More Swift Basics
Challenge- Showing the Total Score
现在我们想在底部的 Score row 显示我们游戏的总分。怎么办?
1 | struct ContentView: View { |
Your First Bug
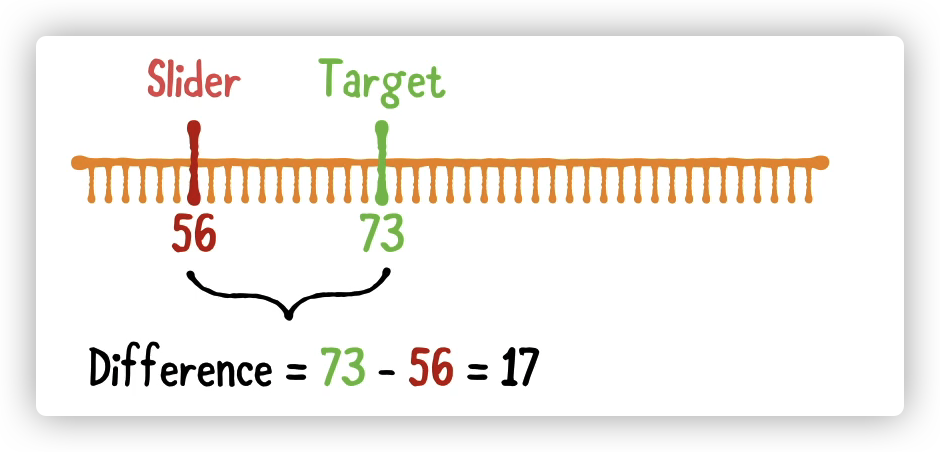
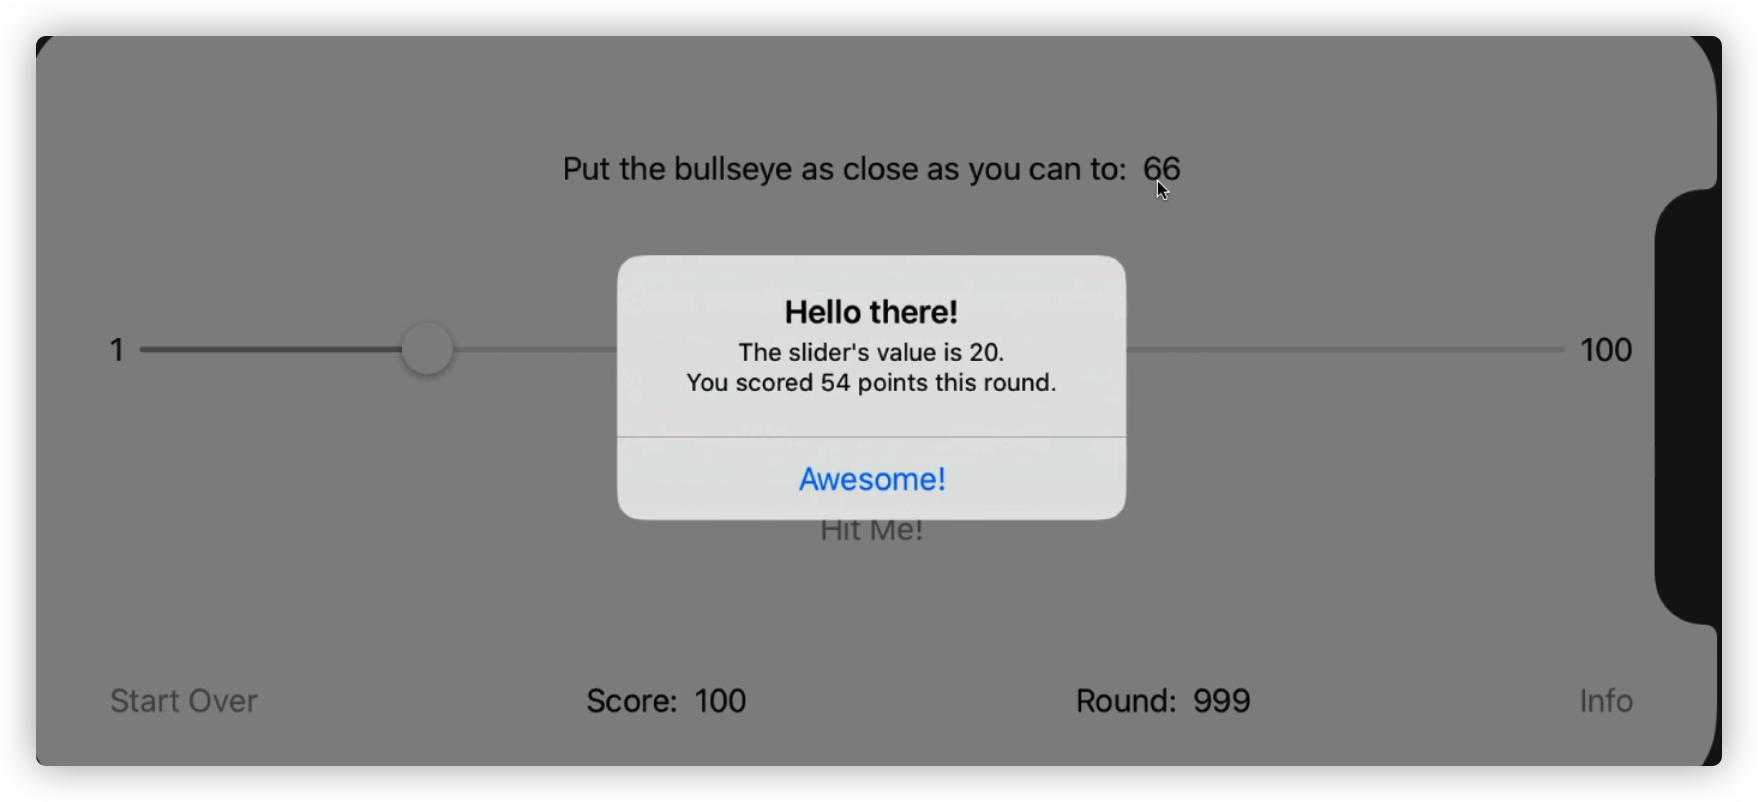
现在我们的游戏出了点小问题,就是说我每次点击后目标数值并不会重新刷新。
最朴素的解决方式就是在点击Hit Me按钮的时候重置target
但是我们要注意,不能在Button的action作用域中写刷新语句。因为计算、呈现都发生在action之后,如果我们在action时就刷新了target,那么计算时就会以新的target为标准。
就如同下图,本来的target是20,但是在我点按钮的时候刷新到了66,那么游戏计算得到的分数就不是100而是$100-|66-20|=54$
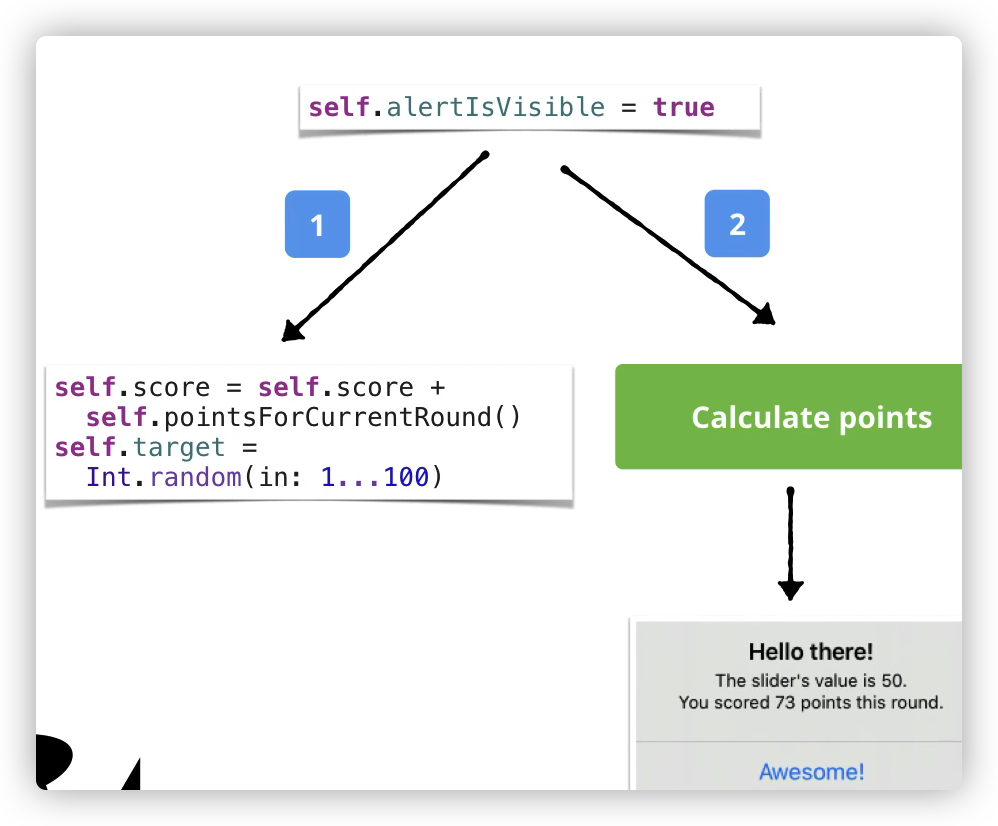
那么怎么解决这个问题呢?我们可以把逻辑设置成当点击 dismiss button时更新分数以及target,因为dismiss button也是按钮,因此swift允许在点击按钮之后再运行一些代码。因此我们可以在.default()之后打一个大括号,括号中写需要执行的代码
如下:
1 | Button(action: { |

Challenge- Tracking Rounds
现在我们还要把轮次写上去。同样的我们要把逻辑加载 Dismiss Button 之后:
Better Alert Title
现在我们要设计一个更好的弹出提示。
比如说当我们刚好击中了target,弹出的文本可以是”Perfect”
,当离target很近的时候,可以是”You almost had it”
一般近的时候,可以是”Not Bad”
最差一档是:”Are you even trying ?”
1 | struct ContentView: View { |
Challenge- Bonus Points
现在我们再加入一个机制。就是当我们完美击中目标时,会获得额外的奖励100分。而离目标仅有1时,会获得额外50分
1 | func pointsForCurrentRound() -> Int { |
Challenge- Starting Over
这个很简单,直接重置Score、Round、sliderValue为初始值即可,同时要刷新一个随机值。我们可以写一个没有返回值的函数来是现这些功能
1 | Button(action: { |

Styling the App
Introduction
到现在为止app的基本框架我们已经搭好了,但是还需要美化一下。因此点击这里 下载需要的图片
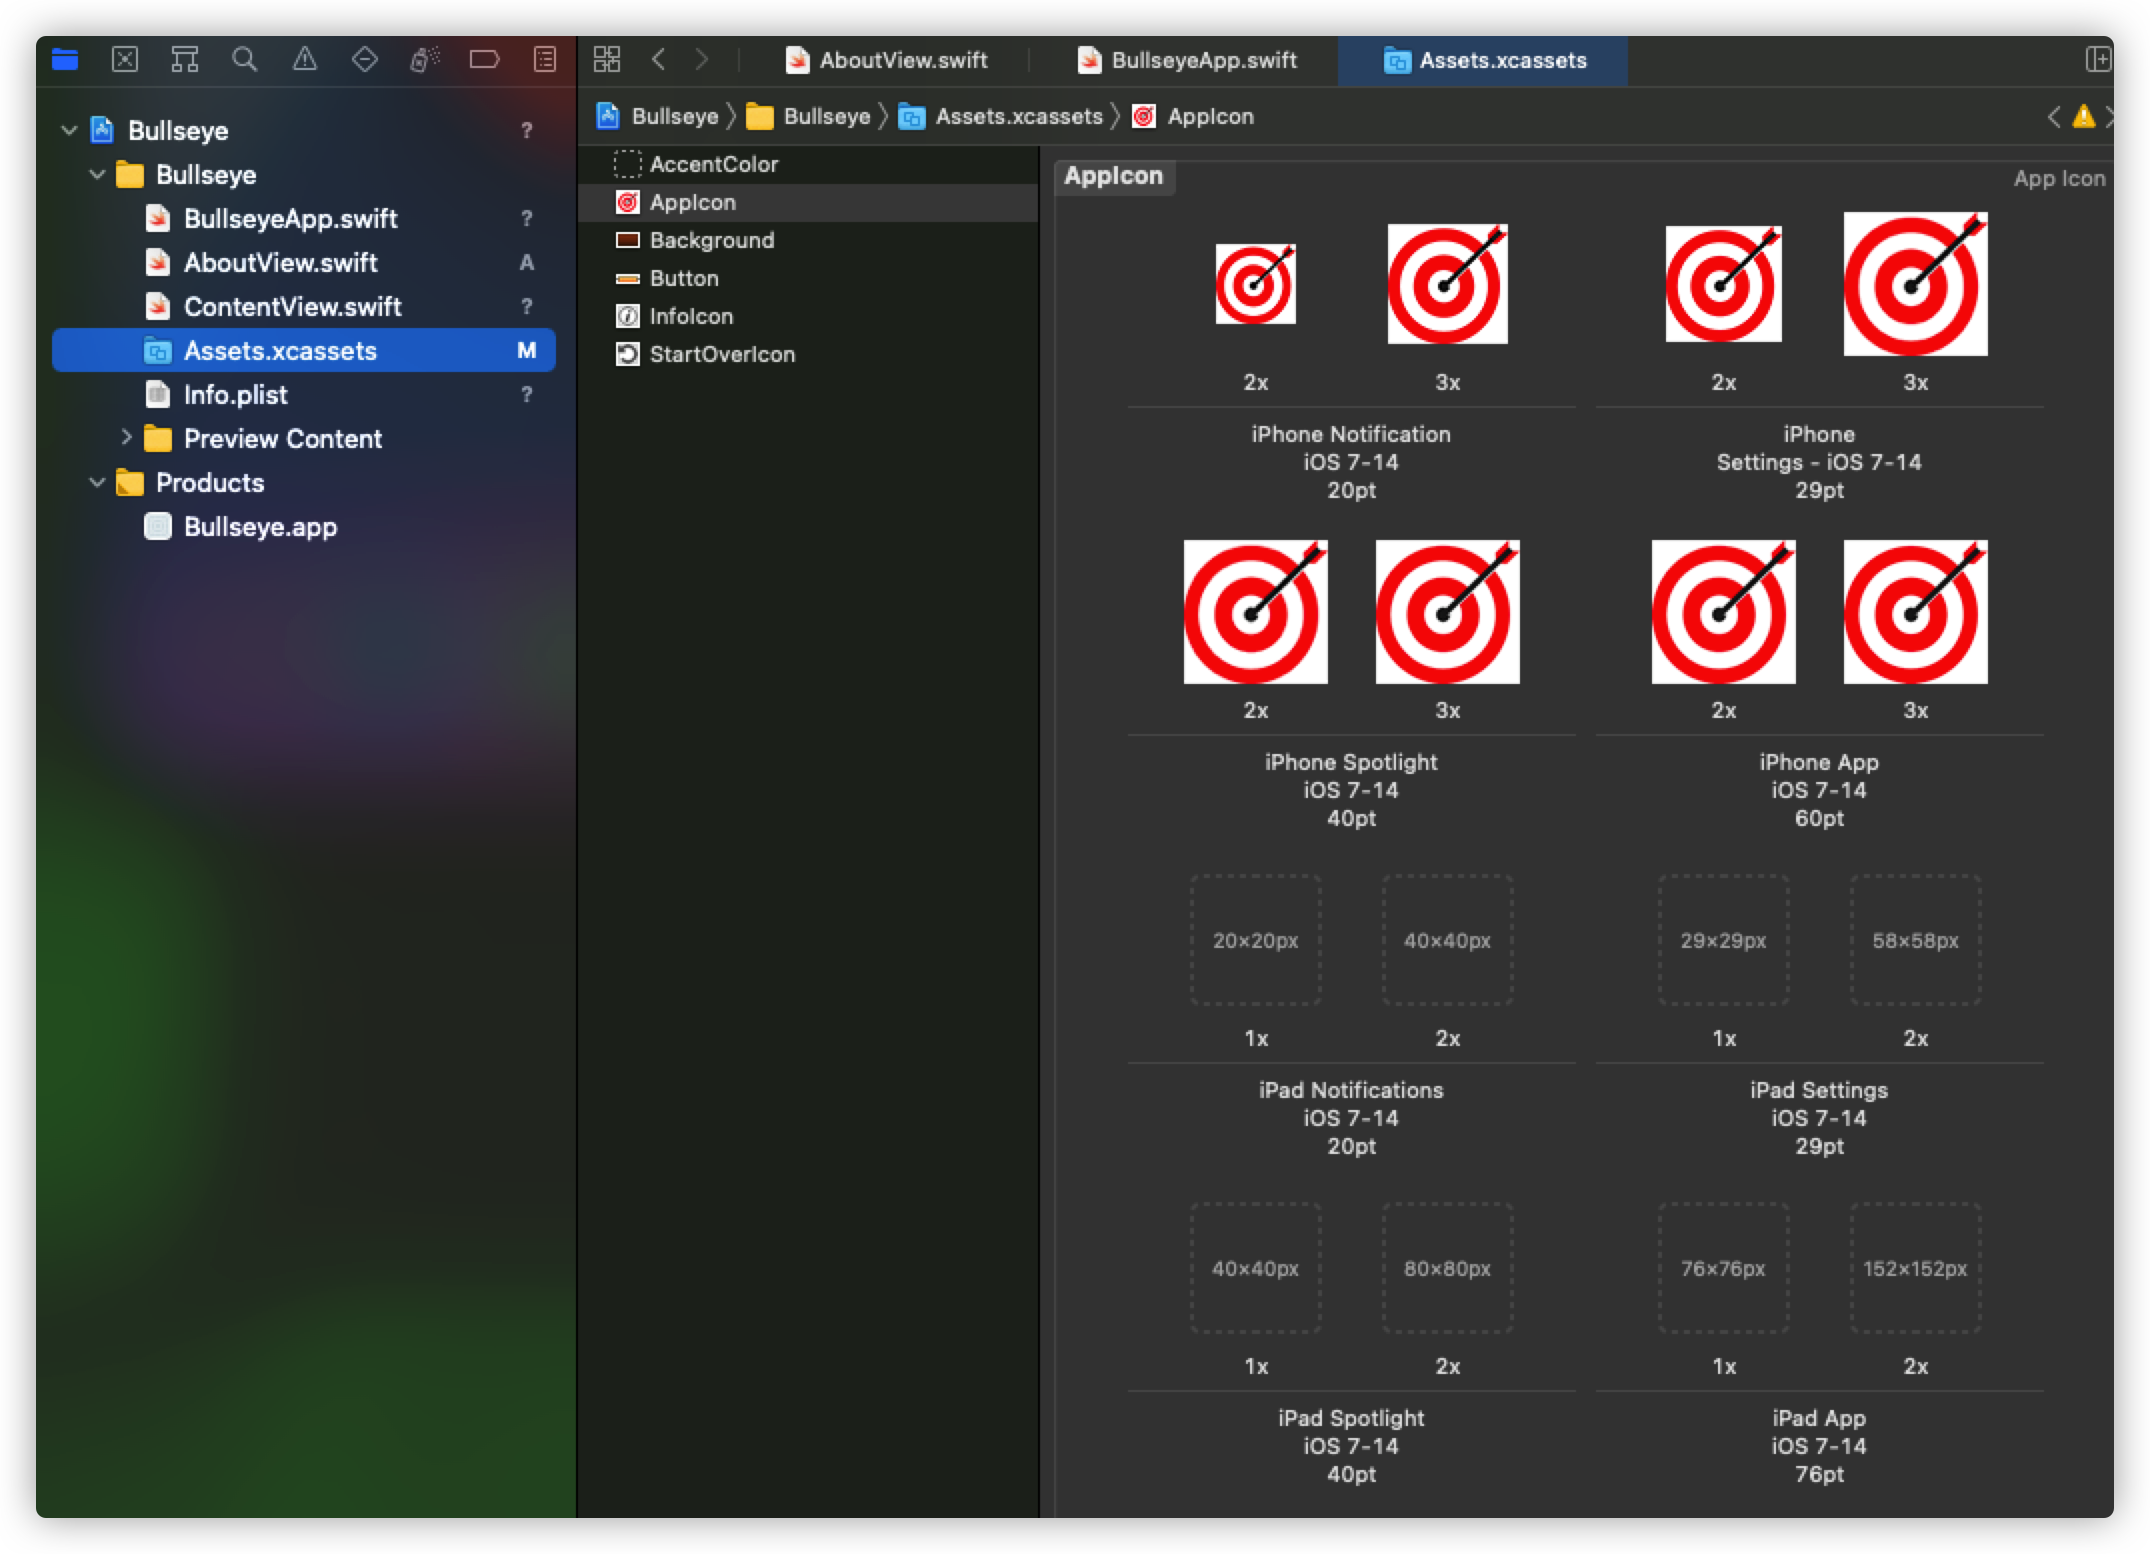
Images
首先我们要把要用的照片都拖动到 Assets 文件夹当中:
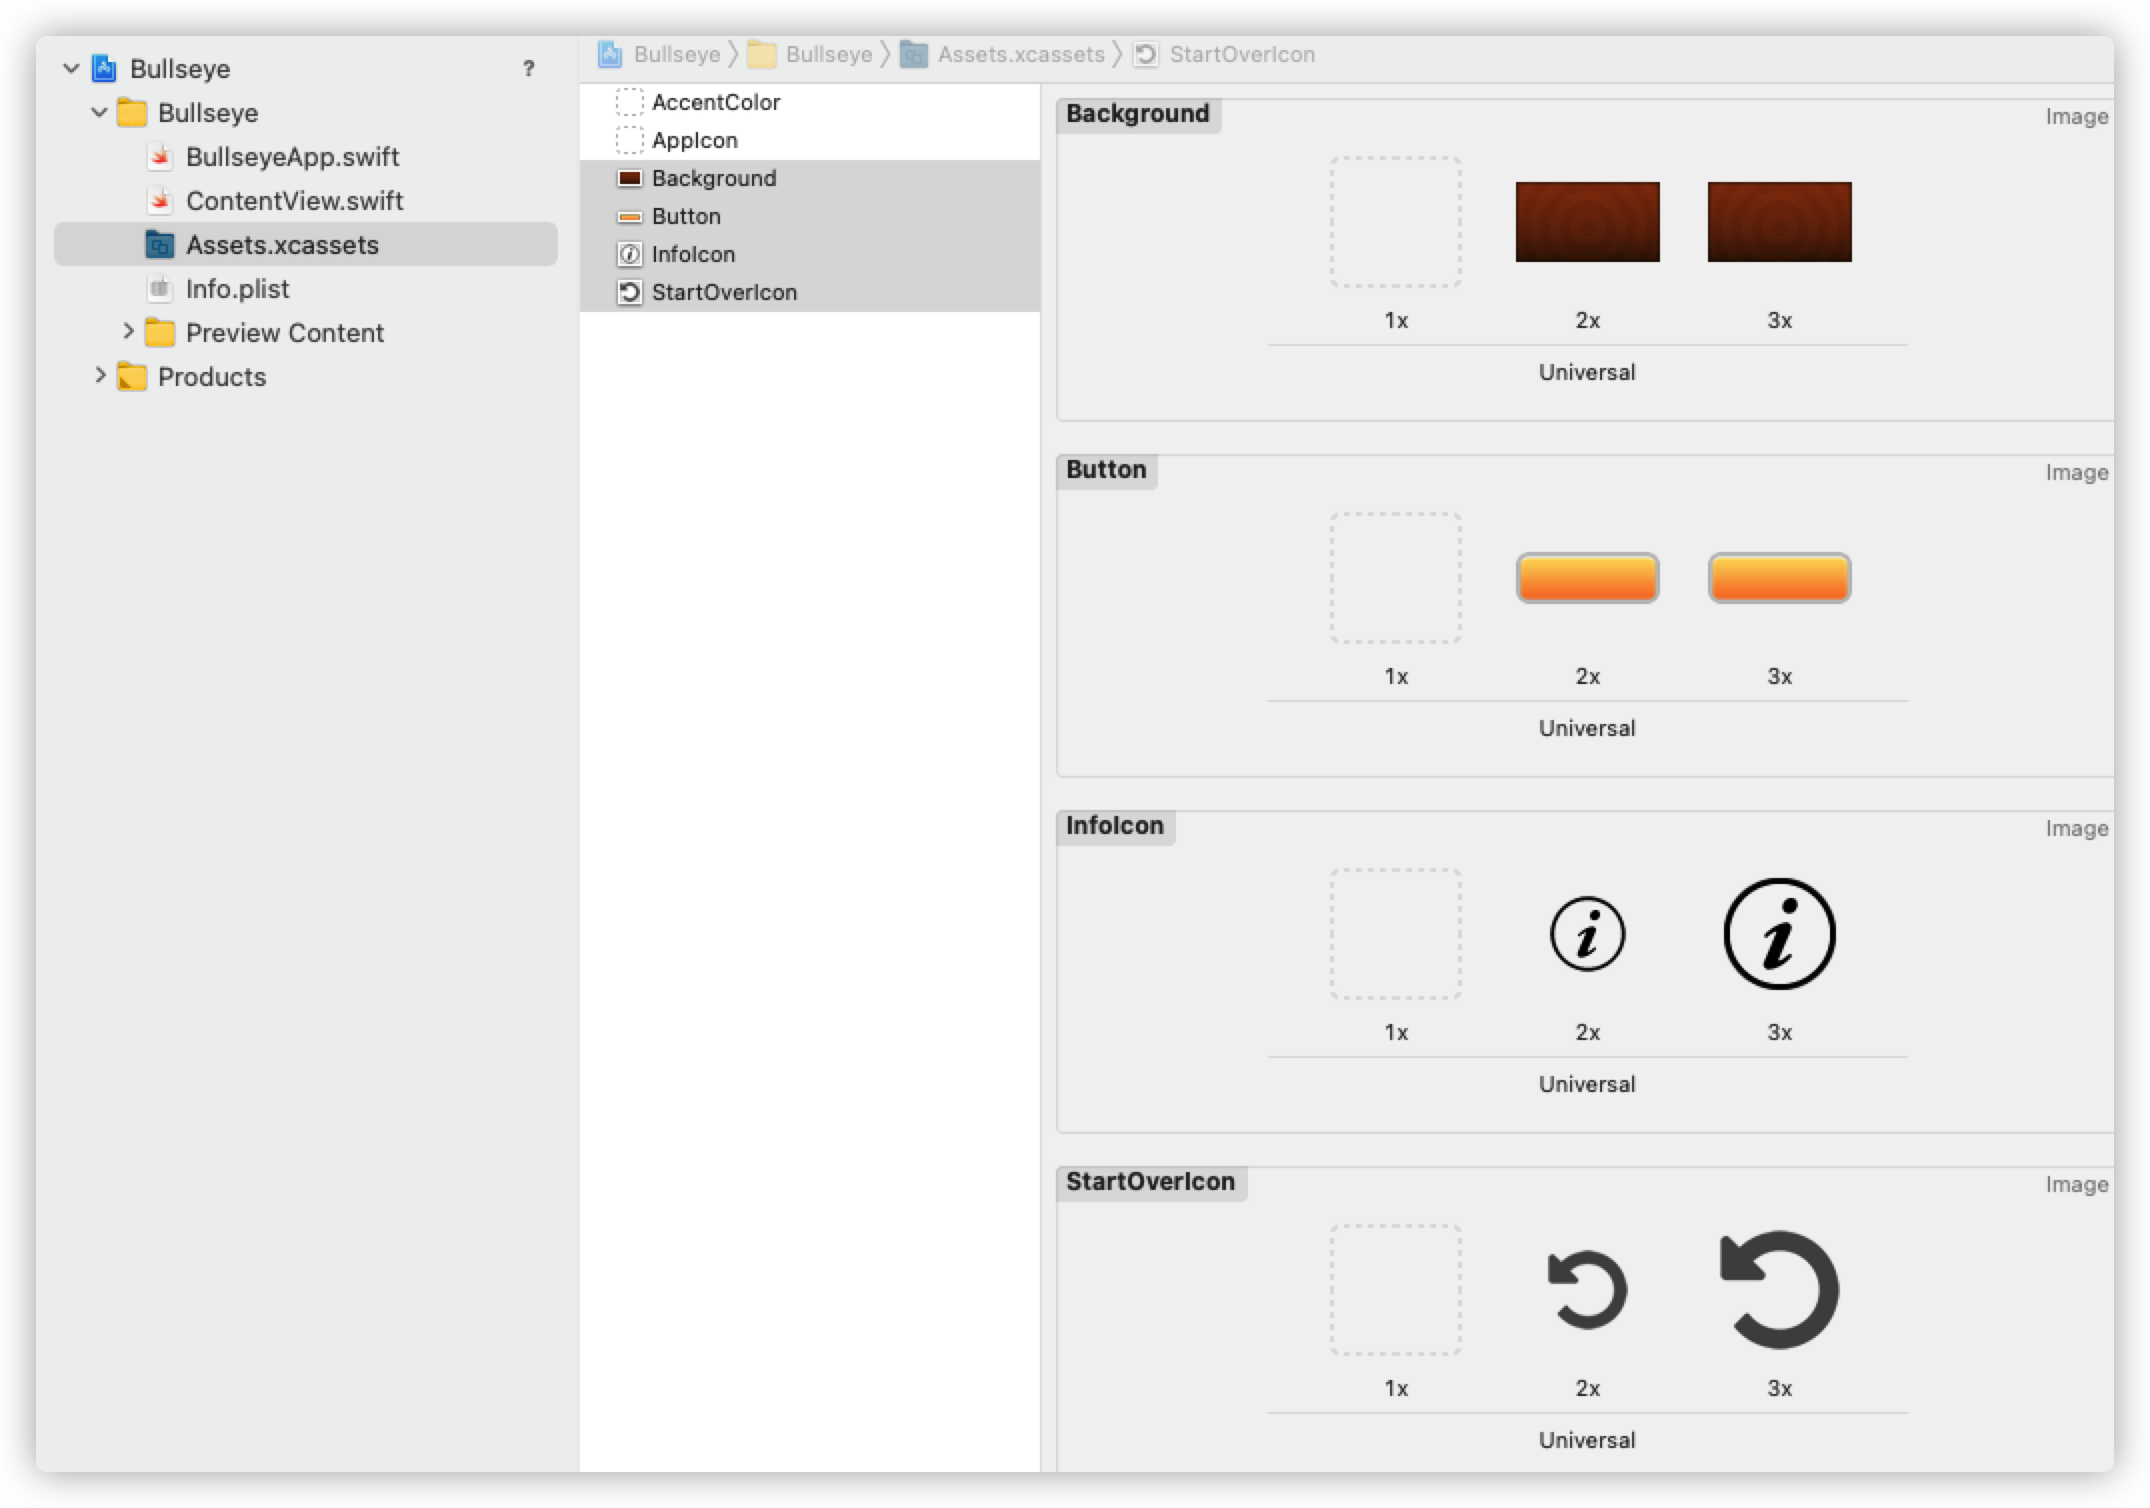
我们会发现图片分为三个档次-1x,2x,3x 其实这和图片的分辨率有关系。
1x 适合最早没有视网膜屏的手机
2x 适合视网膜屏的手机
3x 适合高清视网膜屏的手机(10代以后)
对于不同的手机像素我们可以上这个网站查看
那么怎么给我们的app设置背景呢?可以搜索apple 文档
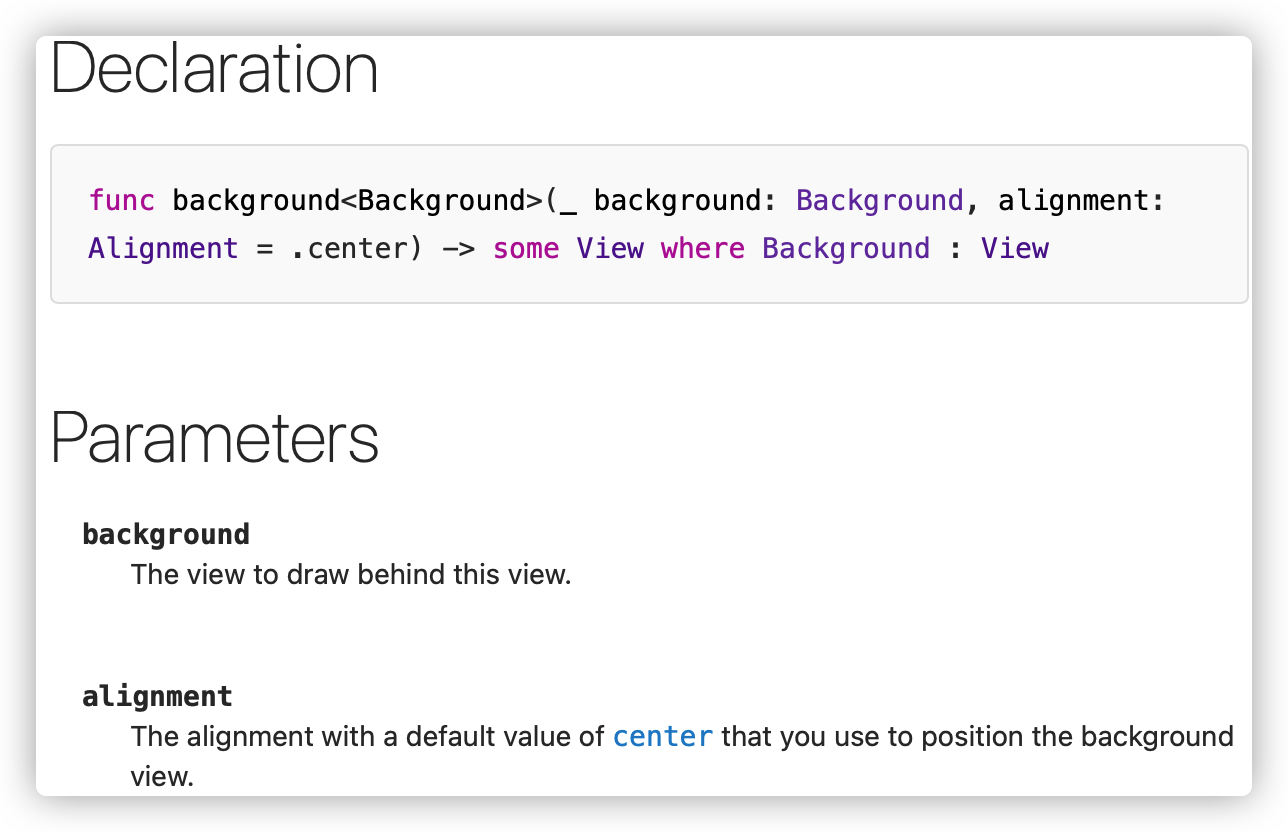
然后到body的最后面设置整个body的背景
1 | .background(Image("Background"),alignment: .center) |
View Modifiers
但是这个背景并不适合黑体字,而且字体也不太好看。因此我们还需要修改一下。对于文字,我们可以之间用command+click修改,但是如果要修改字体、添加阴影,那么直接写代码反而会变得方便。关于苹果可以用哪些字体,我们可以上这个网站 查看. 我们使用的是 Arial Rounded MT Bold
1 | Text("Put the bullseye as close as you can to:") |
对于Text的修改如上. 聪明的你可能会问:这么多Text,难道对于每一条我们都要修改这么多吗? 其实我们有更好的方法。那就是创建一个ViewModifier类型的结构,其作用就是对view进行格式修改。如下:
1 | struct LabelStyle: ViewModifier{ |
Challenge
现在我们要修改值得样式,因为值需要看起来更大一些,更好辨认一些。我们的要求是:
- Create a ViewModifier named ValueStyle
- Foreground color: Yellow
- Font: Arial Rounded MT Bold , size 24
- Shadow: The same as in LabelStyle
- Bonus : Can you make the code DRY
- Hint: ViewModifiers can use other ViewModifiers!
第一个任务很简单,就是创建一个基本一模一样的struct
1 | struct ValueStyle: ViewModifier{ |
但是问题是,我们发现两个struct的shadow是重复的,因此我们是否可以利用dry原则进行进一步优化呢?我们可以将shadow样式的语句单独提出来再做成一个ViewModifier,因为ViewModifier本身也可以调用其他ViewModifier
1 | struct LabelStyle: ViewModifier{ |
Styling the Buttons and Slider
现在我们来修改按钮以及滑动条的样式。
首先是给按钮加一个背景。这个很简单就不说了
其次是我们想给按钮的字体换一个颜色换一个大小。于是我们仍需要创建一个 ViewModifier :
1 | struct ButtonLargeTextStyle: ViewModifier{ |
现在还需要把返回图表和信息图表加到按钮上去。为了实现这个操作,我们可以在按钮中添加一个HStack。
1 | Button(action: { |
最后,我们将默认颜色设置成自定义的深空蓝
1 | let midnightblue = Color(red: 0.0/255.0, green: 51.0/255.0 ,blue: 102.0/255.0) |
App Icon and Display Name
现在我们要给我们的Bullseye添加一个图标
很简单的操作
Running the App on Your Device
最后我们要在手机上运行这个app。首先用手机连上电脑,在Window菜单下拉找到devices and simulators界面。然后打开手机信任电脑
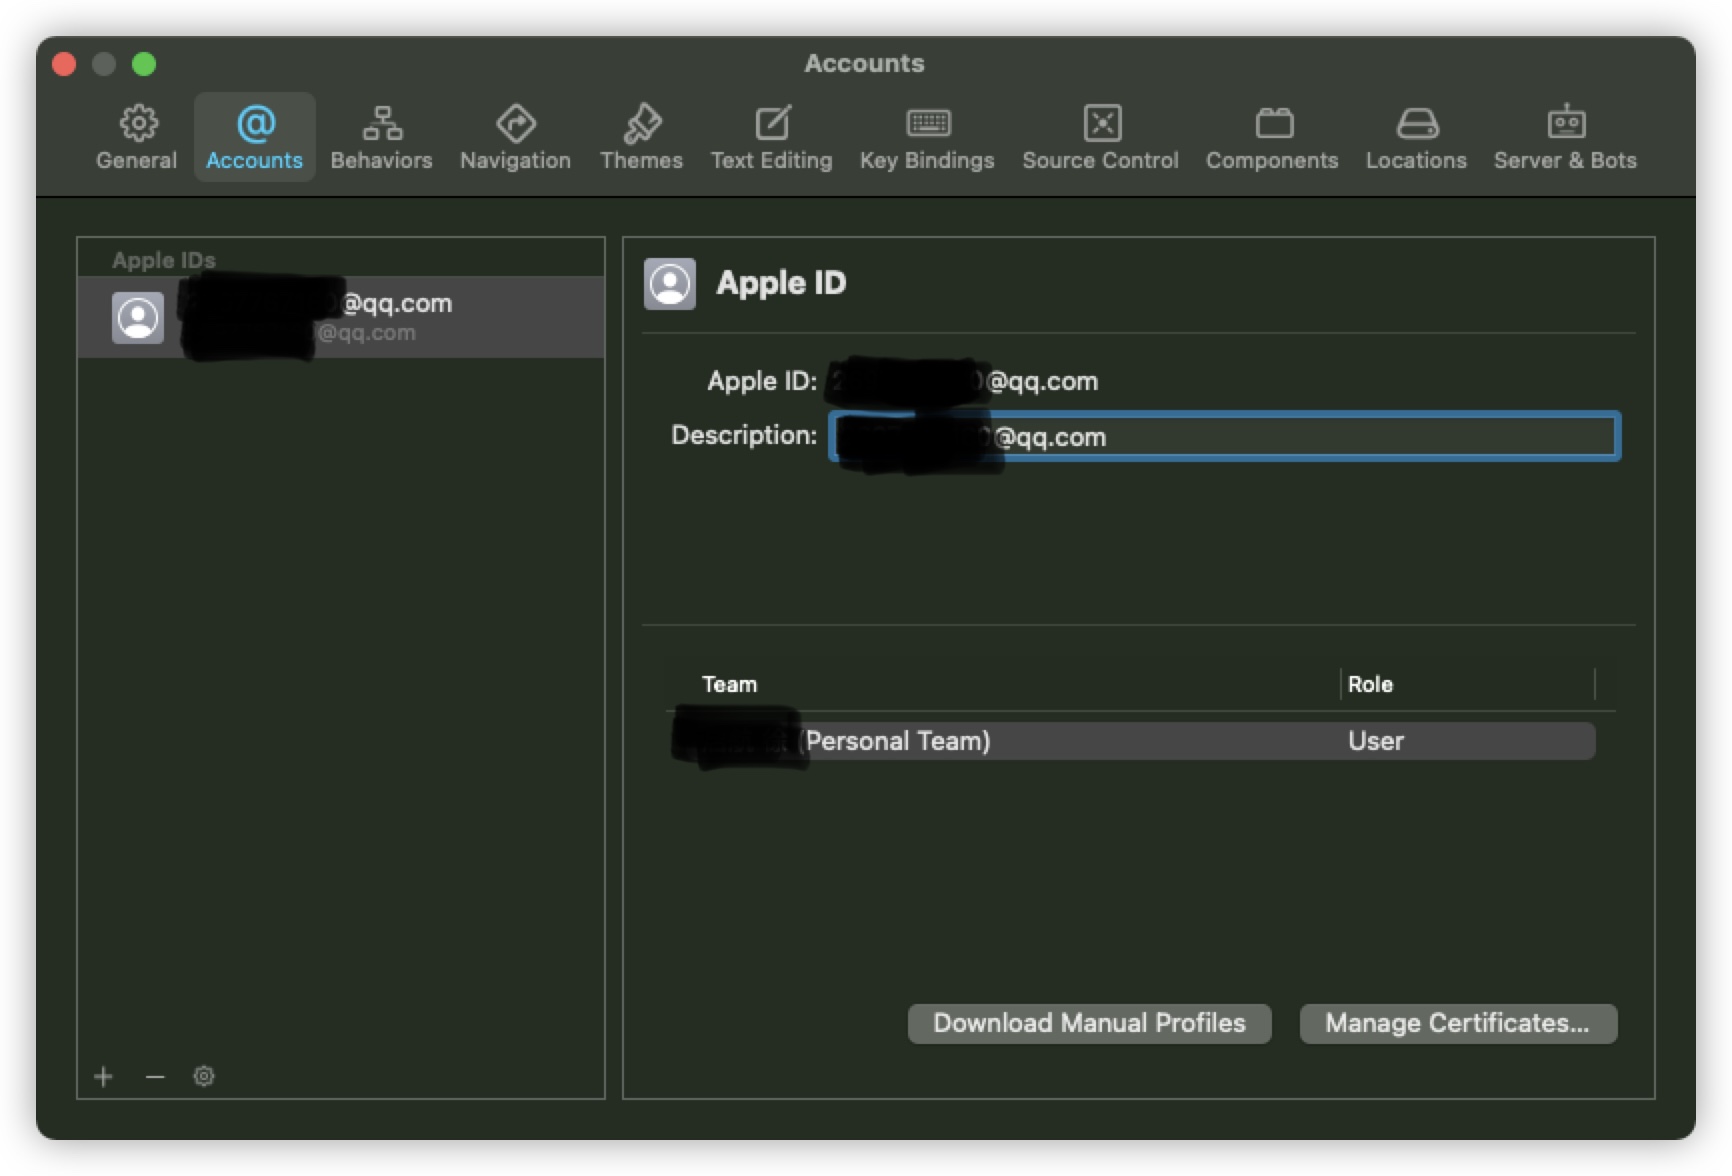
之后,在preference中需要写上与手机上一致的Apple ID
最后,在最上面的设备栏将 simulator改成自己的手机。点击运行就可以了。