Django学习3
Uploading Files
在这一章,我们将学习如何搭建一个RESTFul API,能实现图片上传的操作
Managing Media Files
首先我们要把用户上传的图片给存储到特定地方,然后能够被 url检索到。在这里,我们可以创建一个 media 文件夹。
然后,我们需要修改settings.py, 在settings.py 中有 STATIC_URL = '/static/' 它是用来检索app的静态文件的(如CSS,JAVASCRIPT,HTML) ,因为这属于前端的工作,在这个app中我们就没有创建static文件夹。
那么,当用户上传图片后,我们希望通过/media/{图片路径}来获取图片,因此我们需要创建 MEIDA_URL 和 MEDIA_ROOT 这两个值. 其中MEDIA_URL = '/media/' 代表需要去 media文件夹检索图片; 而 MEDIA_ROOT = os.path.join(BASE_DIR, 'media') 代表将 localhost:9000/和media/ 连接起来。
1 | MEDIA_URL = '/media/' |
现在,比如说我在media文件夹下存放了一张 dog.jpg 的照片,就可以通过http://127.0.0.1:9000/media/dog.jpg 在网页显示这张照片了
Adding Images to Products
现在我们要修改models.py, 增加一个 ProductImage的类,因为一件商品可以有多张图片,因此这里需要建立一个一对多的关系:
这里,用 ImageField 来存储一个图片对象,存放在store/images 文件夹当中。
注意,这里一定要确定related_name 要不然Product无法反向找到ProductImage对象
1 | class ProductImage(models.Model): |
Building an API to Upload Images
现在我们要创建一个API来上传图片。创建一个API的流程我们已经很熟悉了:先Serializer—View—Router构建出大致框架,再细化Serializer和View实现具体功能
框架
首先我们来确定Serializer中的Meta信息:我们想要呈现的是一个物品的所有图片,以及每张图片的编号和路径。因此我们可以这样来写:
1 | class ProductImageSerializer(serializers.ModelSerializer): |
然后,我们创建 ProductImageViewSet ,在这里一开始要确定serializer_class和queryset ,由于url的模板是这样的store/product/{product_pk}/images/{pk} ,在检索图片的时候,我们就需要用到url中的参数 product_pk
1 | class ProductImageViewSet(ModelViewSet): |
最后我们注册路由,由于product和images是一对多的关系,这里需要使用嵌套路由,即:
1 | #... |
具体功能
这个API的具体功能就是希望将用户上传的图片保存在特定的文件夹当中. 因此,实现的关键就是如何保存图片。
我们知道serializer是无法直接获取到url中的参数的,只能获取请求体中的数据(validated_data).因此需要在views中利用get_serializer_context 方法将该商品的id传入。
1 |
|
然后,我们在serializer中重写create函数,在里面通过self.context['product_id']获取到product_pk这个参数,并以此创建一个新的ProductImage对象
1 | class ProductImageSerializer(serializers.ModelSerializer): |
结果如下:
Returning Images from the API
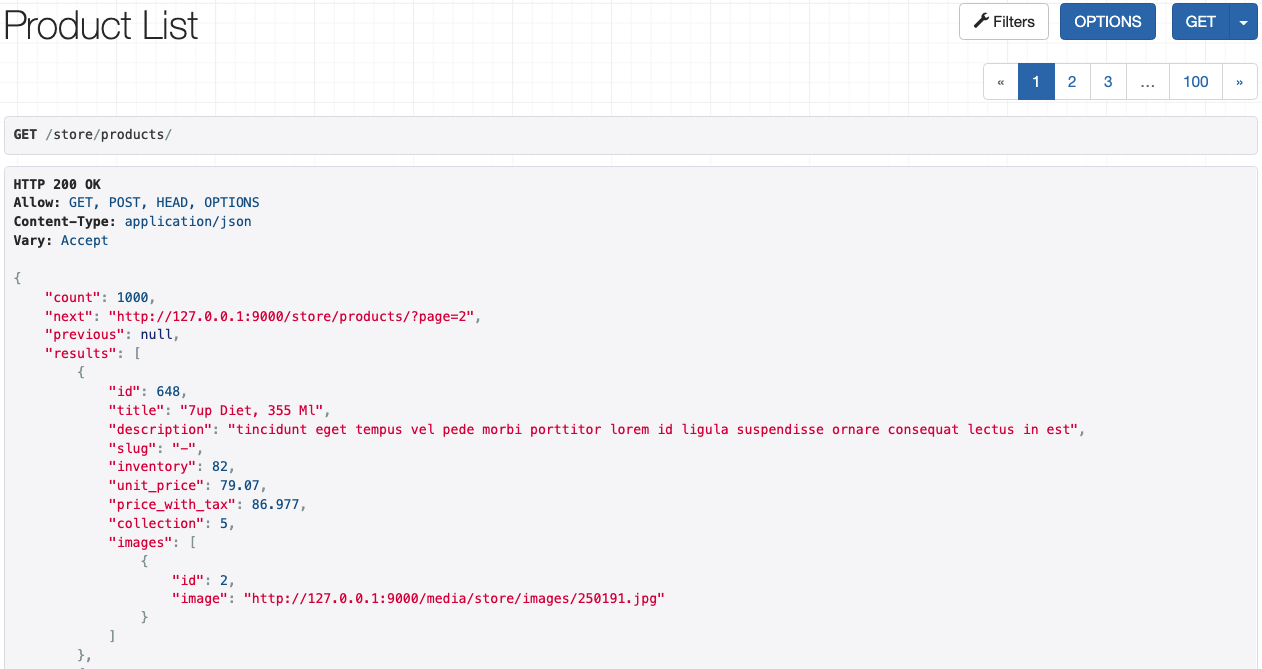
现在,我们希望,在对http://127.0.0.1:9000/store/products/ 进行 GET请求的时候,可以将每个product的图片信息显示出来:
怎么修改?首先我们要修改Serializer,让他把image加进来:
1 | class ProductSerializer(serializers.ModelSerializer): |
为了优化查询,我们需要对ProductViewSet进行修改,即用prefetch_related 将image在初次查询的时候就囊括进来,不用筛选出products以后再单独去进行反向查询
1 | class ProductViewSet(ModelViewSet): |
Validating Uploaded Files
之前我们使用ImageField来确定上传文件的类型,在这背后其实是 Pillow 包做的底层逻辑,对文件是否为图片进行了一个判断。
那么,如果我们希望对图片的大小进行一个限制,比如说不能超过50kb,该怎么写?
我们可以单独创建一个validators.py来存放验证器:
1 | from django.core.exceptions import ValidationError |
然后,在models.py中引入这个验证器:
1 | class ProductImage(models.Model): |
此外,如果该属性是 FileField ,我们只希望接收特定格式的文件,比如jpg ,怎么办? 我们可以使用FileExtensionValidator
1 | from django.core.validators import MinValueValidator,FileExtensionValidator |
Setting Up the Client App
我们打开part3 中的storefront3_client文件夹,把它复制到电脑硬盘中(直接在移动硬盘中操作会出现奇奇怪怪的问题),然后运行npm install 安装依赖,接着运行npm start 启动前端项目
结果如下:
Enabling CORS
但是,上面这个前端是没有办法向后端去传递消息的,因为没有进行跨域.什么是跨域呢? 因为前端是运行在8001端口的,而后端是运行在9001 端口的,这两者之间如果不进行跨域的话,是没有办法进行信息传输的。
CORS 即 Cross-origin Resource Sharing 中文名是跨源资源共享,即跨域。它的作用就是将在一个域名接收到的请求转发到另外一个域名,然后将另外一个域名的返回的结果在转发到这个域名上来。类似一个中转服务器
为了在Django中实现CORS,我们需要用到django-cors-headers 这个Github项目,地址:https://github.com/adamchainz/django-cors-headers 。 里面有细致的安装步骤。
首先,我们运行 pipenv install django-cors-headers 安装 corsheaders APP
然后,我们在 settings.py 中注册 corsheaders
接着,将'corsheaders.middleware.CorsMiddleware' 复制到中间件列表的最前面
最后,注册允许跨域的前端域名,如下:
1 | CORS_ALLOWED_ORIGINS = [ |
然后,因为我们的后端试监听在9000端口的,因此需要修改前端中的uploadFile函数(默认是8000)
1 | const uploadFile = (file) => { |
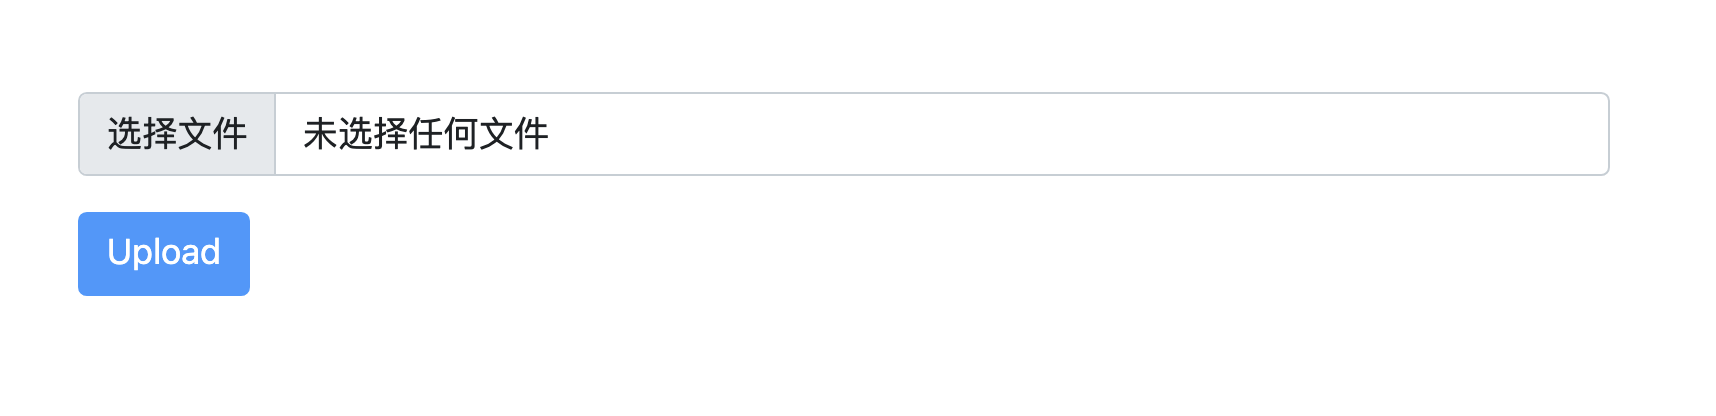
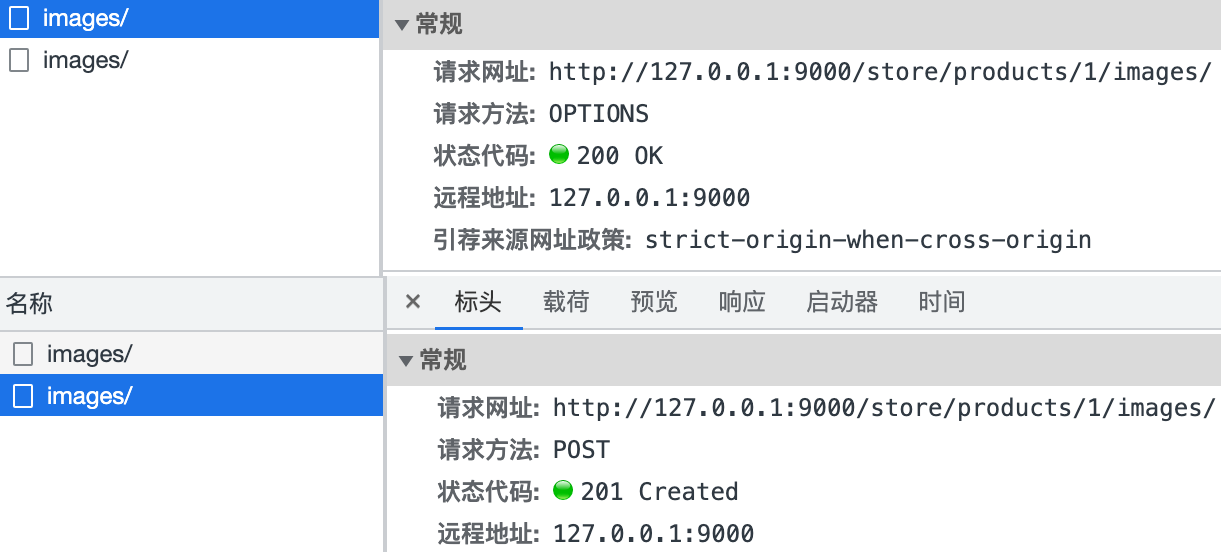
我们可以尝试上传一张图片:

然后我们查看请求的url信息:
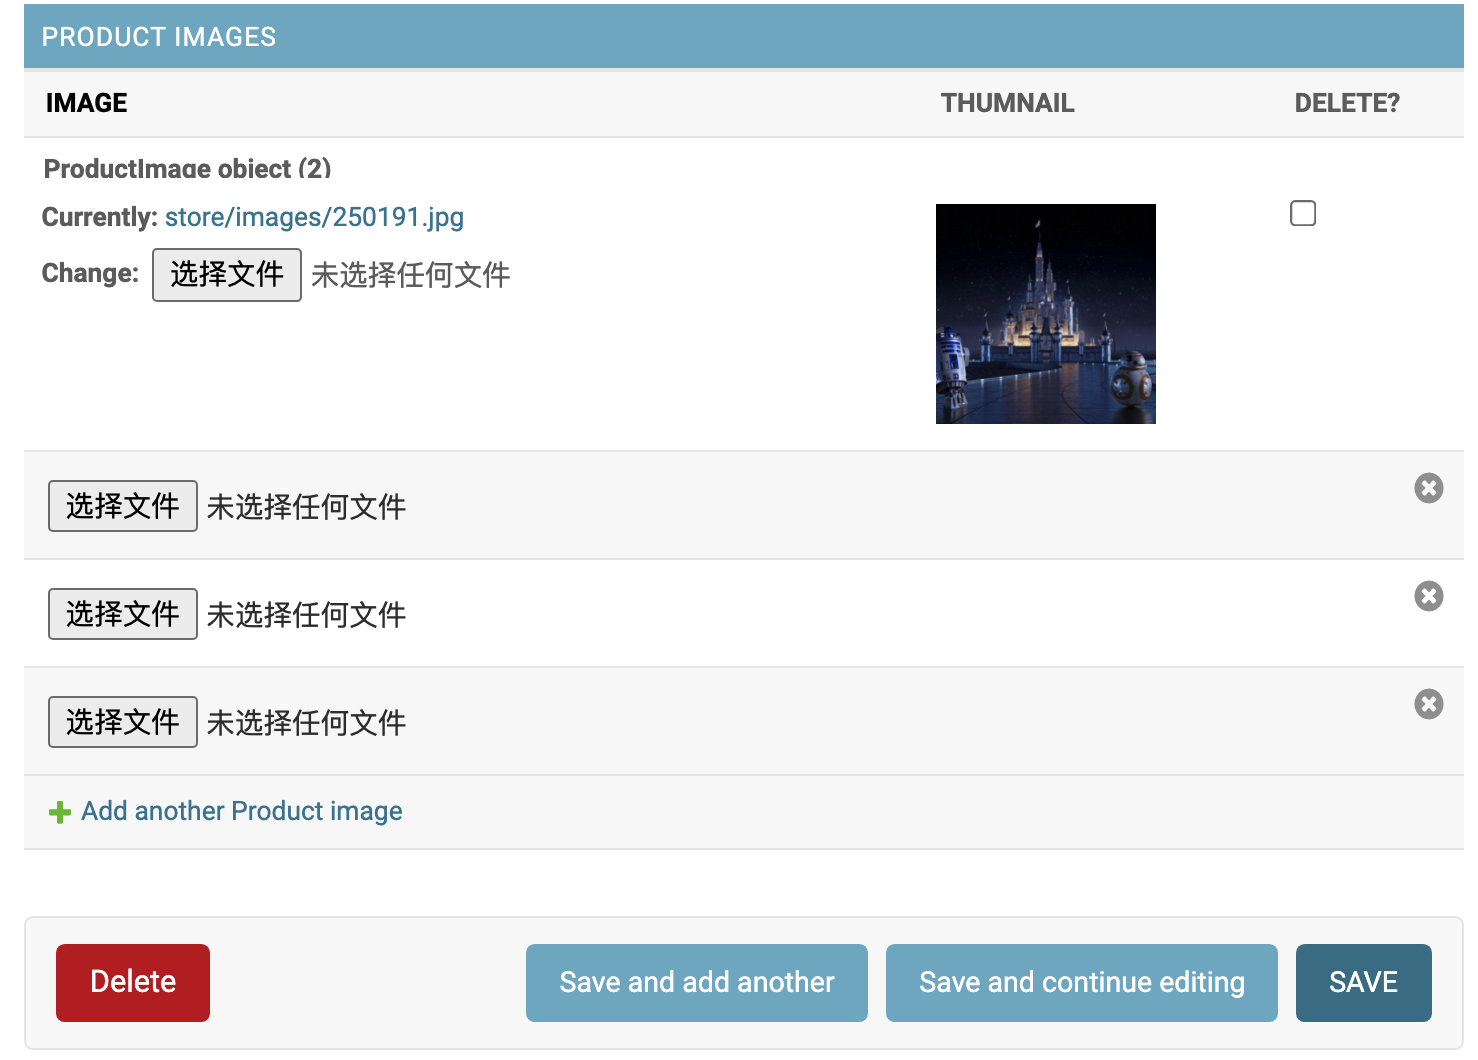
Managing Images in the Admin
现在我们想给以Admin管理图片的功能,能让他在后台可以直接查看到图片,添加\删除图片,怎么办?
由于 图片和商品是一个多对一的关系,想要在特定的商品界面显示与其关联的图片,可以使用inline的方式嵌入:
那么首先我们要到store>admin.py 中创建 ProductImageInline 类:
在这个类中,我们首先规定 models 属性,让其等于 ProductImage
此外,为了显示图片,我们需要额外创建一个字段,暂且称其为 thumnail,然后,我们要使用format_html方法将图片转换成html语言显示出来。
1 | class ProductImageInline(admin.TabularInline): |
然后,我们要在product中将ProductImageInline类导入进去,之前我们在core>admin.py 中为了实现Generic Model Tag的内联实现,我们重新定义了inline字段,因此要在core>admin.py中导入ProductImageInline
1 | class CustomProductAdmin(ProductAdmin): |
但这还是不够的,虽然能在admin界面显示图片,但是是以原大小显示的,很不美观,因此我们需要用css来调节一下。
为了项目的可维护性,我们需要在store文件夹下创建 static 文件夹,专门存放html、css之类的静态文件。
1 | .thumnail { |
最后,我们要在 ProductAdmin中引入这个css文件:
1 |
|
结果如下:
Sending Emails
Setting up a Fake SMTP Server
在计算机网络中,我们学过SMTP协议 ,也就是一个简单邮件传输协议。现在我们如果想要我们的app来发送邮件,就需要创建一个简单的SMTP服务器
项目网址如下: https://github.com/rnwood/smtp4dev
我们需要在Docker中安装这个项目,因此需要先安装Docker。然后运行docker run --rm -it -p 3000:80 -p 2525:25 rnwood/smtp4dev 安装
但是对于m1 mac,可能会出现找不到合适版本的问题,我们可以指定一个版本让其安装:
1 | docker run --rm -it -p 3000:80 -p 2525:25 rnwood/smtp4dev:3.1.3-ci20211206101 |
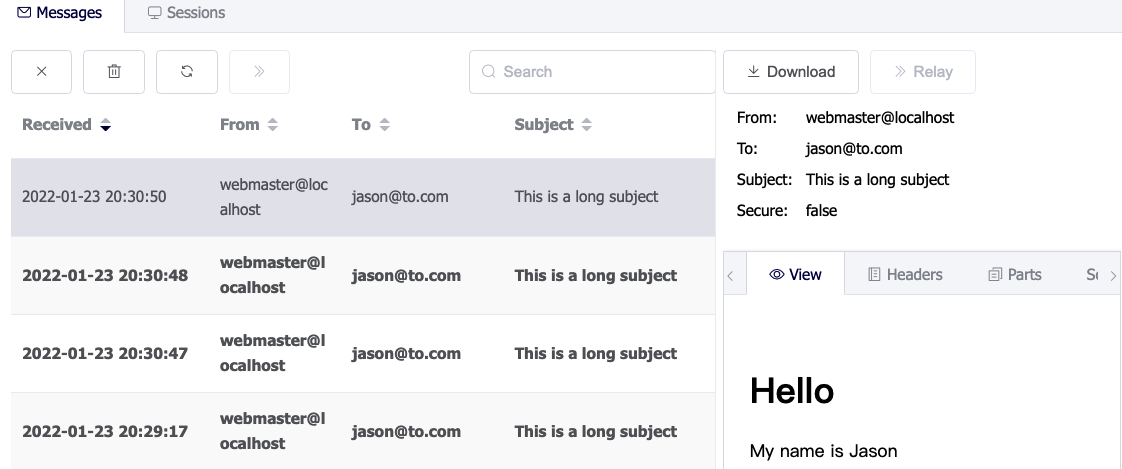
然后,访问localhost:3000 ,就可以打开 smtp4dev
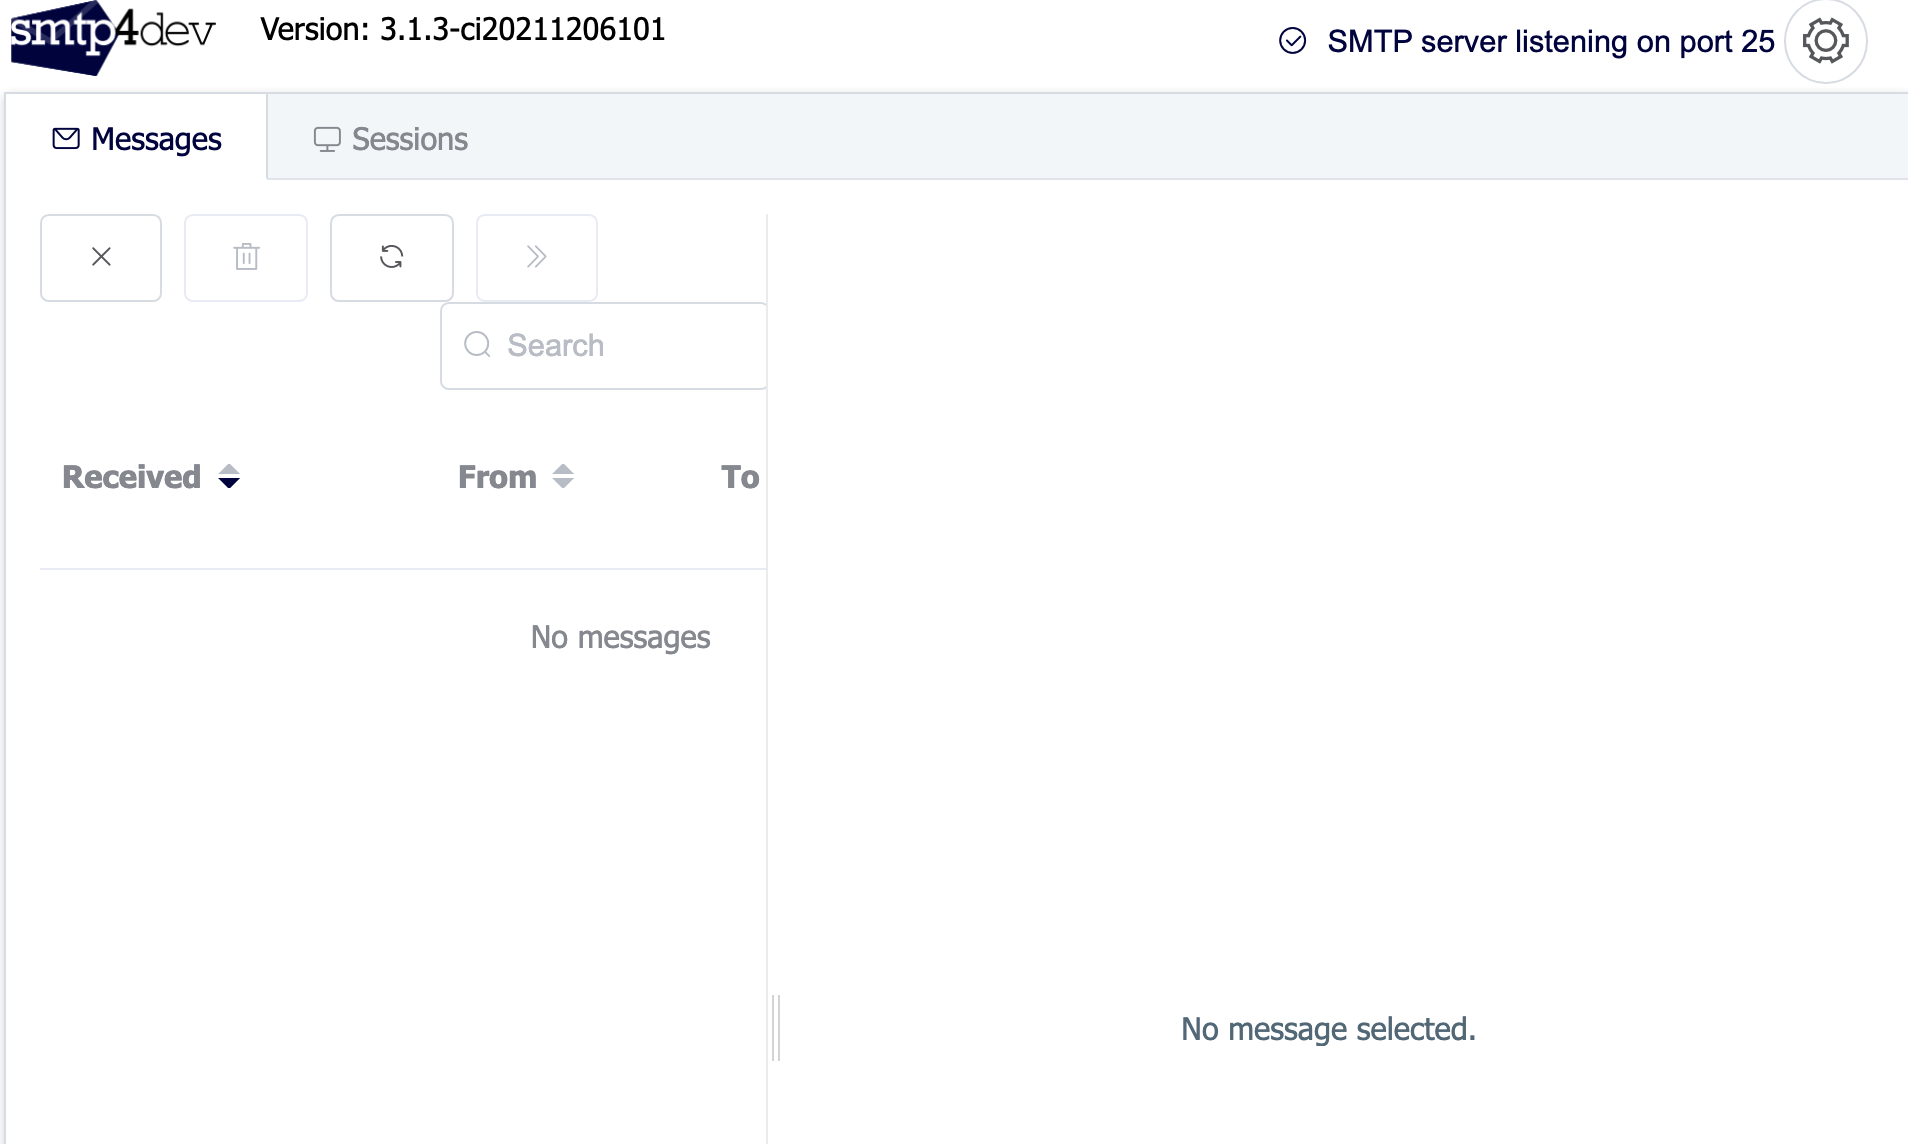
这是一个假的smtp服务器,他不会真的发送邮件,但它的作用是检测通过这个端口(2525)利用SMTP协议发送的邮件
Configuring the Email Backend
首先我们要在Django中对电子邮件后端进行一些配置。
我们
1 | EMAIL_BACKEND = 'django.core.mail.backends.smtp.EmailBackend' |
EMAIL_BACKEND 设置邮件后台,默认为smtp,还有console(邮件显示在终端),file(将邮件显示在文件里)
EMAIL_HOST 由于smtp4dev是开在本地的,因此这里写 ‘localhost’
EMAIL_HOST_USER 和 EMAIL_HOST_PASSWORD 由于对这个邮件服务器我们没有设置用户和密码,因此直接写空串
EMAIL_PORT 是邮件走的端口号,由于 smtp4dev 监听在2525,这里写2525
DEFAULT_FROM_EMAIL 是默认邮箱,即从这个邮箱往其他邮箱发送邮件
Sending Emails
我们可以用 django.core.mail 中的 send_mail 函数来发送信息。由于存在发送错误的情况,我们需要用 try-except 进行错误捕捉。
1 | from django.shortcuts import render |
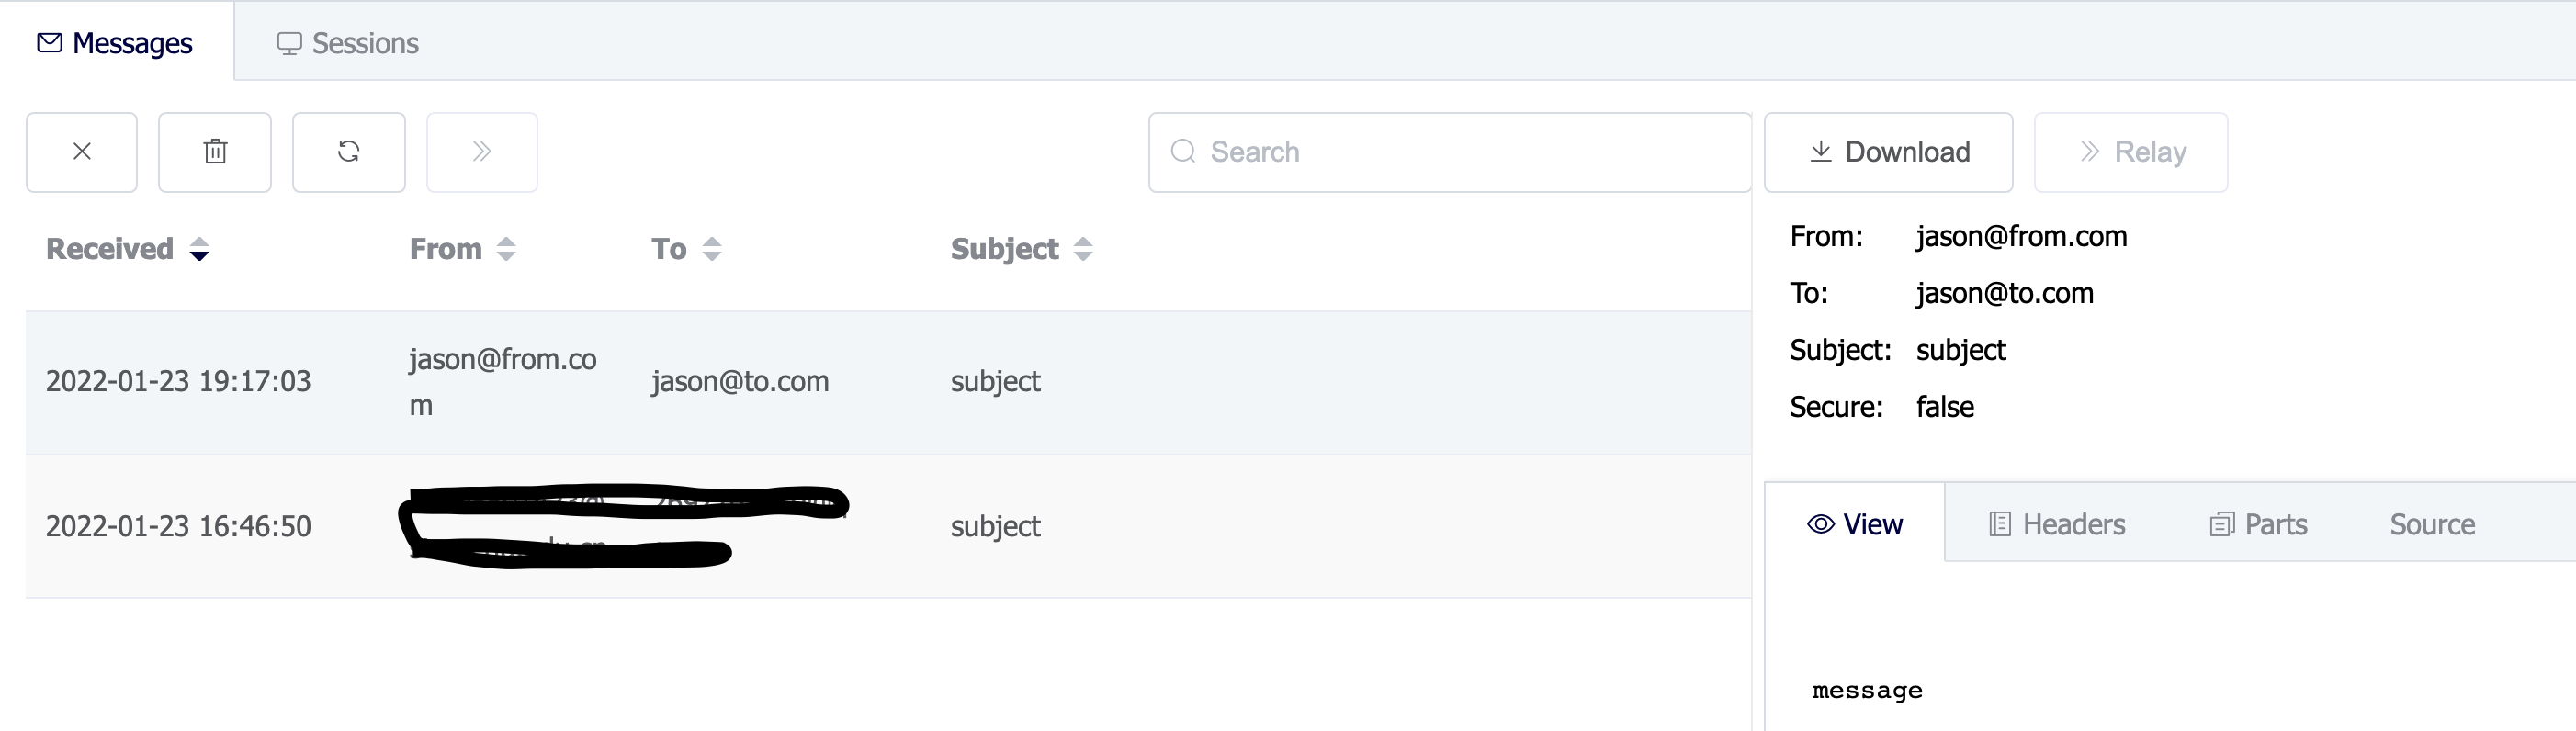
在访问 http://127.0.0.1:9000/playground/hello/ 之后我们看到 smtp4dev服务器已经捕捉到这封邮件了
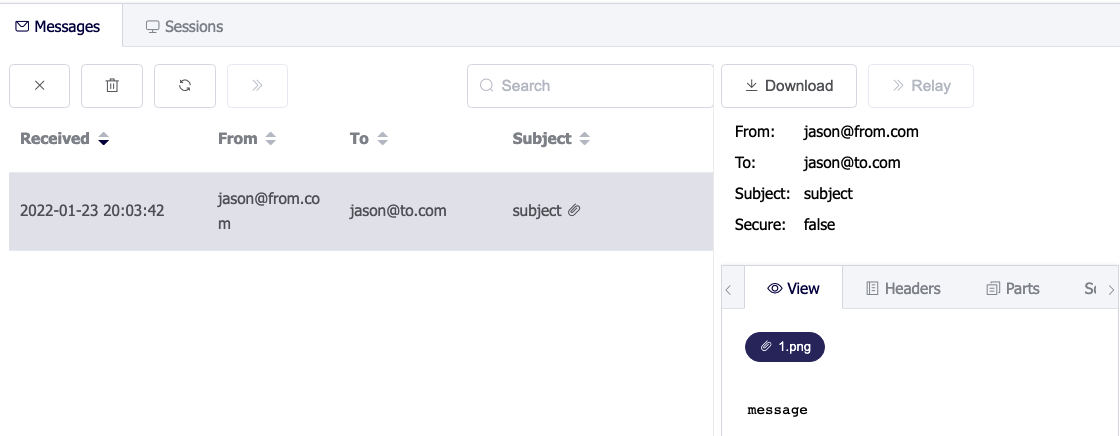
Attaching Files
如果我们想发送一封带有附件的文件,该怎么办?
我们可以先确定邮件的内容,然后再利用attach_file 来加载附件
1 | def say_hello(request): |
Sending Templated Emails
我们可以下载django-templated-mail 这个app,来实现发送模板邮件的功能。
首先我在 playground 下的 templates/emails 文件夹下创建一个hello.html文件,用来存放模板
1 | {% block subject%} This is a long subject {% endblock %} |
views.py中,我们要用 BaseEmailMessage 去替换原来的 EmailMessage
1 | from django.shortcuts import render |
结果如下:
Running Background Tasks
Introduction to Celery
在遇到一些上传文件、发送邮件的任务时,我们希望它能够在后台运行。这时候我们就可以用到Celery:
Celery是一个简单,灵活,可靠的分布式系统,用于处理大量消息,同时为操作提供维护此类系统所需的工具。
它是一个任务队列,专注于实时处理,同时还支持任务调度。
celery 的优点
简单:celery的 配置和使用还是比较简单的, 非常容易使用和维护和不需要配置文件
高可用:当任务执行失败或执行过程中发生连接中断,celery 会自动尝试重新执行任务
如果连接丢失或发生故障,worker和client 将自动重试,并且一些代理通过主/主或主/副本复制方式支持HA。
快速:一个单进程的celery每分钟可处理上百万个任务
灵活: 几乎celery的各个组件都可以被扩展及自定制
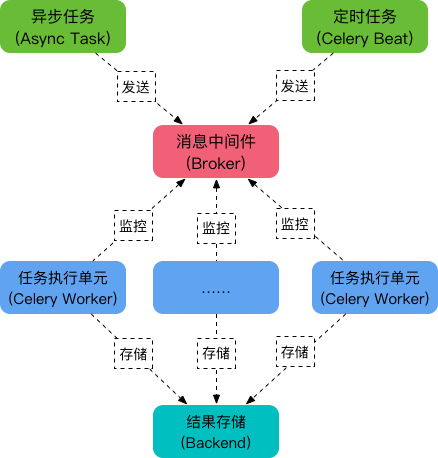
celery 的5个角色
- Task
就是任务,有异步任务和定时任务
- Broker
中间人,接收生产者发来的消息即Task,将任务存入队列。任务的消费者是Worker。
Celery本身不提供队列服务,推荐用Redis或RabbitMQ实现队列服务。Redis只是一个数据库,但是可以用来实现队列服务,而RabbitMQ是一个企业级的 Broker
- Worker
执行任务的单元,它实时监控消息队列,如果有任务就获取任务并执行它。
- Beat
定时任务调度器,根据配置定时将任务发送给Broker。
- Backend
用于存储任务的执行结果。
其结构如下所示:
Installing Redis
pipenv install redis
docker run -d -p 6379:6379 redis
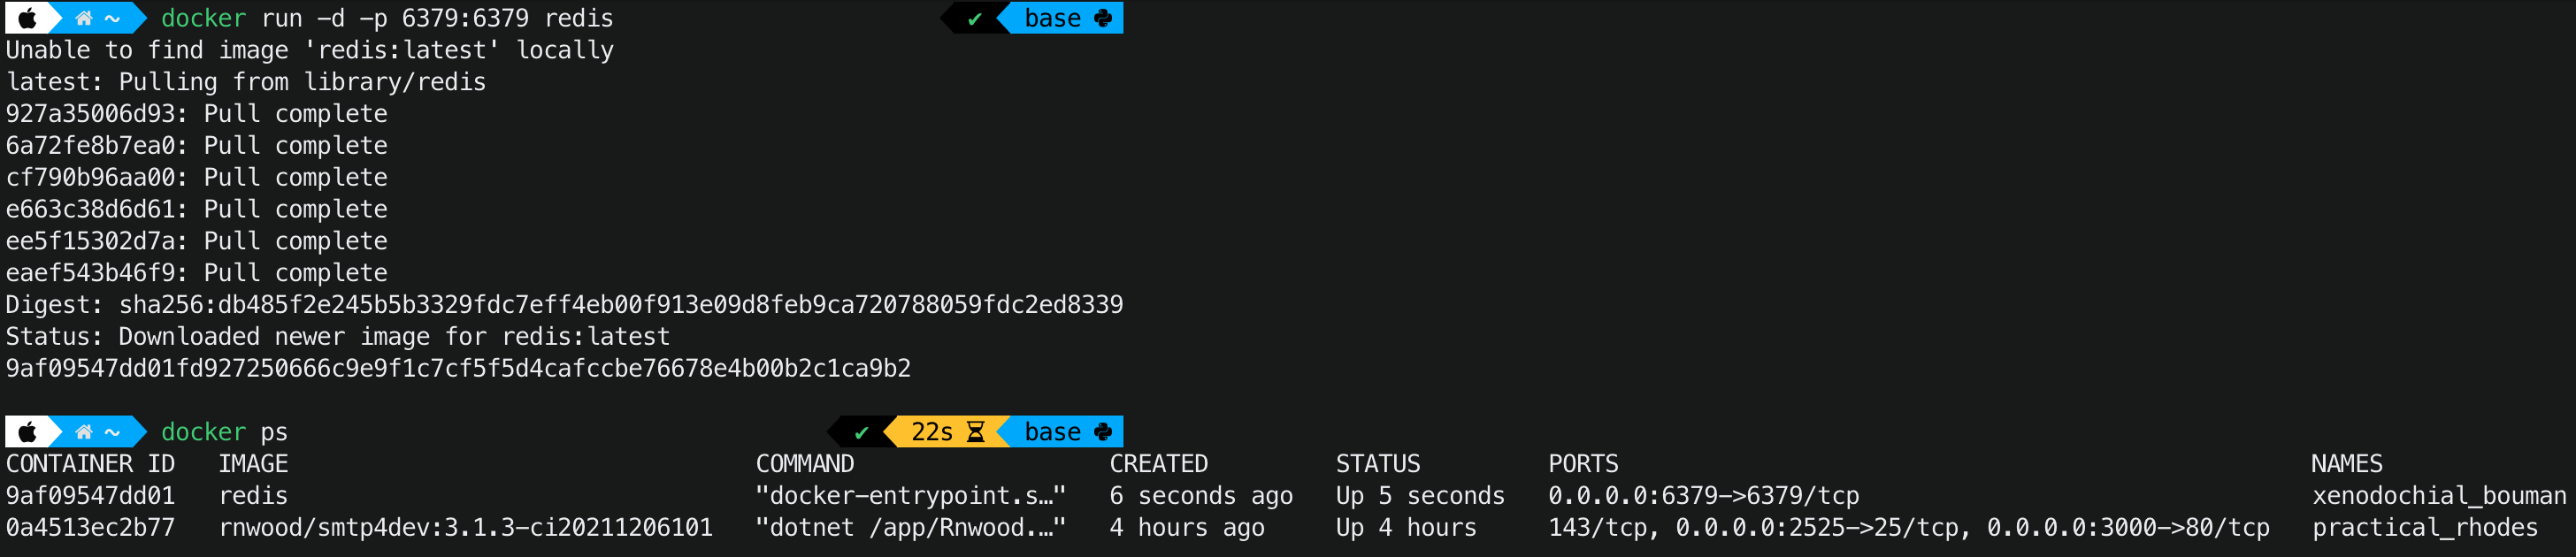
Setting Up Celery
Celery与Windows系统不兼容,所以如果是windows系统请使用 wsl linux环境运行这个Django项目。
首先,我们要在storefront中新创建一个celery模块:先运行pipenv install celery 下载Celery
进行一个简单的配置
1 | import os |
然后在settings.py 中 设置CELERY_BROKER_URL变量,6379代表redis运行的端口号,/1代表我们这个项目所属数据库的名字
1 | CELERY_BROKER_URL = 'redis://localhost:6379/1' |
在 storefront中的__init__.py 中导入我们设置好的celery模块:
1 | from .celery import celery |
最后,我们用celery -A storefront worker --loglevel=info 来启动celery
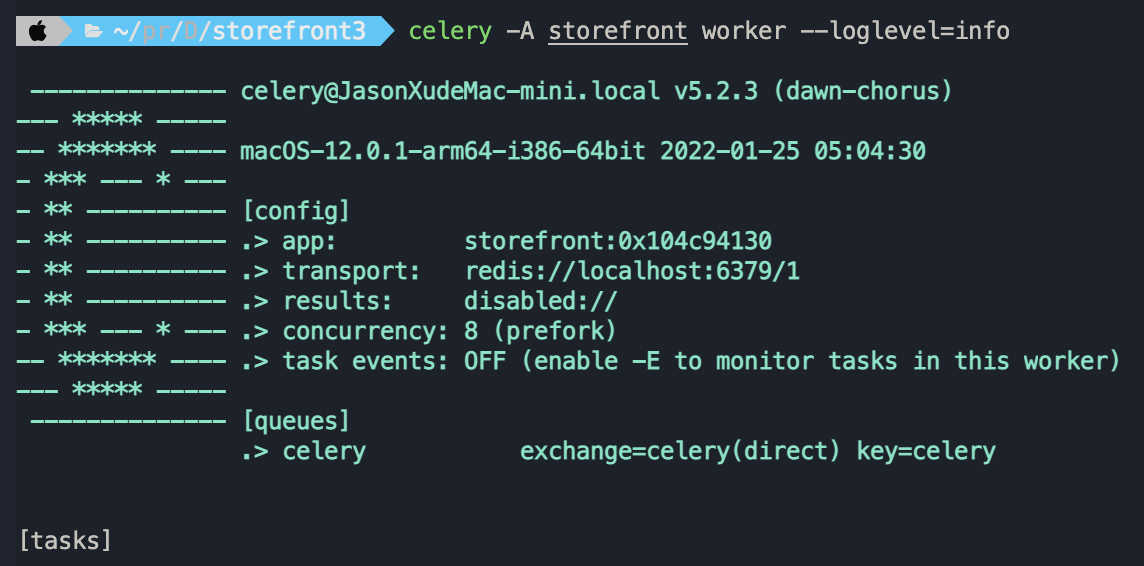
我们看到,celery已经启动了,一共有8个cpu核可供我们进行并行任务处理
然而,现在我们的项目已经有点复杂了,一共需要3条命令,3个终端窗口才能实现
- 一个 运行项目 :
python manage.py run server - 一个运行redis :
docker run -p 6379:6379 redis - 一个运行celery:
celery -A storefront worker
Creating and Executing Tasks
我们在playground 中创建tasks.py 用来模拟需要运行的任务。这里我们模拟发送一封信件,需要消耗10s。注意,如果要让celery去执行,需要使用shared_task来修饰
1 | from time import sleep |
然后,我们可以再views.py中运行这个任务:
1 | from .tasks import notify_customers |
结果如下,我访问http://localhost:9000/playground/hello/会直接返回html文件:

此时,该任务在后台运行,我们发现,过了10秒以后,才显示 Email were successfully sent

需要注意的是,这里我即使使用 ctrl+c 关闭了 Celery ,刷新界面之后也会直接返回html文件,这是因为,redis还开在后台,项目会把这个任务存放在redis(broker)当中,当celery重新启动的时候,redis会尝试重新发送这个任务给worker。
但是如果我关掉redis,那么程序就会报错,因为任务无法发送到6379端口
Scheduling Periodic Tasks
如果我希望每隔特定的时间重复运行一个任务,我们可以使用 celery beat
要使用celery beat,需要在 settings.py中设置 CELERY_BEAT_SCHEDULE 变量,如下所示:
首先,我们要确定重复的任务:notify_customers,设置这个任务的位置, 即task属性,以及什么时候重复。
1 | CELERY_BEAT_SCHEDULE = { |
在这里,我直接使用了数字2,代表每间隔2秒进行一次重复。当然,我也可以使用celery.schedules中的 crontab模块:'schedule': crontab(day_of_week=1, hour=7, minute=5)
这个就代表,每一周的第一天的七点零五分运行这个任务。
或者'schedule': crontab(minute='*/15') 代表每间隔15分钟运行一次,当然'schedule': 15*60 也可以达到相同的结果。
最后,我们打开一个新的终端,运行celery -A storefront beat
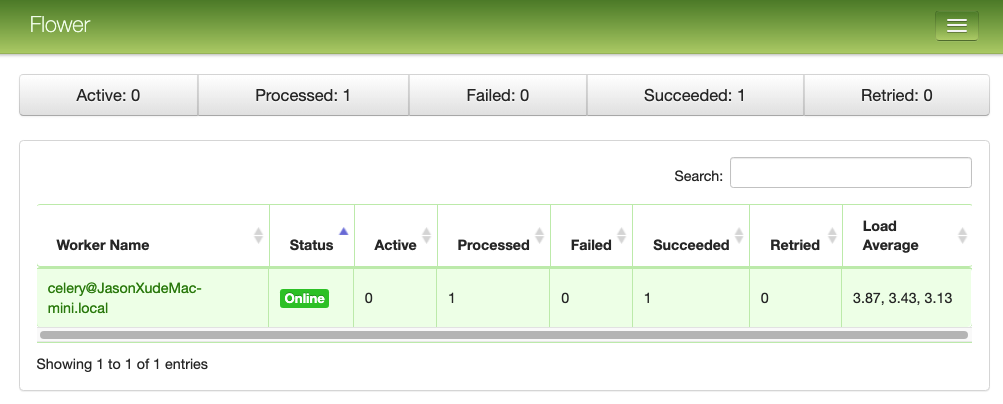
Monitoring Celery Tasks
最后,我们来讲讲怎么监控 Celery Task , 这里我们需要用到一个小工具: Flower。 我们可以用pipenv install flower 来下载
然后用celery -A storefront flower来启动flower:
然后访问http://localhost:5555 来监控后台任务
Automated Testing
What is Automated Testing
现在我们要对项目做单元测试。单元测试是代码正确性验证的最重要的工具,也是系统测试当中最重要的环节。也是唯一需要编写代码才能进行测试的一种测试方法。在标准的开发过程中,单元测试的代码与实际程序的代码具有同等的重要性。每一个单元测试,都是用来定向测试其所对应的一个单元的数据是否正确。
比如说对于我们store app中的products,对它们可以进行创建、更新、删除等操作。但有些操作只有特定权限的用户才能够进行。因此我们需要手动测试这些api,是否只有特定的人才能实现特定的功能。
然而,单元测试的代码会随着项目的增长称指数型爆发,在后期会难以为继,因此,我们就需要更有效地工具——自动测试(Automated Testing) , 我们可以将测试集成在一起,然后统一运行,这样节省了时间,又能使测试覆盖面更广。
Test Behaviours,Not Implementations
写单元测试的时候,我们要有一个原则: 测试api的行为,不测试api的实现逻辑。就好比我们要测试电视遥控板的功能是否正常,而不是把电视遥控板拆开去测一个电阻是否正常工作
比如说,我们对 /collections 的POST方法进行测试,我们需要囊括以下结果:
- Anonymous -> 401
- Non-admin -> 403
- Admin && invalid data -> 401
- Admin && valid data -> 401
这是这个collection的behavior,而不是内部的实现逻辑
Tooling
在Python中,我们有不同的测试工具,主要是两个测试框架:
- unittest
- pytest
在这里我们使用pytest, 因为它有三个优点:
- More features
- Tons of plugins
- Less boilerplate(代码量少)
我们可以用 pipenv install --dev pytest 来下在pytest
此外,还需要下载一个插件: pipenv install --dev pytest-django
Your First Test
现在我们来写第一个test,首先我们在store文件夹下创建一个test文件夹,然后创建test_collection.py ,注意,命名规则需要一个test_ 开始。
然后,为了方面组织测试函数,我们把测试一个功能的所有函数都放在一个类里,这个类叫做TestCreateCollection 注意,这个类也要以Test 开始,否则pytest不会把这个测试囊括在内。
在这个类中,我们可以写一个个测试函数。注意,函数命名要以test_开始。
接下来我们正式开始写测试,首先,我们需要用到APIClient,它可以模拟一个客户端向后端发送请求。
因为这里我们想要测试创建collection,因此需要用到client.post
然后,我们判断 response的状态码是否等于预想的401,如果等于,测试就会通过,否则就会报错。
1 | from rest_framework.test import APIClient |
Running Tests
接下来我们运行上面这个测试: